Raiders of the Lost Ark - Level 1: The Lost Temple
True Adventurer: 30,000 studs |
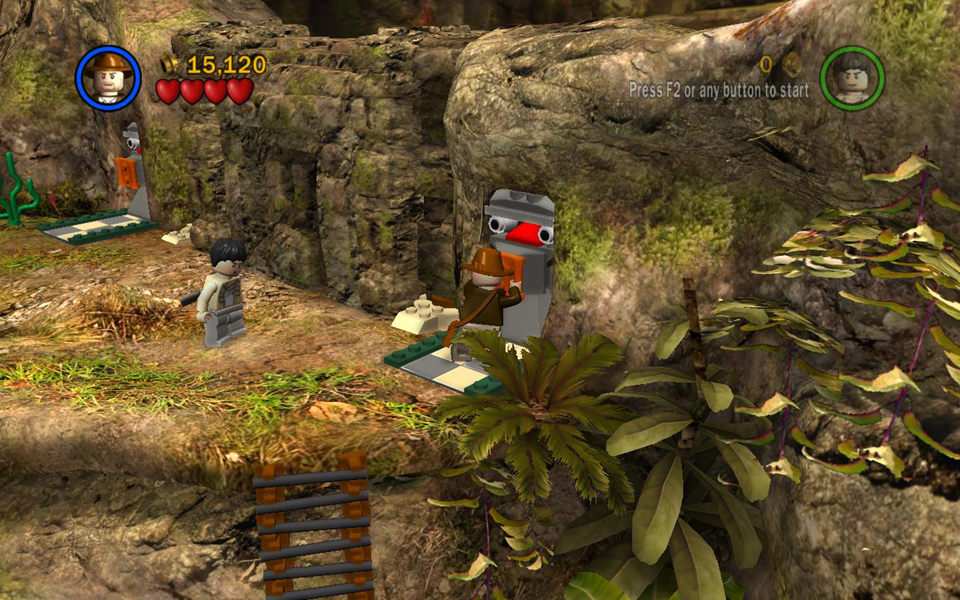
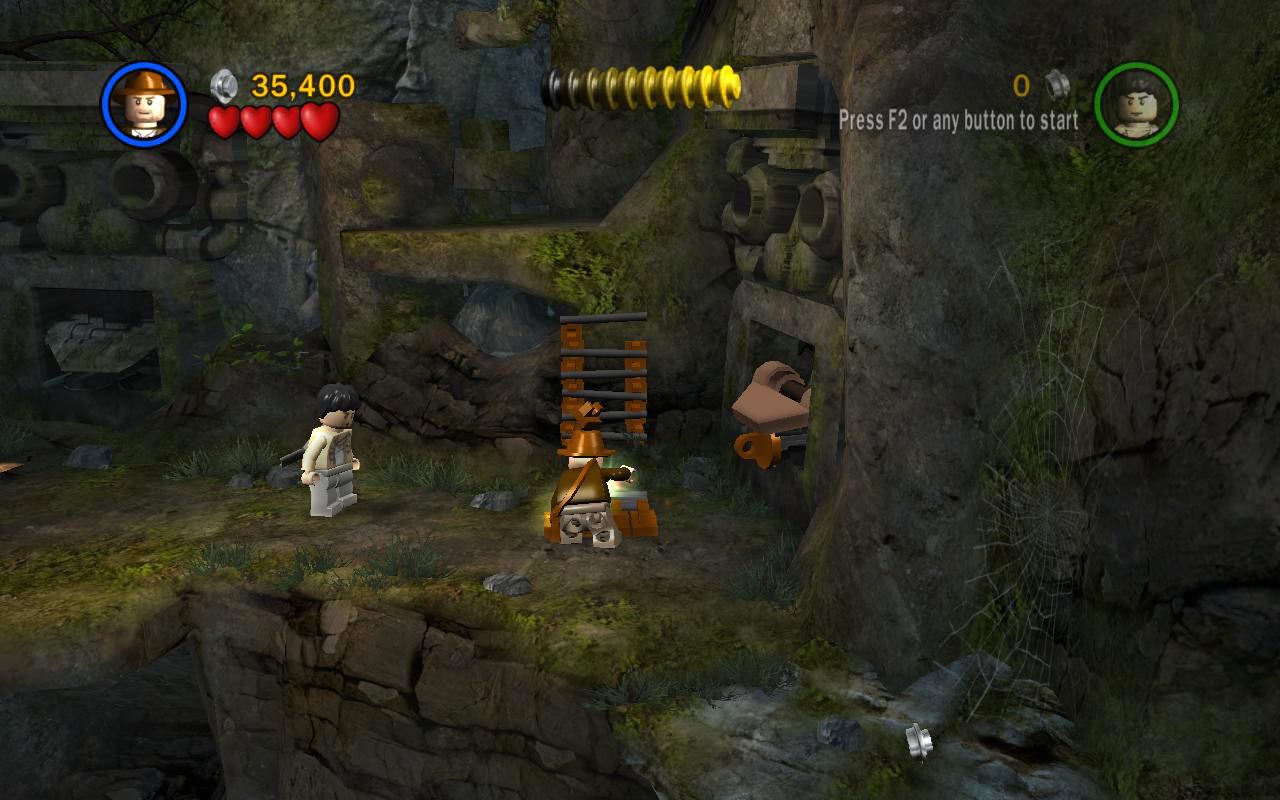
Area 1: Jungle
(Click any of the screenshots below to enlarge.)
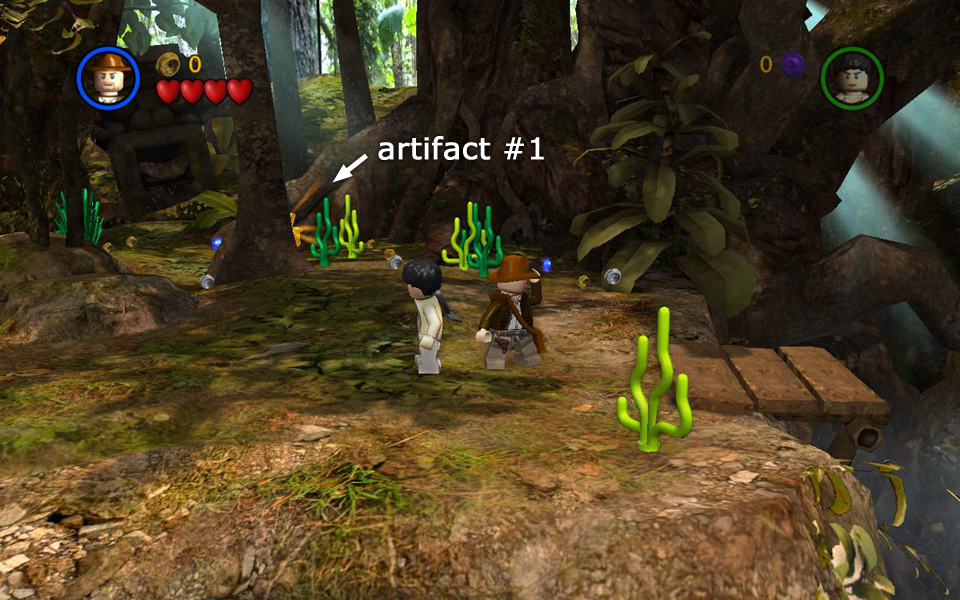
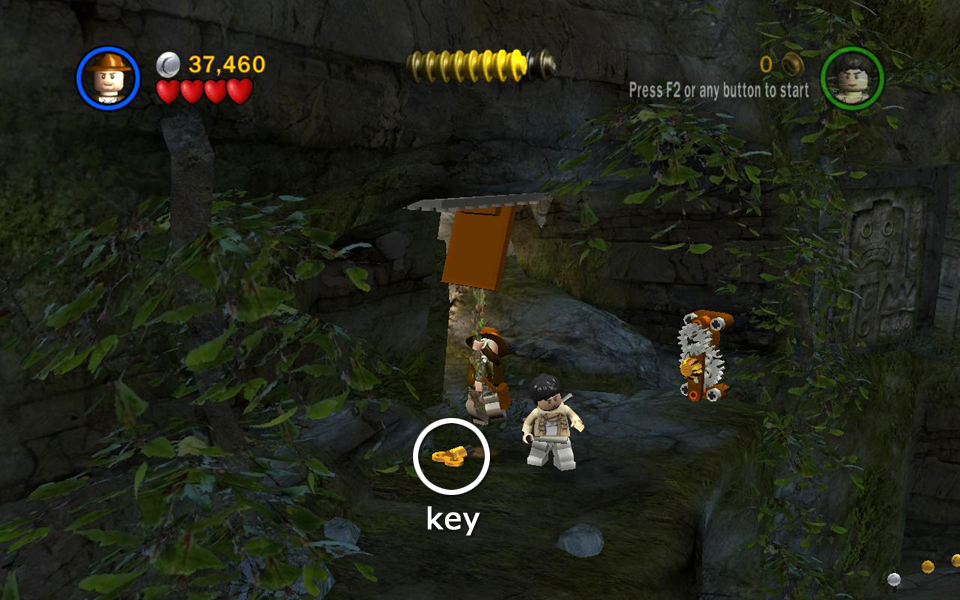
From the starting point, head toward the back of the screen and look behind a tree to find artifact piece #1.
Go to the left and locate the sparkly patch of ground. Press the Free Tag button to switch characters to Satipo and use his shovel to dig up a shiny golden head (1/3). This is the first of several golden heads you'll need to recover to obtain artifact piece #2.
 Artifact piece (1/10). |
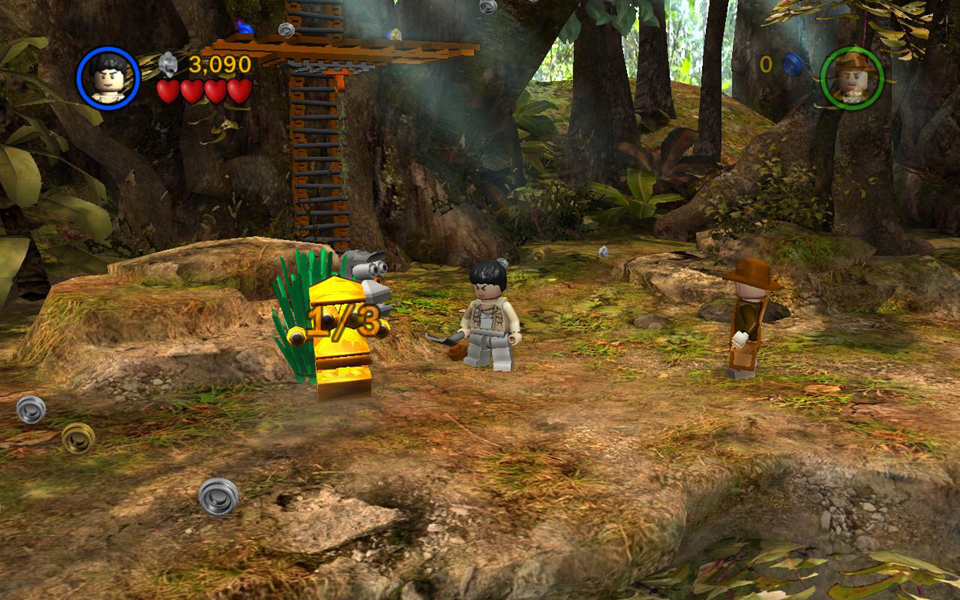 Dig up the golden head (1/3). |
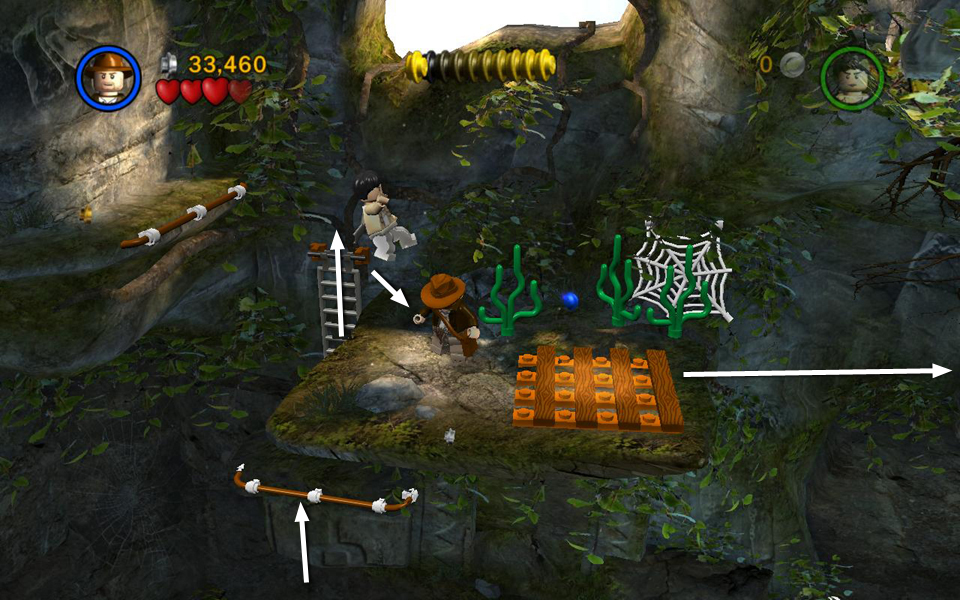
If you like, you can approach the ladder and jump up to grab the dangling rope. This pulls open a trapdoor. Have Indy climb up, stand on the wooden whip platform on the right and whip swing out over the open area to snag some extra studs.
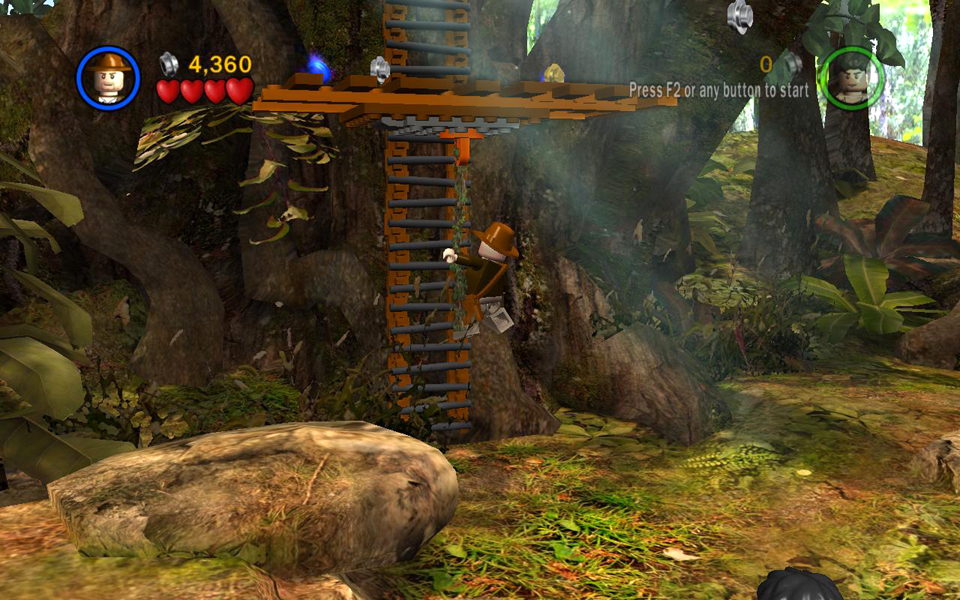 Pull the rope to open the trapdoor. |
 Climb up to the whip platform and swing out to get the studs. |
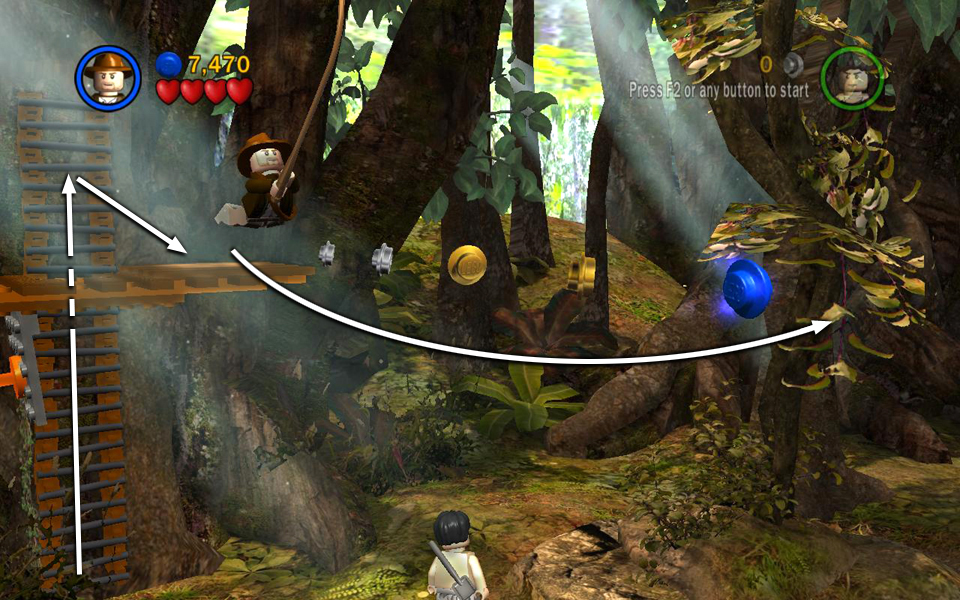
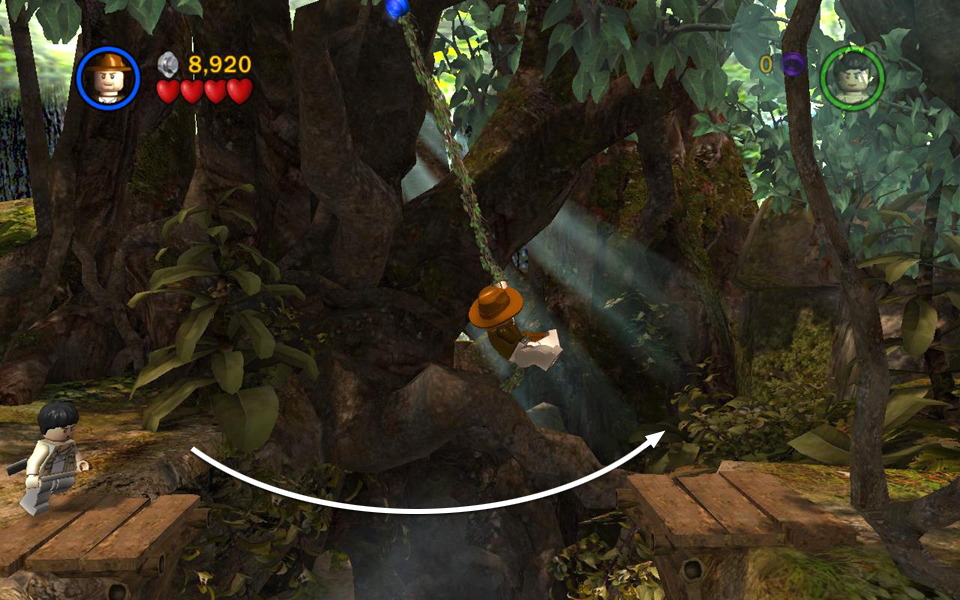
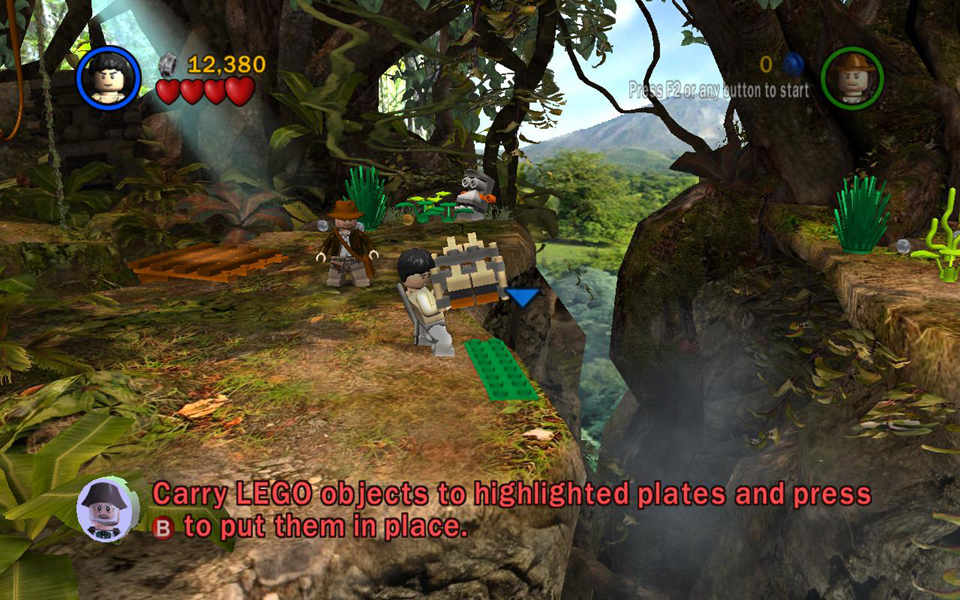
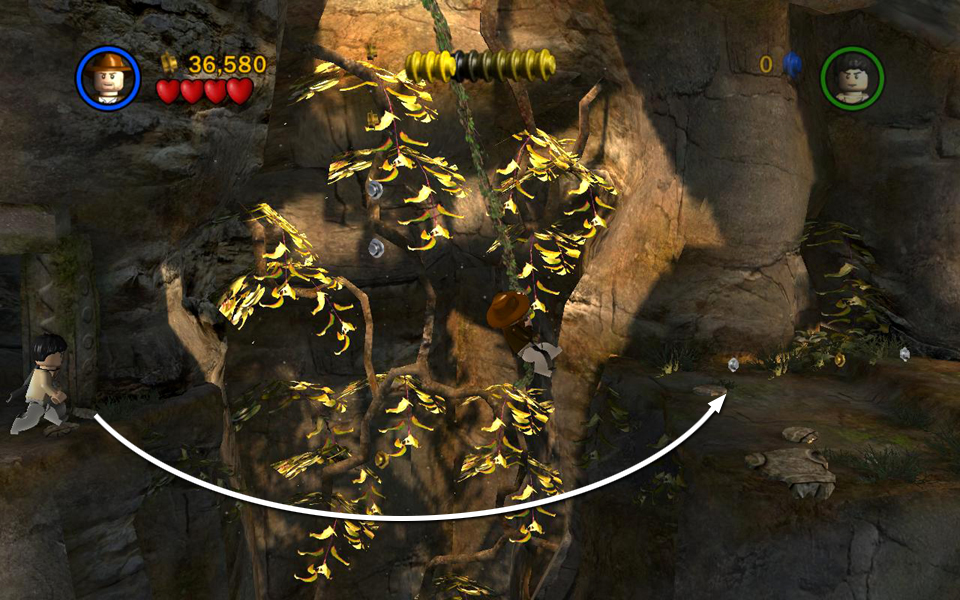
Return to the wooden platform near the start. Take a running jump to grab the dangling vine and swing across the chasm.
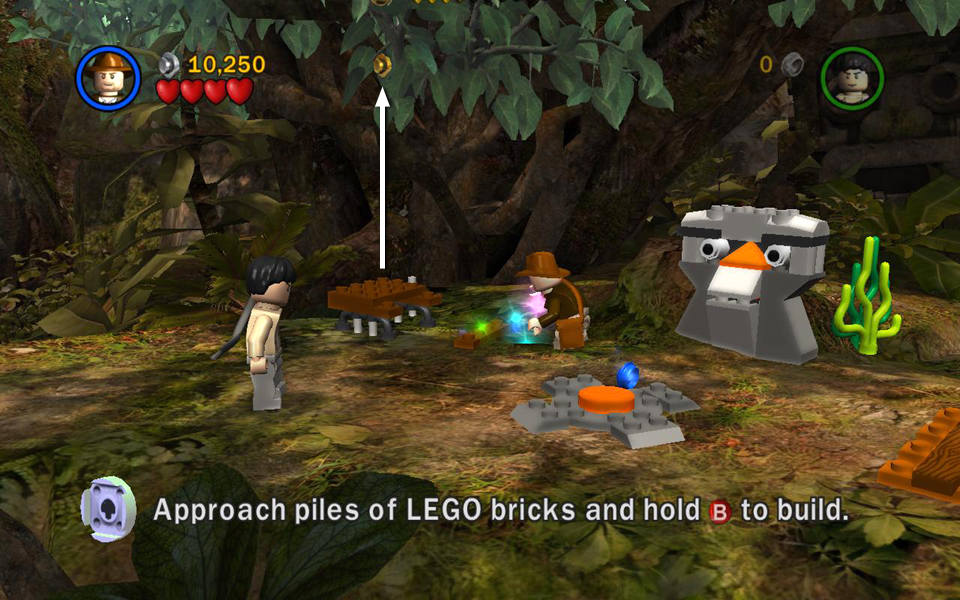
Approach the pile of jiggling LEGO bricks and hold the Use button to build a springboard, which you can use to jump higher and reach the studs above.
 Use the vine to swing across the gap. |
 Build a springboard to reach the high studs. |
Avoid stepping on the orange button, which will cause the LEGO head to shoot studs, injuring your character. To get the blue stud near the button, attack the LEGO head to break it. Then the button will no longer work.
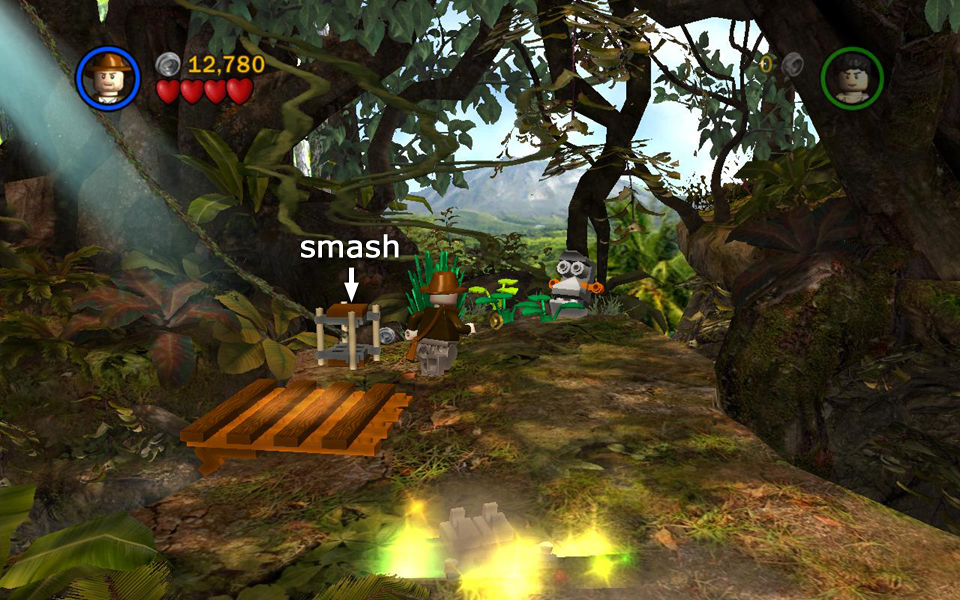
The wooden pallet with the spotlight is another whip platform, like the one on the platform in the tree near the start. Move onto it and use Indy's whip to swing across the gap. Smash the little LEGO structure near the opposite whip platform to free the dangling vine so Satipo can swing across.
 Make Indy whip swing across the gap. |
 Free the dangling rope so Satipo can cross. |
Switch to Satipo and dig the LEGO object out of the ground. This turns out to be bits for a bridge. Pick up the bundle and drop it on the green LEGO plate, and it'll roll out to form a bridge that you can use to cross the next chasm.
 Dig up the bits for the bridge. |
 Drop them on the green plate to build. |
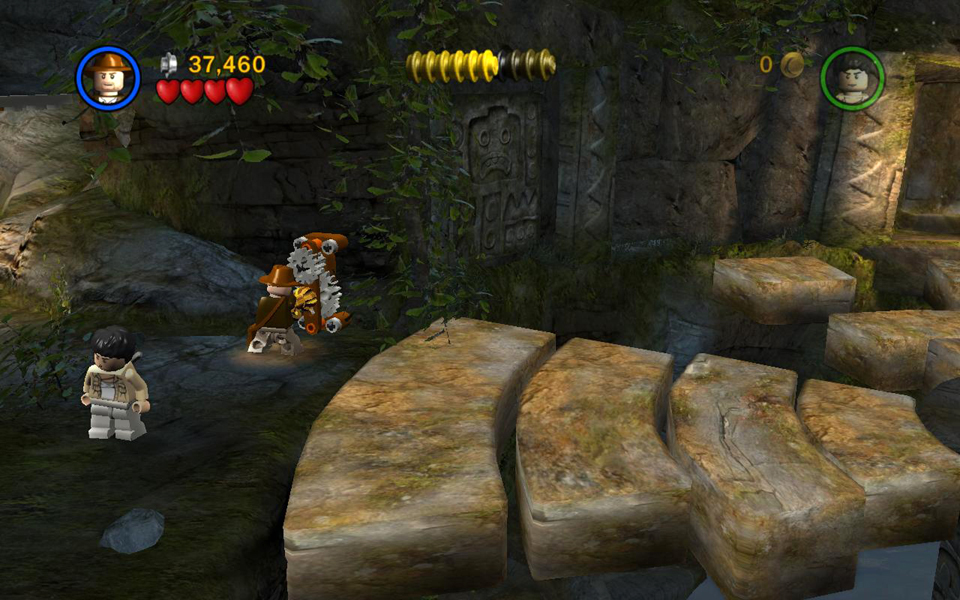
Continue to the left. Either avoid the orange buttons, which activate the head traps, or smash the traps to deactivate them and collect studs. Notice the glow coming from behind the second head. Smash it to expose another shiny object stuck in the ground. Use Satipo to dig up another golden head (2/3).
 Smash the second LEGO head. |
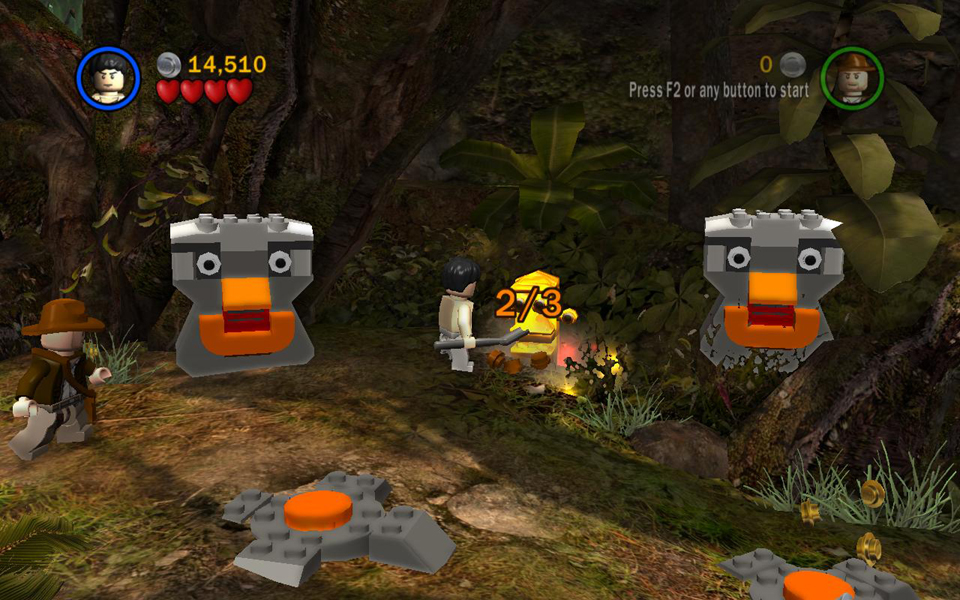 Dig up the golden head (2/3). |
Avoid the wide, orange button concealed behind the trees. It triggers the spike trap ahead. If you do step on it, step off and then wait for the spikes to retract before moving past them.
 Watch out for the orange button that triggers the spikes. |
At the bottom of the hill, dig up a LEGO object and place it on the pedestal to the left of the stone door. When it snaps into place, push the orange handle forward, revealing a button in a small alcove. Push the handle on the other side of the door to reveal another button. Step on both buttons to open the door.
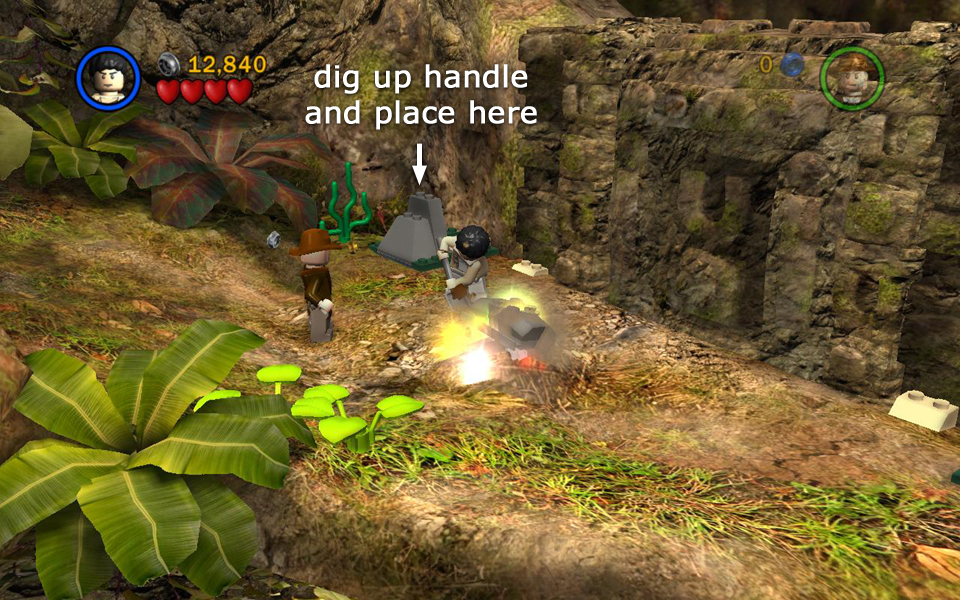 Dig up the handle and place it on the pedestal. |
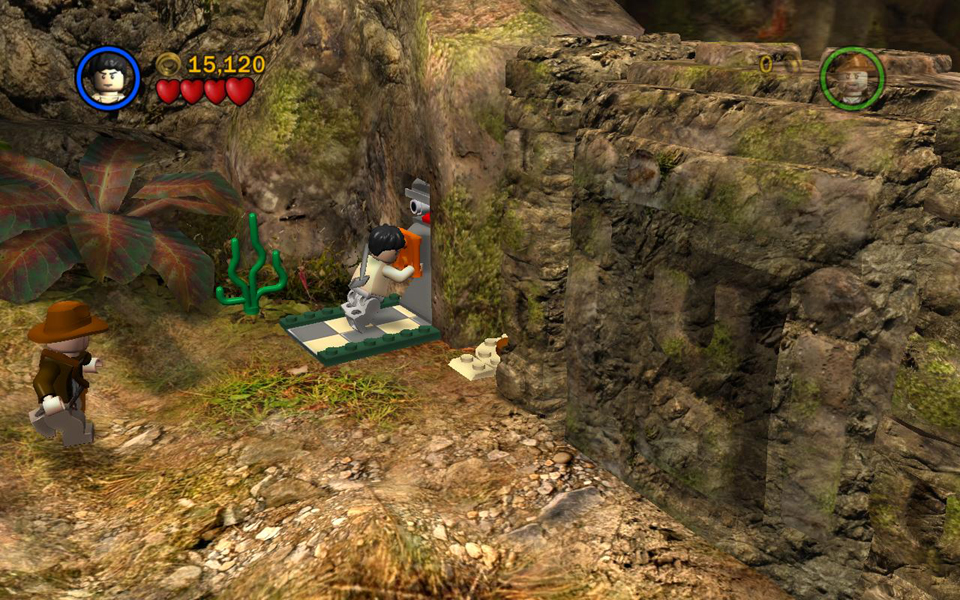 Push the handle to reveal a button. |
|
 Push the handle on the right as well. |
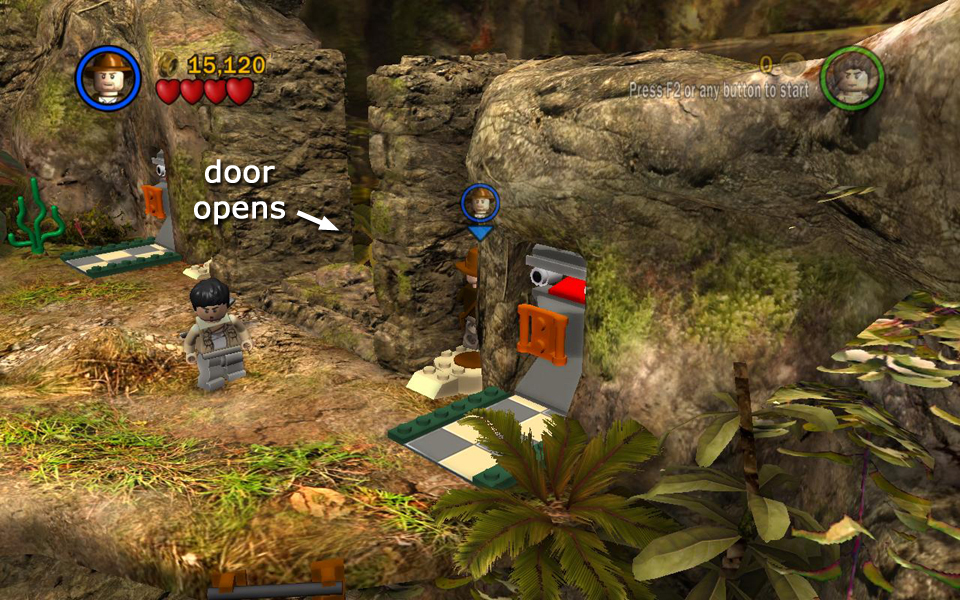 Step on both buttons to open the door. |
Before going through the door, climb down the ladder near the right handle and button. Follow the ledges to the left and dig up another golden head (3/3). If you've found the other heads as well, this causes artifact piece #2 to appear on the ledge near the ladder. Climb back up to the stone door and go through.
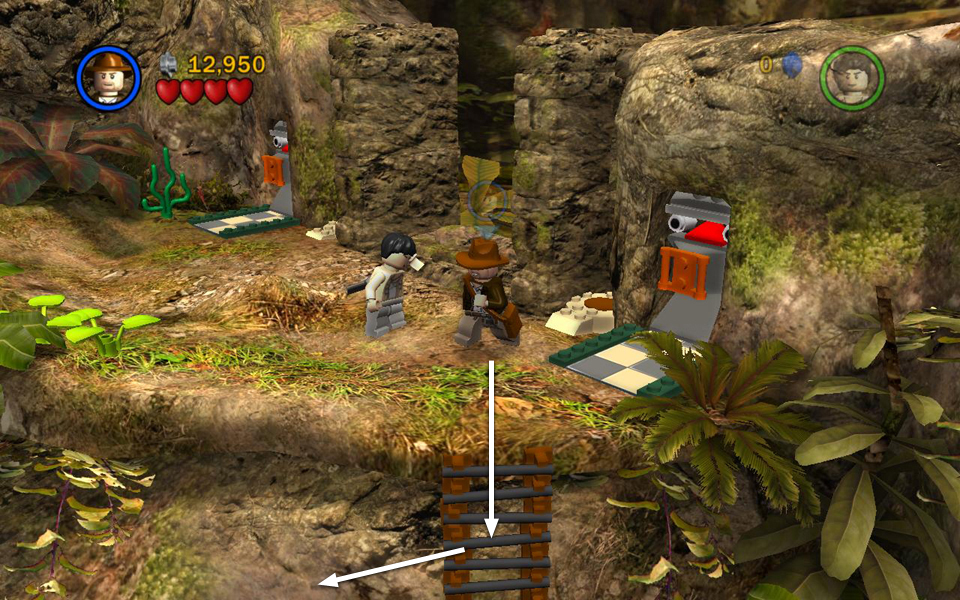 Climb down the ladder and head to the left. |
 Dig up golden head (3/3). |
|
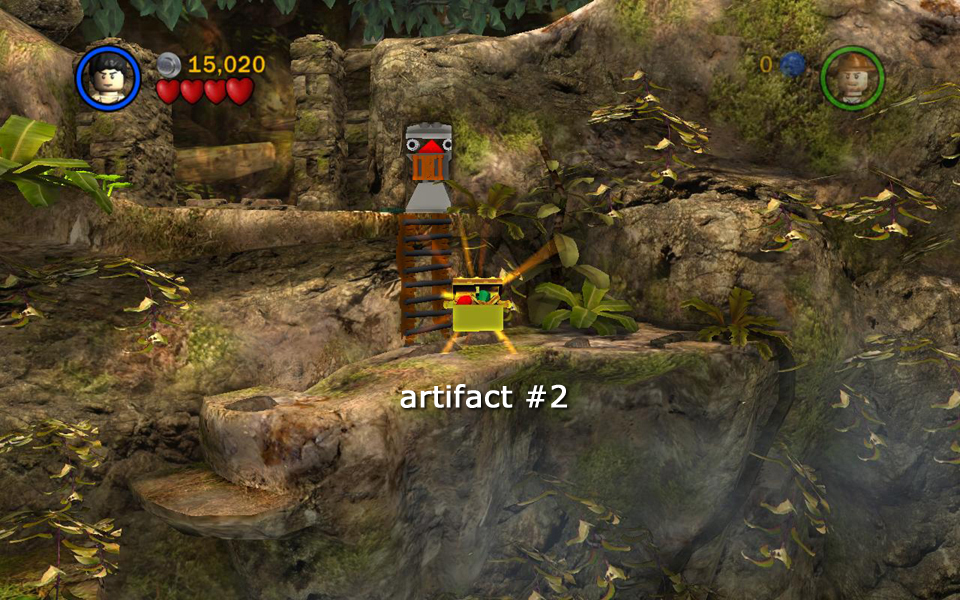 Artifact piece (2/10) appears to the right. |
||
Area 2: Croc Pool [jump to top]
(Click any of the screenshots below to enlarge.)
Build a raft from the pile of LEGO bits at the water's edge. Have Satipo jump onto it and press Free Tag to sit on the pilot's chair. (Only characters with shovels can paddle.) Indy should jump on automatically. Paddle across the pool and jump onto the dock.
Note that Indy can take care of the crocodiles in the pool using his whip, so you can swim safely, but you'll still need the raft to reach the dock on the other side.
 Use the loose LEGOs to build a raft. |
 Use Satipo's shovel to paddle across the pool. Then jump onto the dock. |
Head up the path toward the next stone door. When you do, 2 giant spiders drop down from above. Punch or whip them into bits. They will continue to respawn as long as you remain in this area.
Before moving on, head to the left and search behind the boulders at the base of the tall tree to find artifact piece #3.
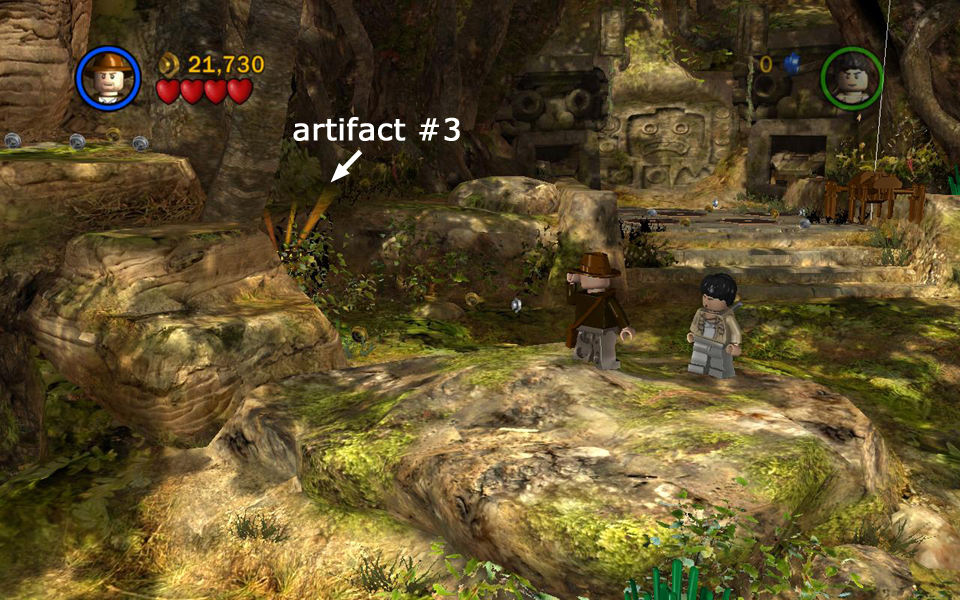 Artifact piece (3/10) behind tree. |
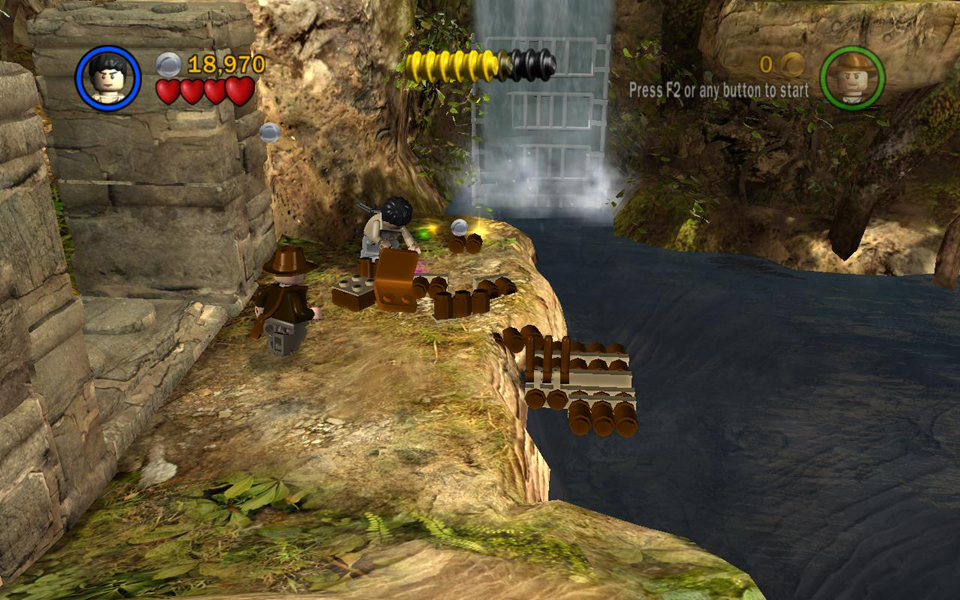
Then climb the rocks to the left and follow the ledges to a lever. Use it to open the gate behind the waterfall. Jump off the ledge and swim behind the falls or return to the raft and paddle there.
In the cave behind the falls, go to the left and use the lever to make a block protrude from the wall. Use it to reach artifact piece #4 on the ledge above.
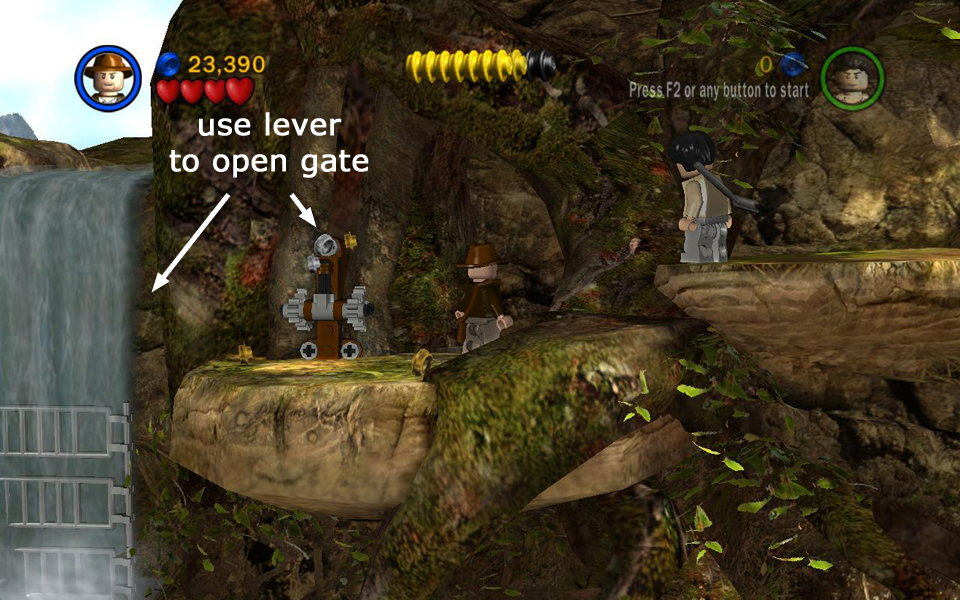 Use lever to open gate. |
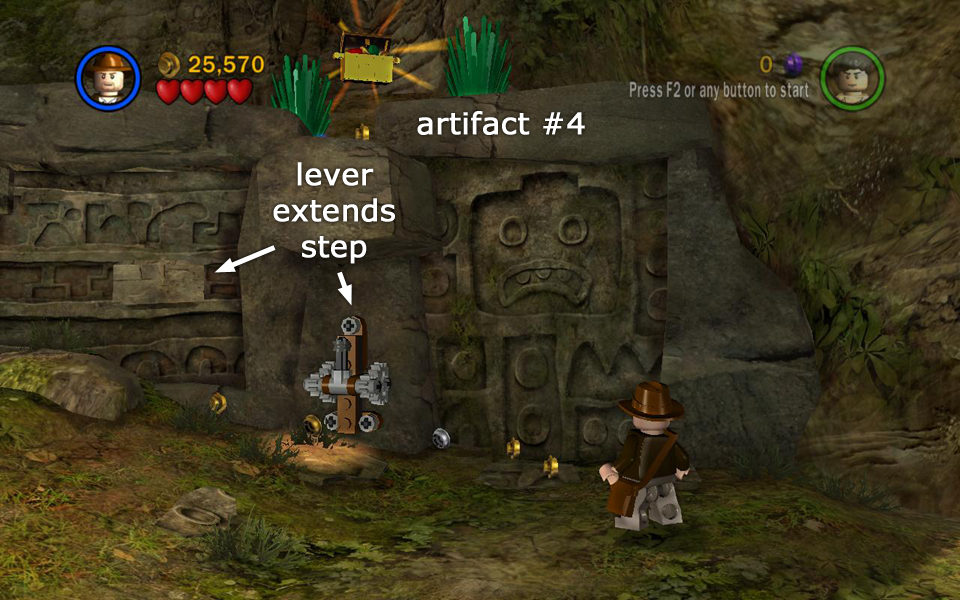 Artifact piece (4/10) in cave behind falls. |
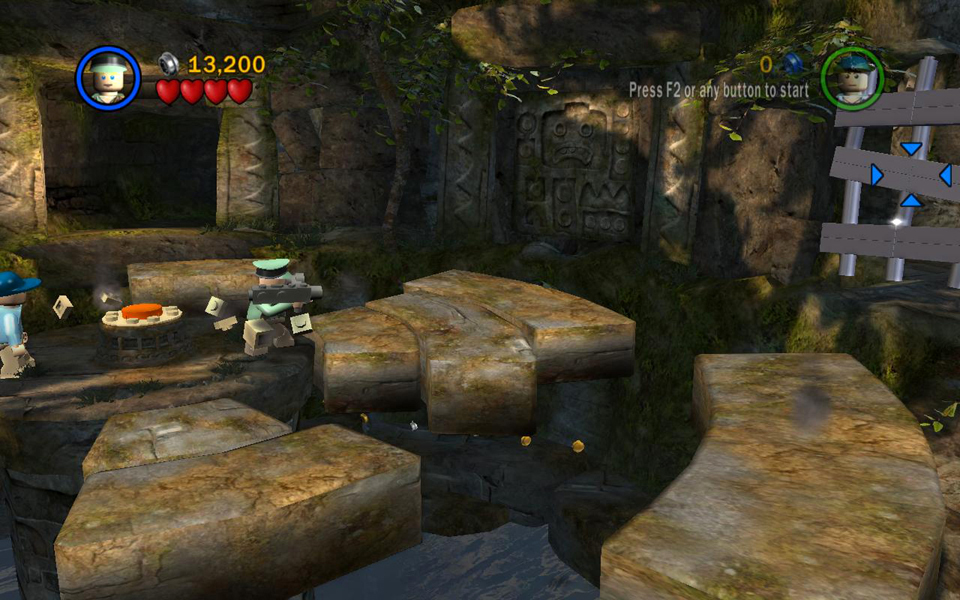
Swim back to the big pool and climb out on the dock once more. Go up the steps toward the stone door. Watch out for more giant spiders here. At the top of the steps, move carefully to avoid the spears that spring out of the dark brown tiles near the door. Satipo can use his shovel to smash these if you like; otherwise just carefully move past them.
Have each character grab one of the ropes on either side of the door to open it. (In single-player mode, just grab one rope and wait for the other character to grab the other.) Go through.
 Pull both vines at once to open the door. |
Area 3: Dark Cave [jump to top]
(Click any of the screenshots below to enlarge.)
Climb the handhold and ladder to reach the whip platform above. Then swing over to the ledge on the right. Pick up the brown crate and place it on the middle button. Then have Indy stand on the left button. This retracts the spikes on the middle and left ledges below. Satipo will then jump across to the middle ledge.
Move Indy onto the right button to retract the right set of spikes. Satipo will then jump across to the wide ledge on the right and use the key mechanism there to retract all three sets of spikes. Now Indy can drop down and jump across to the right.
 Climb up to the whip platform and swing across to the right. |
 Depress the left and middle buttons. . . |
|
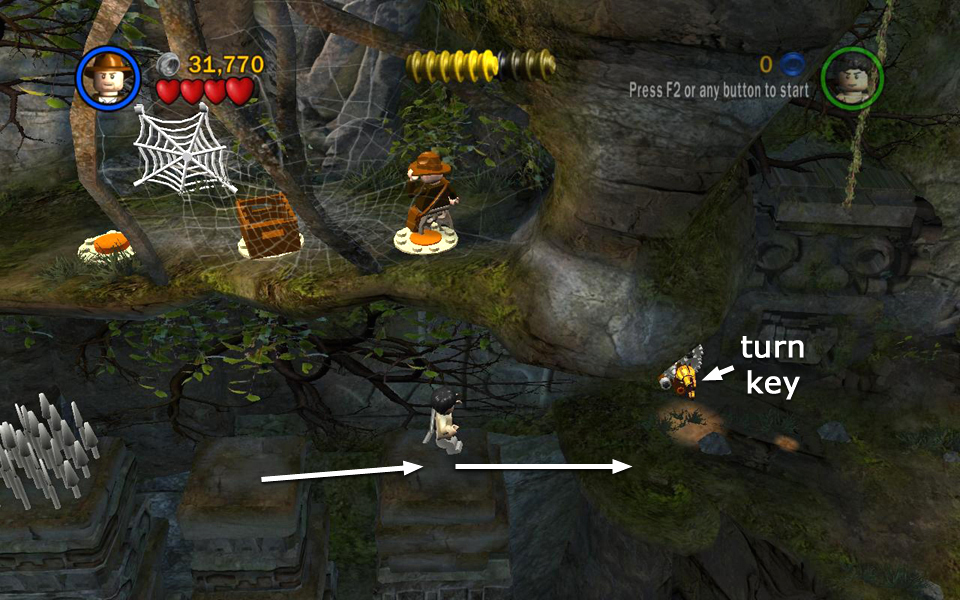 . . . then the middle and right buttons to let Satipo cross and turn the key. |
||
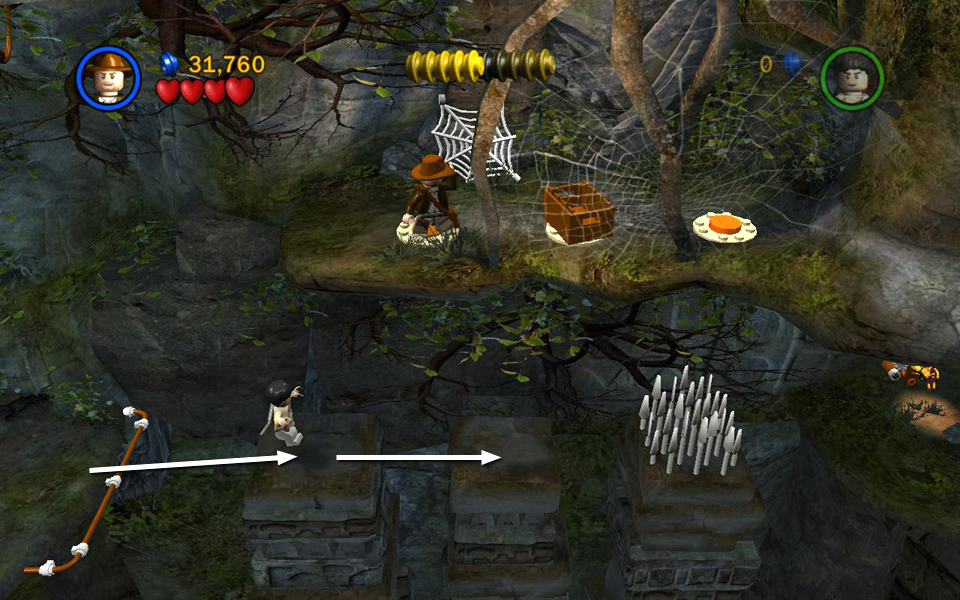
Stand on the whip platform and use Indy's whip to pull the ring behind the spikes. It will spit out a pile of LEGO bits, which you can build into a ladder.
 Use the whip to pull the ring. |
 Then use the bits to build a ladder. |
Before climbing up, follow the curved ledge around to the right to find artifact piece #5.
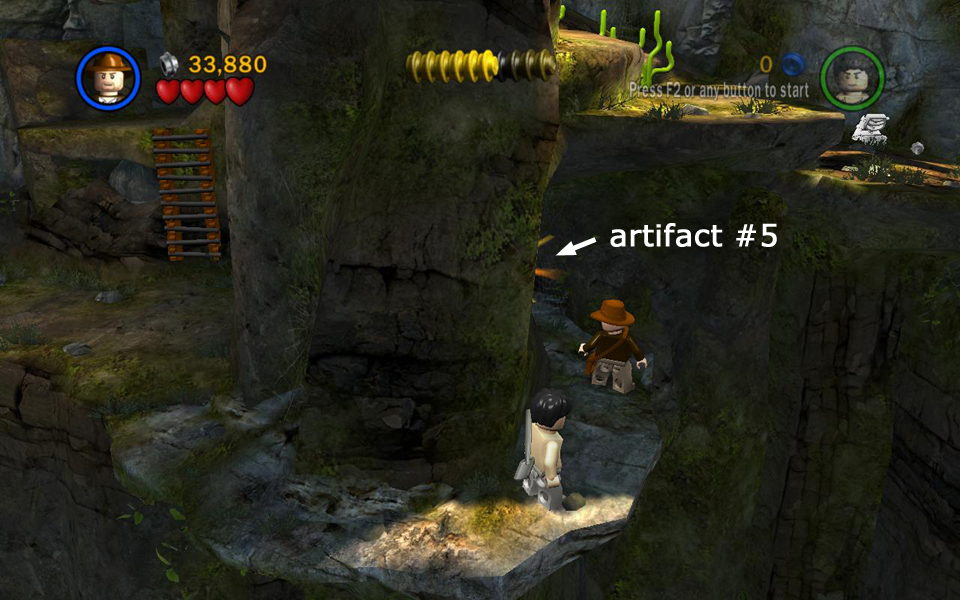 Artifact piece (5/10). |
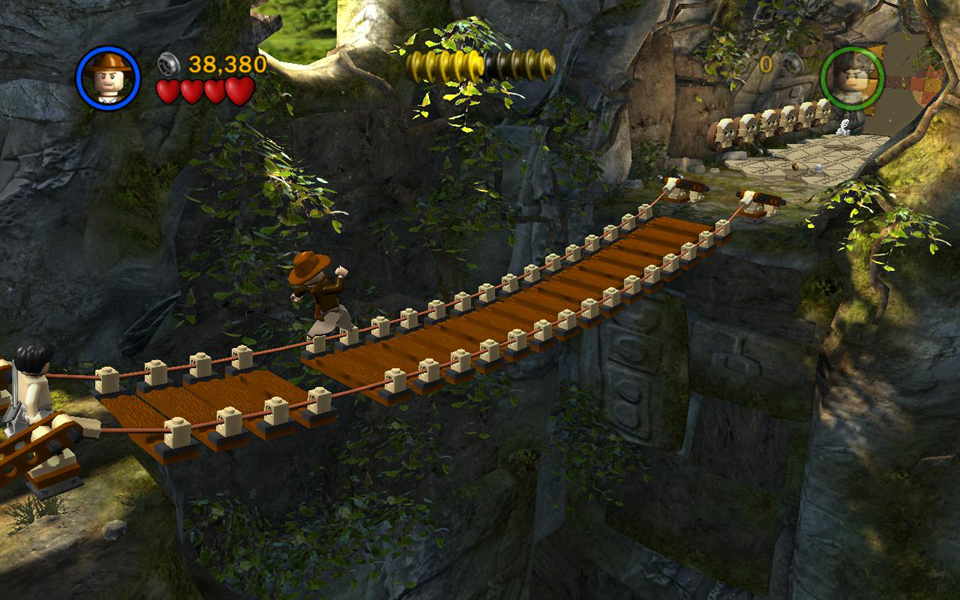
Return to the ladder and climb up. Jump to grab the dangling rope and swing to the ledge on the right. Continue to the right, down some steps and across a rickety wooden bridge.
To cross the trapped floor in front of the door, jump from one dark tile to another. When you've stepped on all four dark tiles, the door ahead opens and you can go through.
 Watch out for weak sections on the bridge. |
 Jump on the dark tiles to open the door. |
Avoid the spear traps in front of the stairs. Climb up and smash another giant spider. Then continue forward to the next area.
Area 4: Idol Room [jump to top]
(Click any of the screenshots below to enlarge.)
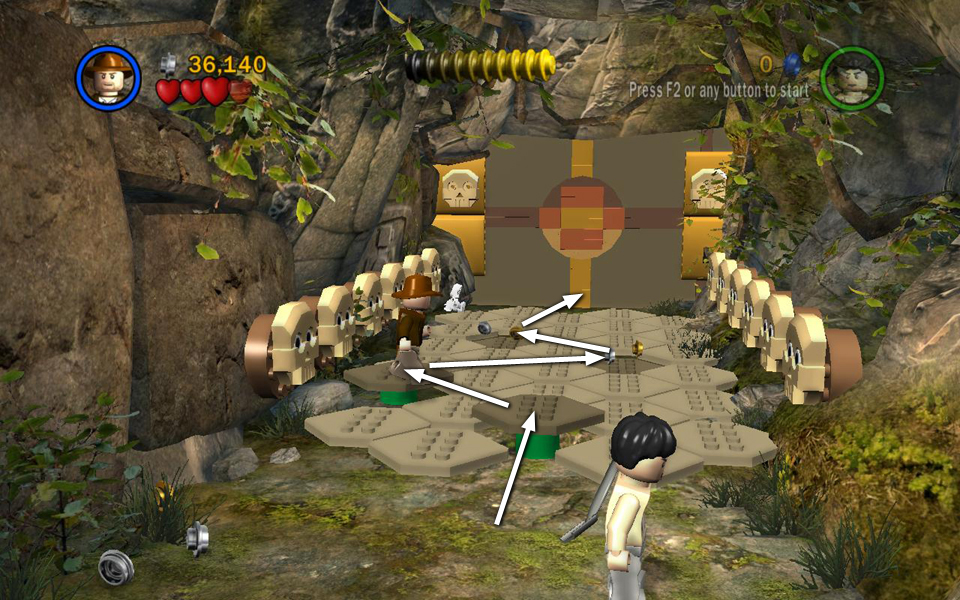
Jump to grab the dangling rope near the door. This opens a trapdoor and a golden key falls out. Pick it up and fit it into the mechanism nearby. Then turn the key to rotate the stone floor sections in the middle of the room. Keep cranking until three sections line up, enabling you to reach the pedestal in the center.
After the cut scene in which Indy takes the golden idol, the room begins to crumble. Make your way across the moving platforms to the exit on the back wall near the middle of the screen. If you fall into the pool with the crocodiles, there's a handhold on the left where you can climb out and a ladder leading back to the upper level.
 Grab the rope to open the trapdoor and get a key. |
 Use the key to crank the ledges around to form a walkway. |
|
 Now you can reach the idol in the center. Then hop across to the exit at the back. |
||
FREE PLAY & SECRET CHARACTER: Before leaving this area, go after another artifact piece. On the right side of the idol room is a doorway blocked by silver bars. These can only be destroyed using explosives. So, later on, be sure to return to this level in Free Play mode after you've unlocked a character with a bazooka or grenades. Blow up the bars and enter the area behind to find artifact piece #6.
Here you'll also discover C-3PO, one of five hidden Star Wars characters that will enable you to unlock Han Solo as a playable character. Hit the golden head on the pedestal to make the droid appear. For more info, see the Characters page.
 Explode the silver bars to access the secret area. |
 Artifact piece (6/10). |
|
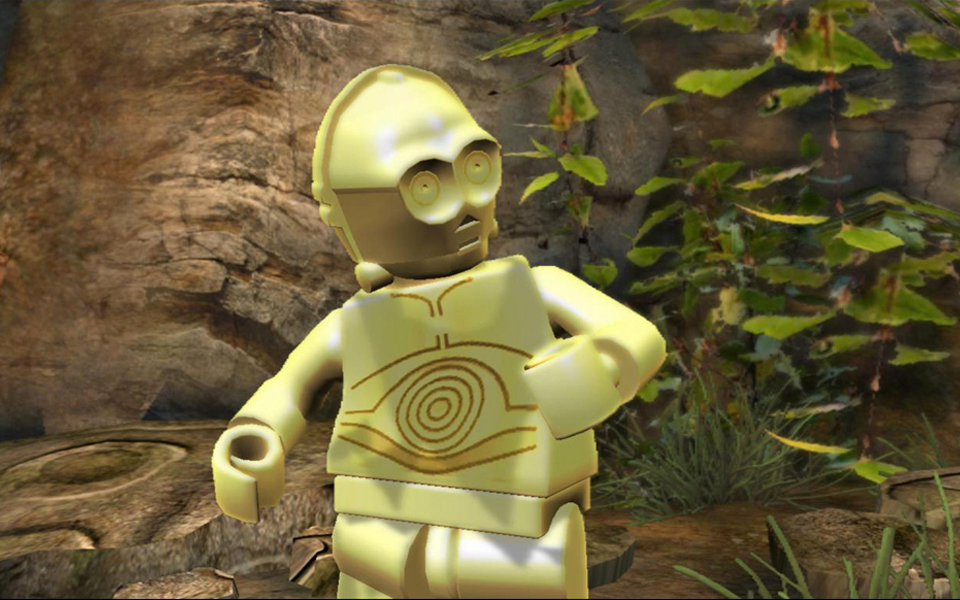 Hit the golden head to reveal C-3P0. |
||
Area 5: Cave with Falling Heads [jump to top]
(Click any of the screenshots below to enlarge.)
Use the dangling vine to swing across the deep chasm to the right. Run down the path, stepping into the various alcoves to get studs and avoid the rolling LEGO heads. Continue to the right to where the path ends.
 Use the vine to swing across the gap. |
 Step into the alcoves to avoid the rolling heads. |
Use the dangling vine to swing across the gap, but watch out for the falling LEGO heads.
Jump to grab both of the 2 short vines (one character for each) and hang there to raise a small platform behind you. Wait until a head rolls past and smashes the wooden door. Then let go of the vines and run through.
NOTE: If you're redoing the level in Free Play and have the necessary special abilities, explore the area below to obtain another artifact piece and a parcel. Once you have everything, climb back up the long ladder and jump to the ledge on the right. Open the exit as described in the previous paragraph and continue.
 Watch out for giant falling heads as you swing across the next gap. |
 Pull the 2 short vines to raise a ledge so the rolling head smashes the door. |
FREE PLAY: There's another artifact piece down below, as well as a hidden parcel, but you won't be able to get them in Story Mode. Be sure to replay the level later in Free Play mode after you've unlocked characters with the necessary special abilities—in this case, Thuggee and academic and either glass breaking or explosives. (See the Characters page for more info.)
On the left side of the gap with the ladder and dangling vine, there's a Kali statue. In Free Play, switch to a Thuggee character and use the statue to retract the spikes on the level below.
 Use the Kali statue. . . |
 . . . to retract the spikes below. |
Drop down and run to the left. Duck into one of the alcoves or hug the back wall whenever one of the huge heads rolls past. Near the end of the path, there's a hieroglyph puzzle. Switch to a character with academic ability and use the puzzle. Watch as four of the glyphs light up in a particular sequence. Then activate the glyphs in the same sequence to solve the puzzle. This extends a walkway to the left. Wait for another giant head to roll past and crash through the door. Inside you'll find artifact piece #7.
 Solve the glyph puzzle to extend a walkway. |
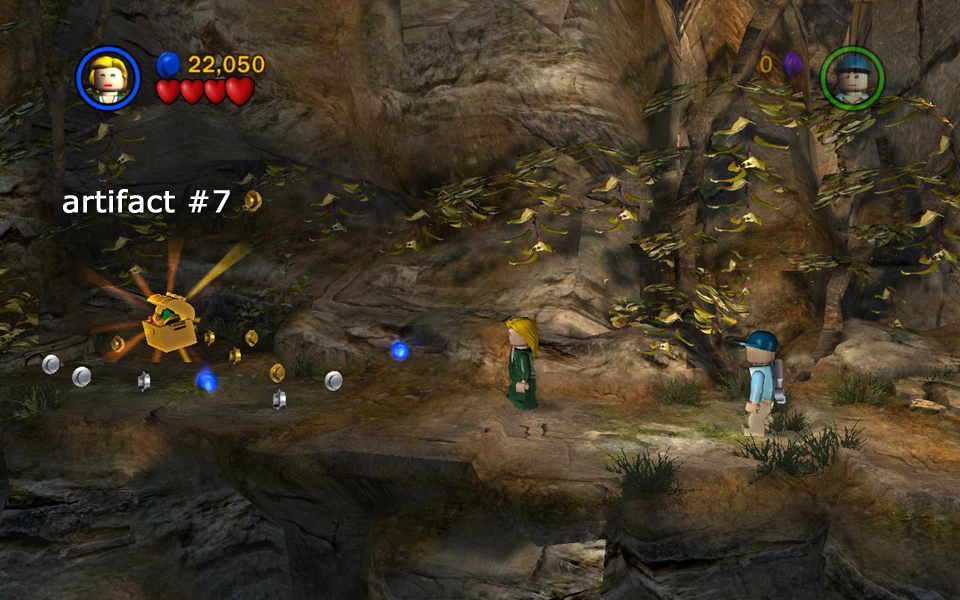 Artifact piece (7/10). |
PARCEL: Also in Free Play, use the Kali statue to retract the spikes on the lower level, as described in the section above. Drop down and follow the path to the left, ducking into the alcoves and/or hugging the back wall to avoid the rolling heads. Pass the mailbox for now. A little farther along you'll see the parcel behind a sheet of glass. Switch to a character with the explosives or glass-breaking ability and shatter the glass to get the parcel. Carry it back to the right and place it in the mailbox.
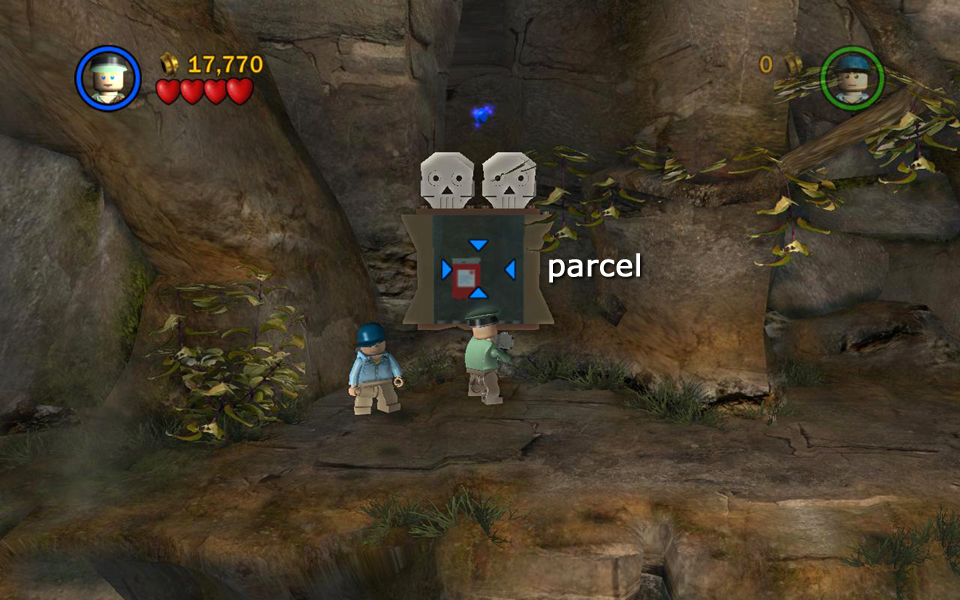 Shatter the glass and take the parcel. |
 Use the mailbox to send the parcel home. |
Later, when you've finished the level and returned to Barnett College, go to the Mail Room and pay the postage due to claim your parcel. In this case, 30,000 studs unlocks the "Fast Fix" Extra. (See Parcels & Extras for more info.)
Area 6: Rolling Boulder [jump to top]
(Click any of the screenshots below to enlarge.)
Immediately start running toward the foreground to avoid the huge rolling boulder. As you run, you'll need to jump to clear the various pits, some of which are lined with spikes. Don't worry about picking up studs. Just concentrate on getting through.
If you make it to the end of the tunnel without getting flattened, you'll see artifact piece #8 near the opening. Run through it and continue out into daylight. If you miss the artifact on your first try, you can replay the level again later. You'll need to do this anyway to get the items that are only available in Free Play.
NOTE: If you have Adaptive Difficulty turned ON in the Extras menu, and you mess up this run several times, the game will automatically place Indy and Satipo outside the tunnel, preventing you from getting the artifact. If you turn Adaptive Difficulty OFF when you replay, your character may die and lose some studs in the process, but you'll be able to try the run as many times as you want.
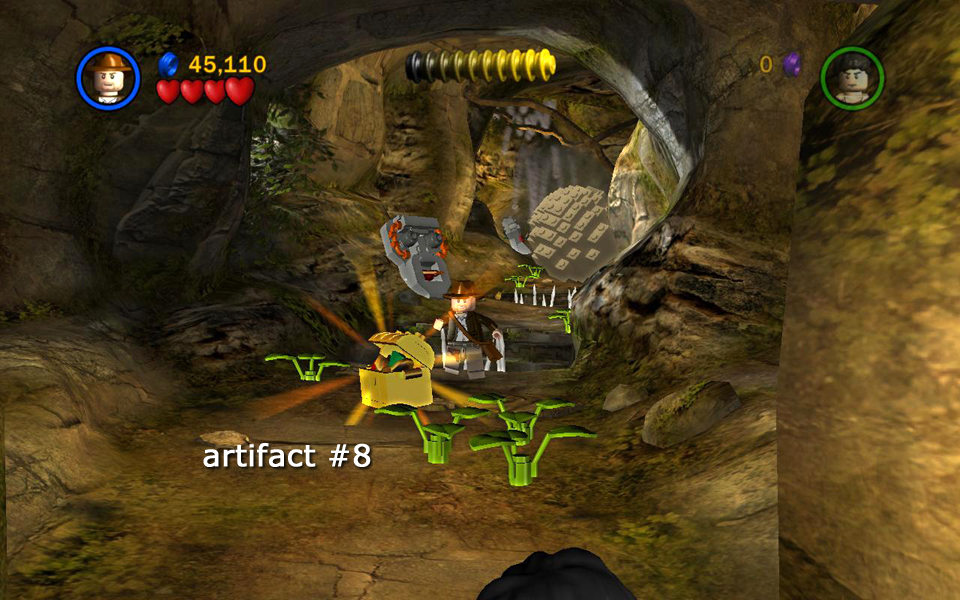 Artifact piece (8/10). |
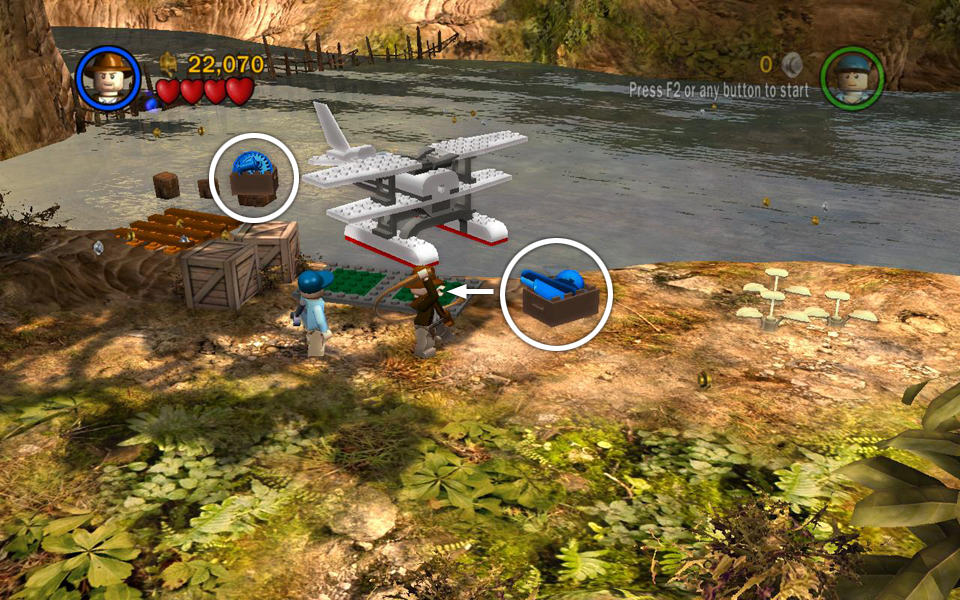
Area 7: Riverbank with Airplane [jump to top]
(Click any of the screenshots below to enlarge.)
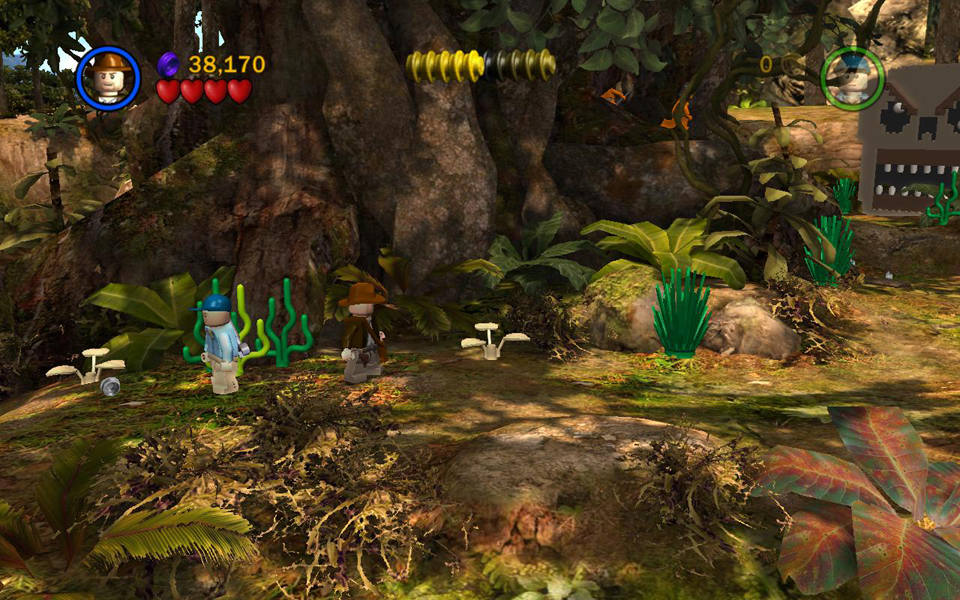
After the cut scene, you control Indiana Jones and the pilot, Jock. From the spot where you start, backtrack up the path a bit (away from the airplane) and enter the clearing with the huge LEGO skull.
Groups of Hovitos tribesmen scramble down the hillside and attack as long as you remain in this area. So you'll need to fight them off as you work.
Artifact piece #9 is sitting inside the mouth of the huge skull. If you're playing in Story Mode, you won't have a ranged weapon. So you'll need to smash a few enemies and pick up one of their spears or crossbows. Then face the big skull so your character aims at one of its eyes (you'll see blue arrows pointing at the object you're targeting). Press the Use button (i.e., the same one you use for tools/whip) to throw the spear or shoot the crossbow. Once you've shot both of the skull's eyes, the mouth will open so you can reach the treasure chest.
 Go back along the path to the clearing with the huge skull. |
 Artifact piece (9/10). |
Return to the path and run down toward the plane. Head along the cliff's edge to the far left side of this area, to find artifact piece #10 hidden in the undergrowth.
Watch out for more angry Hovitos warriors in this area. They'll continue to respawn until you finish the level, so work as quickly as you can.
 Artifact piece (10/10). |
Run to the plane and pick up the box of parts to the right and drop it on one of the green plates. Step onto the whip platform on the left and use Indy's whip to snag the second box of LEGO bits from the post sticking out of the water. Carry it to the other green plate. Now stand next to the pile of LEGO bits and hold the Build button to rebuild the airplane engine.
It's still not totally functional. You can tell by the sparks and smoke coming out of it. Have Jock hop on top of the plane and use his wrench to get it working again.
 Place the bits boxes on the pads and build. |
 Use Jock to repair the plane. |
After a brief but exciting cut scene, the level ends, and you can choose to continue with the next level or return to Barnett College. ![]()
| < < < Introduction | Next Raiders Level > > > |