Raiders of the Lost Ark - Level 3: City of Danger
True Adventurer: 50,000 studs |
Area 1: Short Cairo Street
(Click any of the screenshots below to enlarge.)
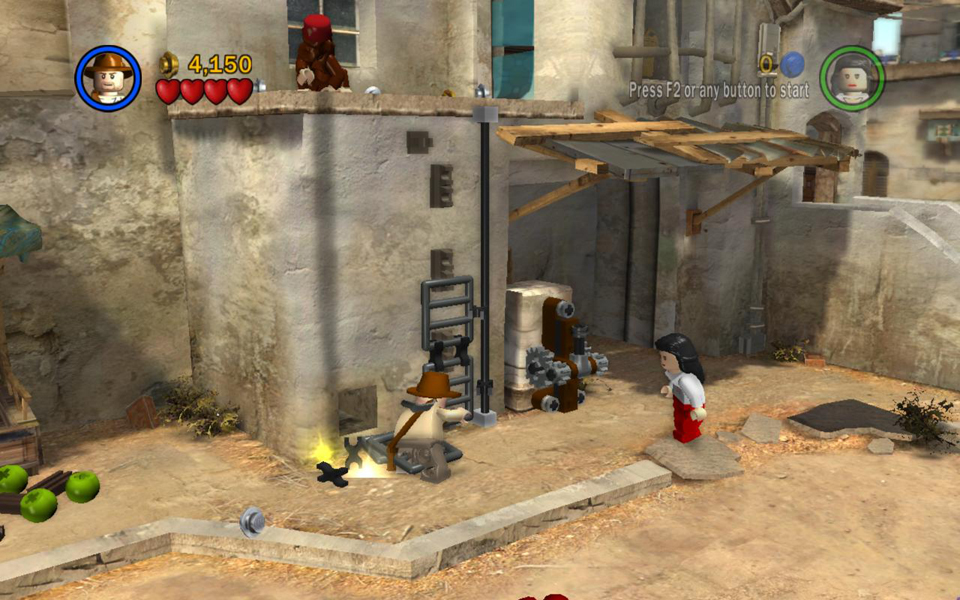
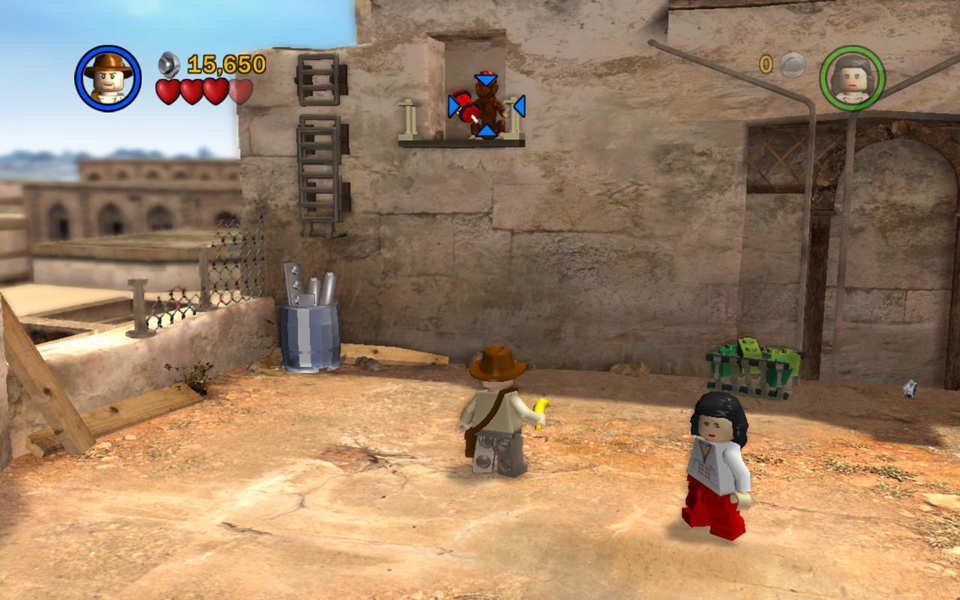
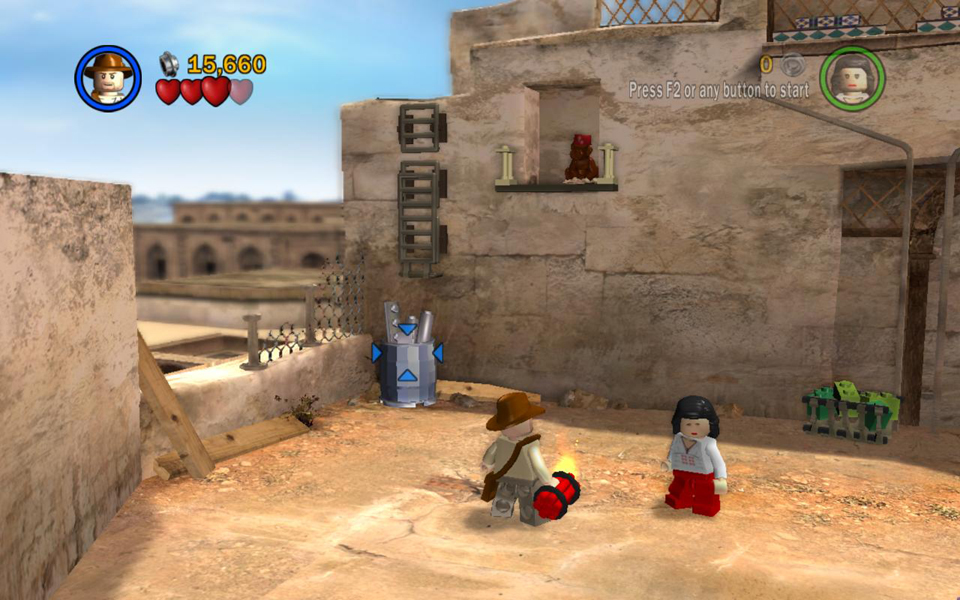
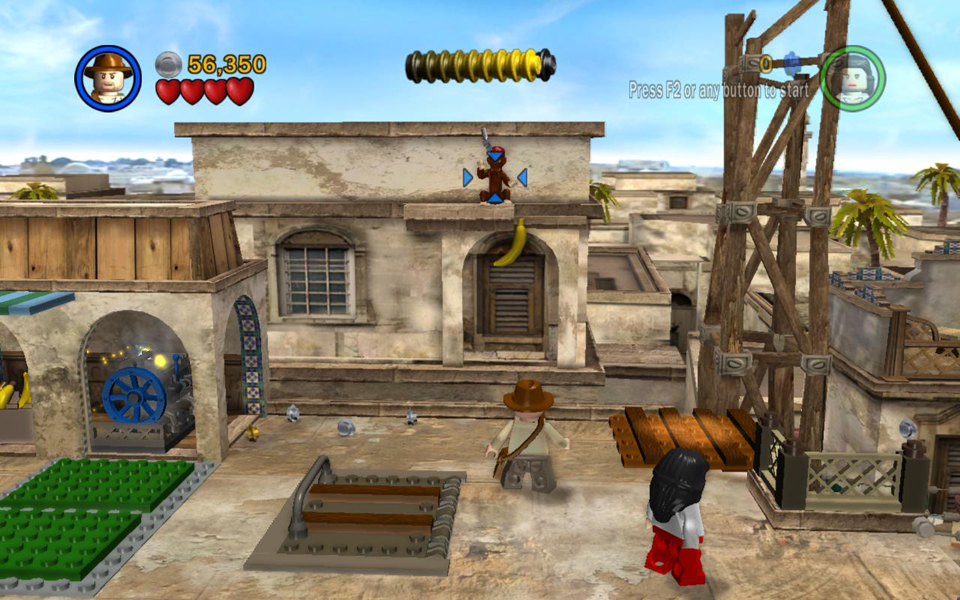
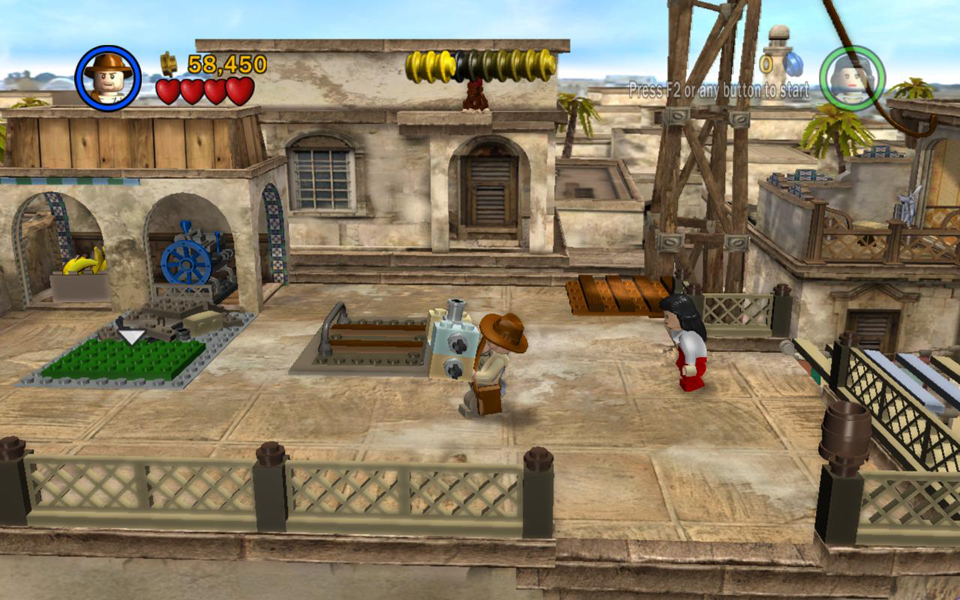
The initial cut scene in which the Monkey Man sends his little helper to steal Indy's photo of Sallah isn't just comical; it provides an important clue: monkeys like bananas. ;)
Grab a banana from the crate and target the monkey sitting on the ledge the same way you would using a weapon. When you see the targeting reticule, press Use to throw the banana. The monkey will catch it and throw down the wrench it's holding. Use the wrench to repair the blue machine so you can ride the lift up to the exit.
NOTE: Try not to injure the local people throughout this level. They won't attack as long as you don't mess with them, but they will fight back if you start something.
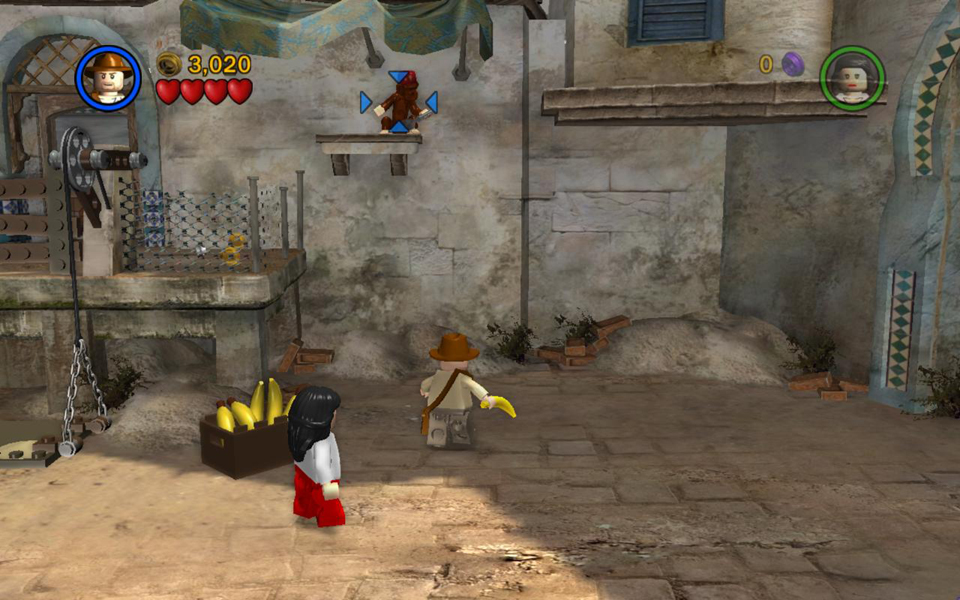 Toss a banana to the monkey and it will throw back a wrench. |
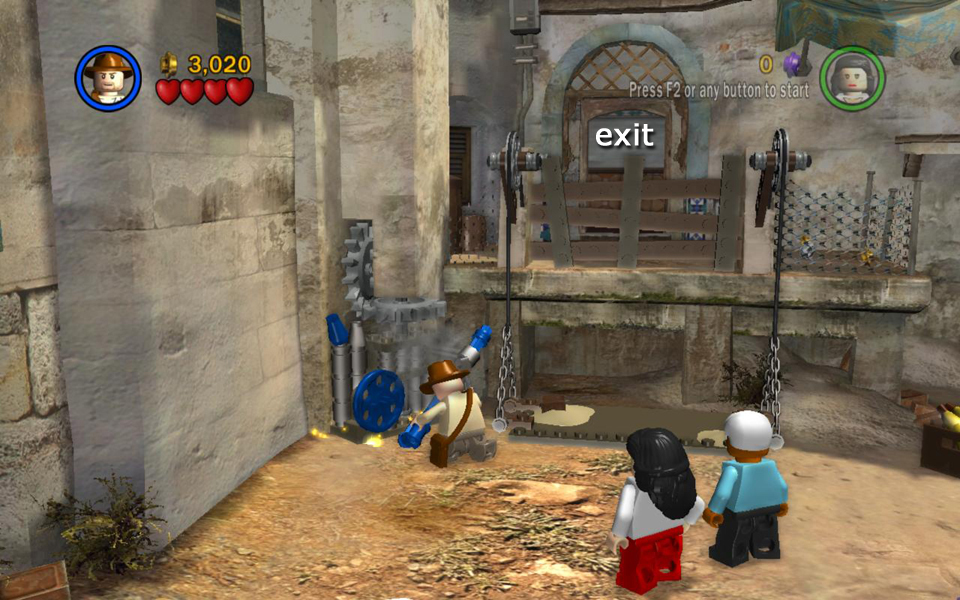 Use the wrench to repair the lift. |
Area 2: Wide Cairo Street [jump to top]
(Click any of the screenshots below to enlarge.)
As you explore this area, various groups of masked bandits attack. They respawn apparently at random. So just stay alert and fight them as they appear. Some drop scimitars you can pick up and use.
There's another monkey to the left of the entrance. This one has the shovel you need. Steal a banana from one of the market stalls and toss it to the monkey in exchange for the shovel.
Use the shovel to dig a handle out of the sparkly patch of ground below and to the right of the monkey's ledge. Attach the handle to the nearby lever. Then smash the tub of tools just to the left and build a ladder out of the leftover LEGO bits. Pull the lever to extend the ladder.
Climb the ladder to the monkey's ledge. Then jump over to the awning on the left and from there to the ledge with the golden key. (Either character can do this, but the jumping is easier with Marion. She can also reach the studs on the high ledges to the left.)
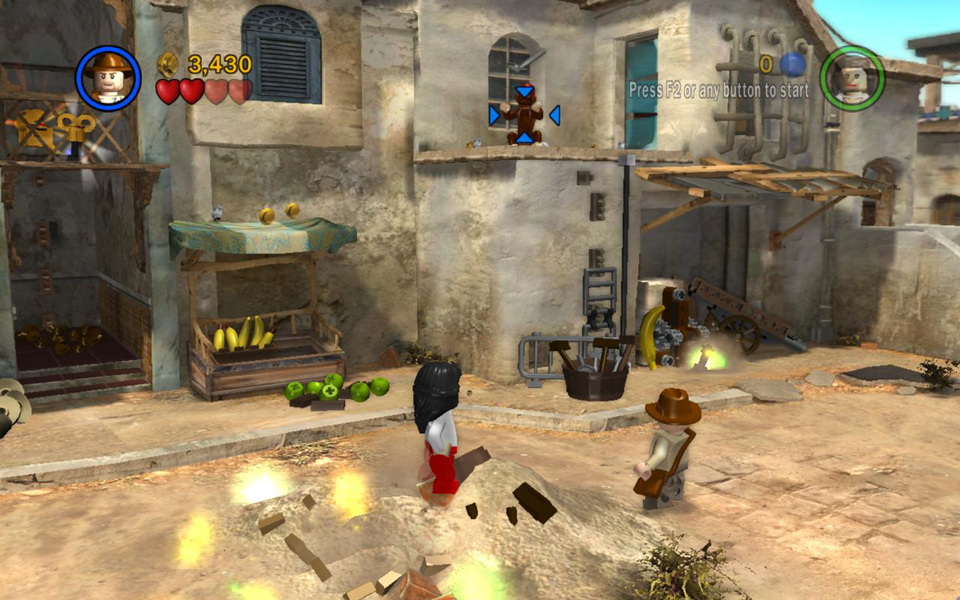 Trade a banana for a shovel. |
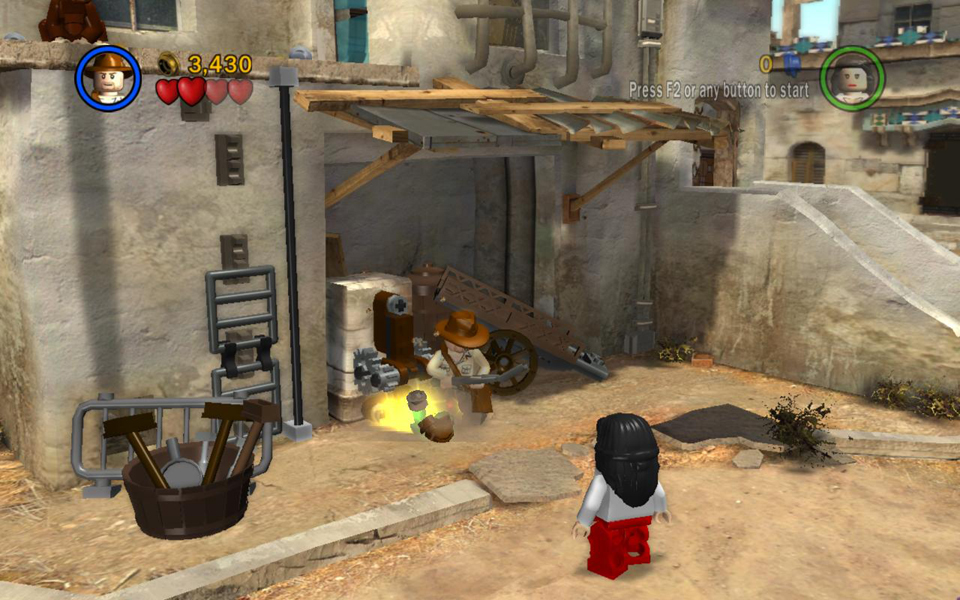 Dig up the handle for the lever. |
|
 Smash the tub of tools and build a ladder. Then use the lever to extend it. |
 Climb up and jump over to the key. |
You can see artifact piece #1 in the alcove behind the ledge with the key, but you can't reach it from here. So hop down and go into the alcove. Smash the debris inside to make flowers grow. Then smash the flowers to get the bits needed to repair the ladder at the back of the alcove. Now you can climb up to reach the treasure chest.
 Smash the dirt in the alcove to grow flowers; smash the flowers and build a ladder. |
 Artifact piece (1/10). |
There are various LEGO objects scattered around this area that you can smash to get studs. The market stalls release studs when you restock them by standing near the spilled items and holding Use. There's also a mound of sparkling dirt in the middle of the road that you can dig up. Use the planks you unearth to build a platform, which you can then smash for studs and hearts.
Head to the right and use the gold key to turn one of the locks on the large, wooden gate.
 Use the key to unlock one side of the gate. |
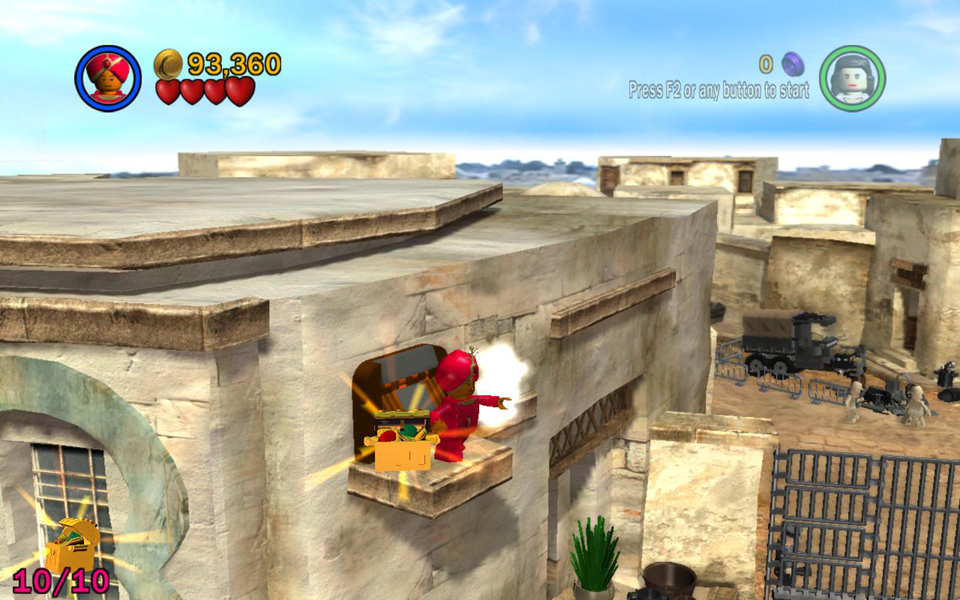
FREE PLAY: While standing on the monkey's ledge, use a character with the glass-breaking or explosive ability to shatter the window. Step inside to get artifact piece #2.
 Artifact piece (2/10). |
Use a small-sized character to enter the crawlspace to the right of the wide steps. There's no treasure chest here, but you'll find some studs.
 There are studs hidden behind the crawlspace. |
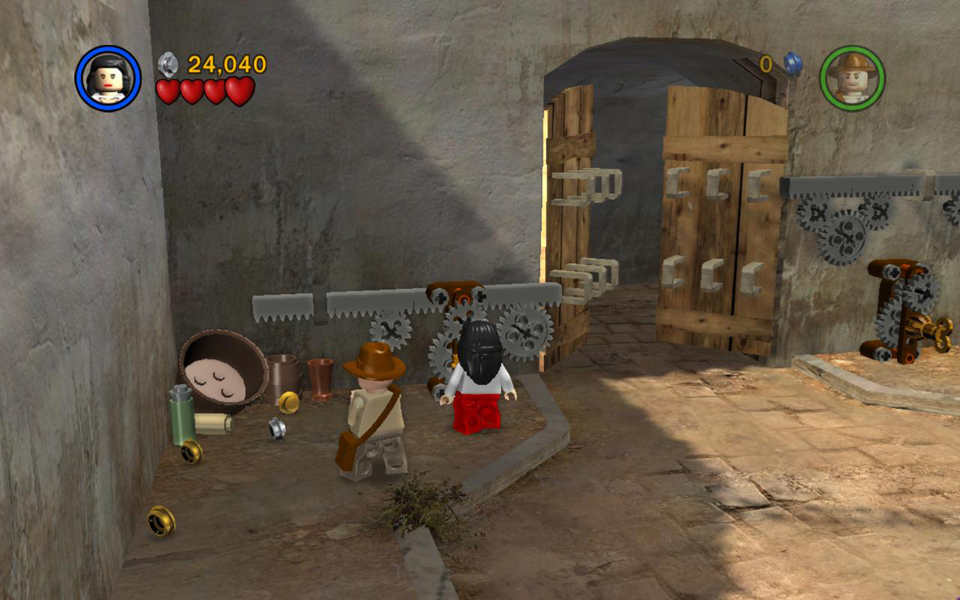
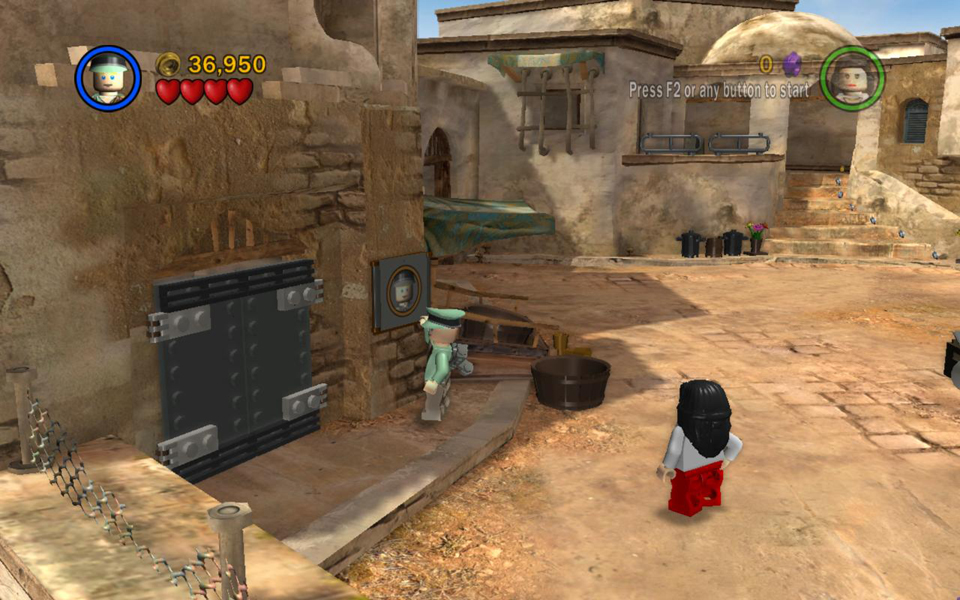
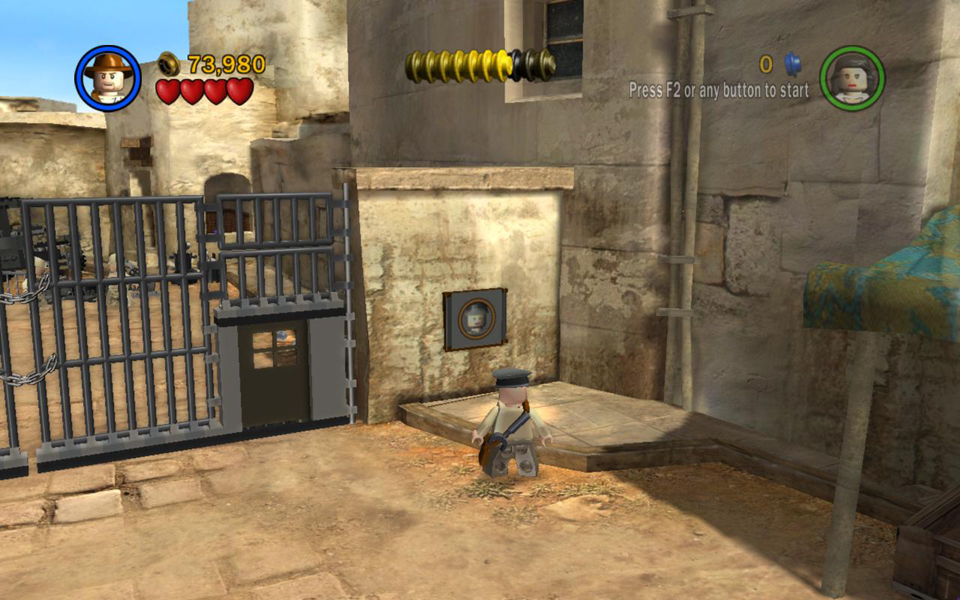
To the left of the wide steps is a door with a guard post. Toggle to a character wearing an enemy uniform and knock at the guard's window. A guard will look out and then open the door.
Inside is a small room with an odd-looking machine. Pull the handle four times. The first three times, enemy soldiers emerge from the machine and you must fight them. The fourth time, out pops artifact piece #3.
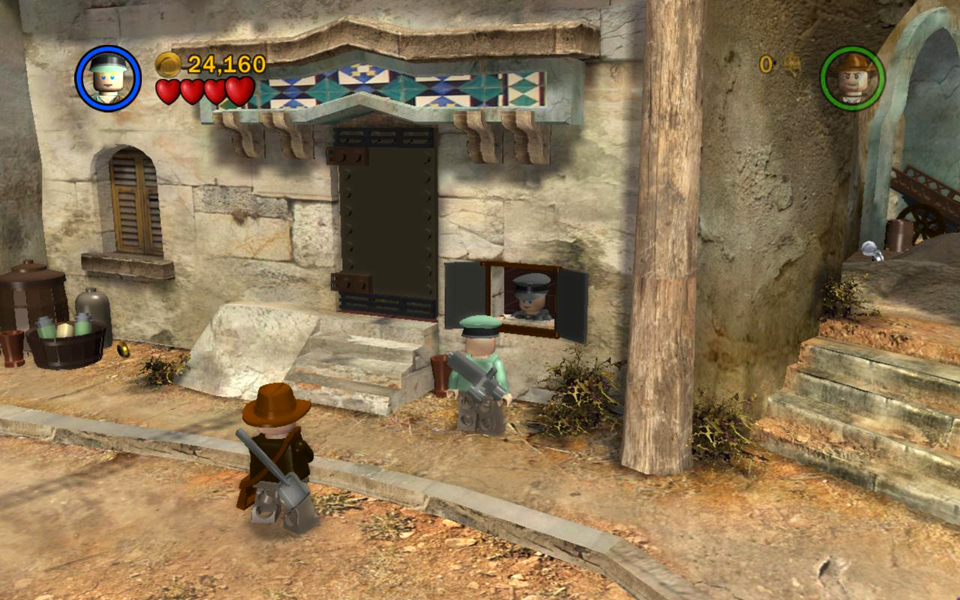 Use an enemy disguise to trick the guard. |
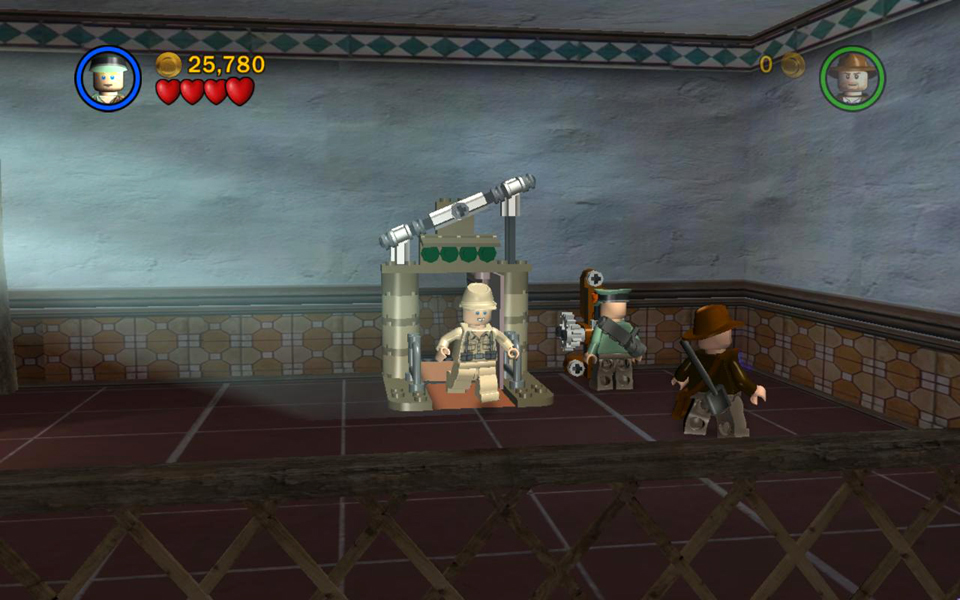 Pull the lever and fight the soldiers that emerge. |
|
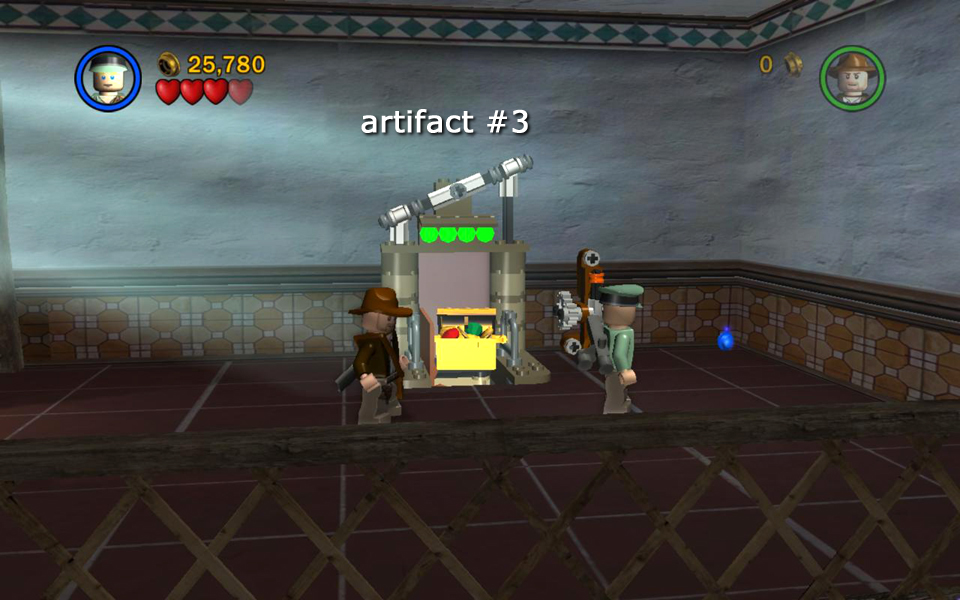 Artifact piece (3/10). |
||
Back in the main area, go up the wide steps towards the back (shown in the screenshot with the crawlspace, above). Fight a few more bandits.
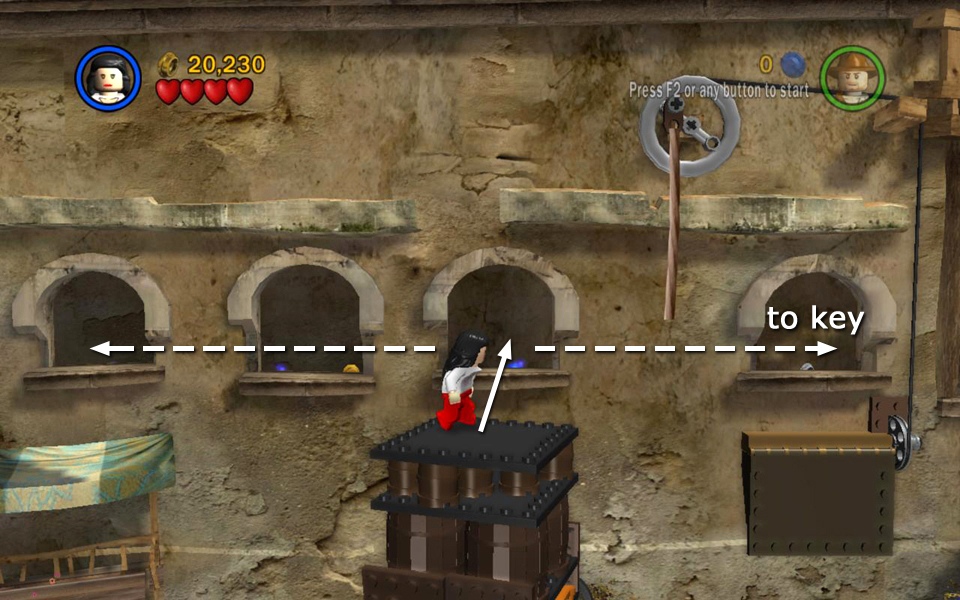
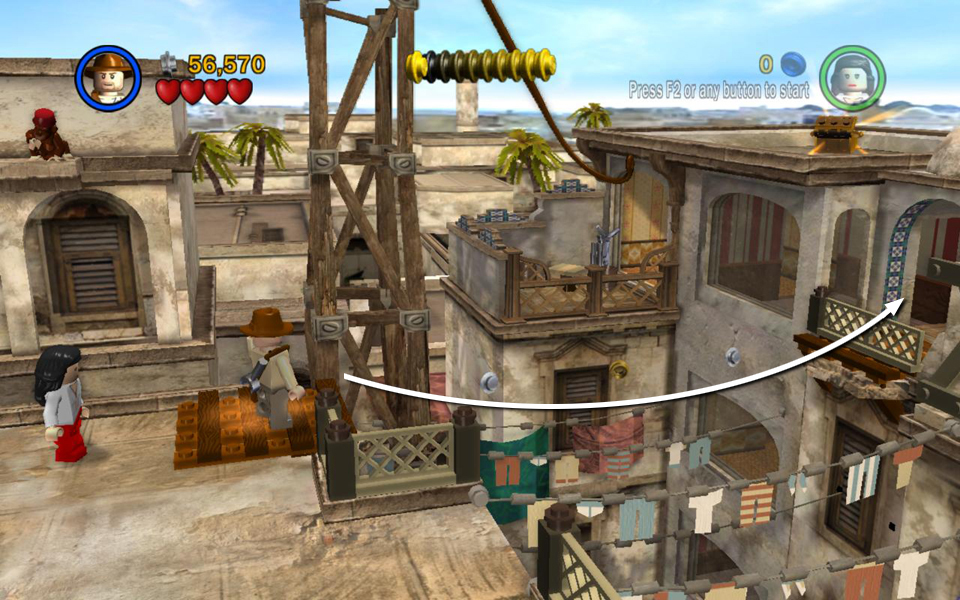
You can see the second golden key on the high ledge on the right. Grab the orange handle on the wheeled cart and push the cart to the left as far as it will go. Have Marion jump onto the awning to the left and bounce from there to the top of the cart. From there, jump to grab the dangling rope. This raises the ledge on the right. Jump from the rope to that ledge to the ledge with the key. Then follow the hallway behind the arched windows to the left to pick up a few studs.
Alternately, you can jump from the top of the cart into the archway on the back wall and then move behind the arches to the left to get the studs, then to the right for the key.
Once you have the key, hop down and return to the left to the big wooden gate. Use the key to in the second lock and go through to the next area.
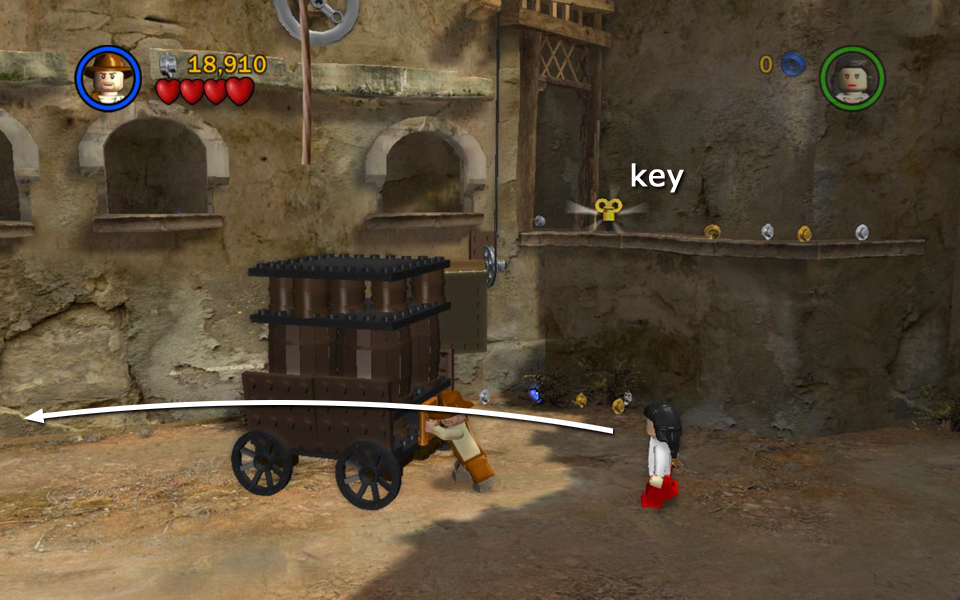 Push the wagon to the left. |
 Have Marion jump from the awning to the wagon. |
|
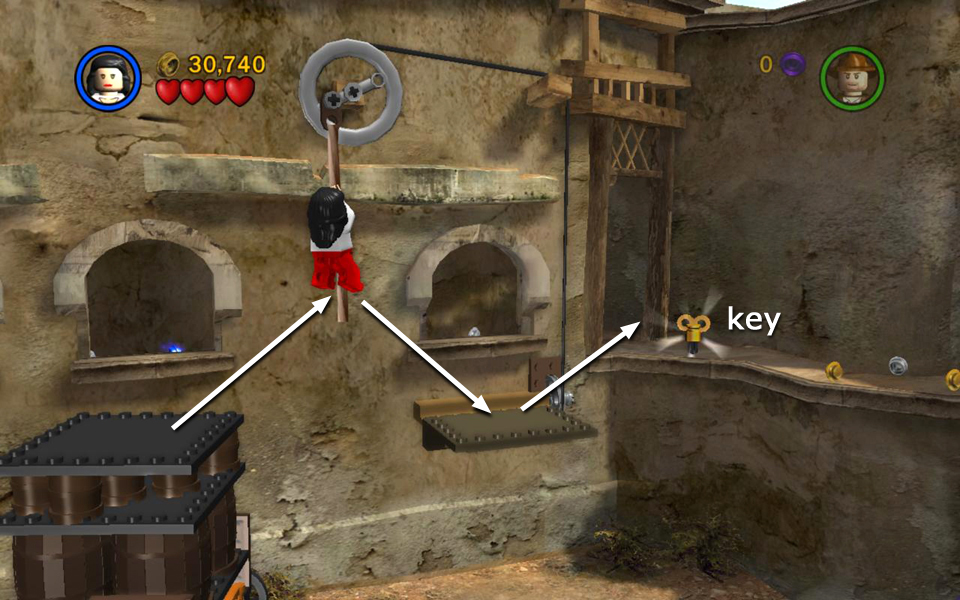 Grab the rope to raise the ledge. Then jump across to the key. |
 Or, jump from the wagon into the archway and go to the right to get the key. |
|
 Use the second key to open the gate. |
||
Area 3: Bazaar with Camels [jump to top]
(Click any of the screenshots below to enlarge.)
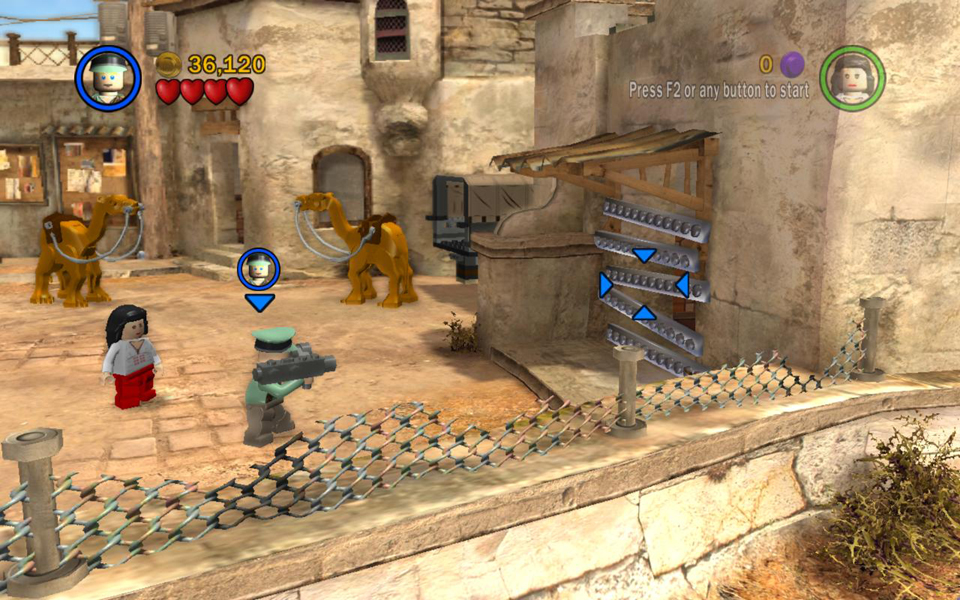
When you move across the square to the right, Indy and Marion are attacked by a pair of soldiers riding camels. More soldiers pour out of the truck at the far right. These continue to respawn as long as you explore this area. You can't harm the camels by punching them, but if you steal some guns from the soldiers on the ground, you can shoot the camels, which causes the soldiers to jump down off their backs so you can fight them. You can also throw objects that you pick up from the bazaar—boxes, bottles, goblets, etc.—or hit the camels with the shovel from the previous area, if you brought it along. Once you've taken care of their riders, the camels will no longer bother you.
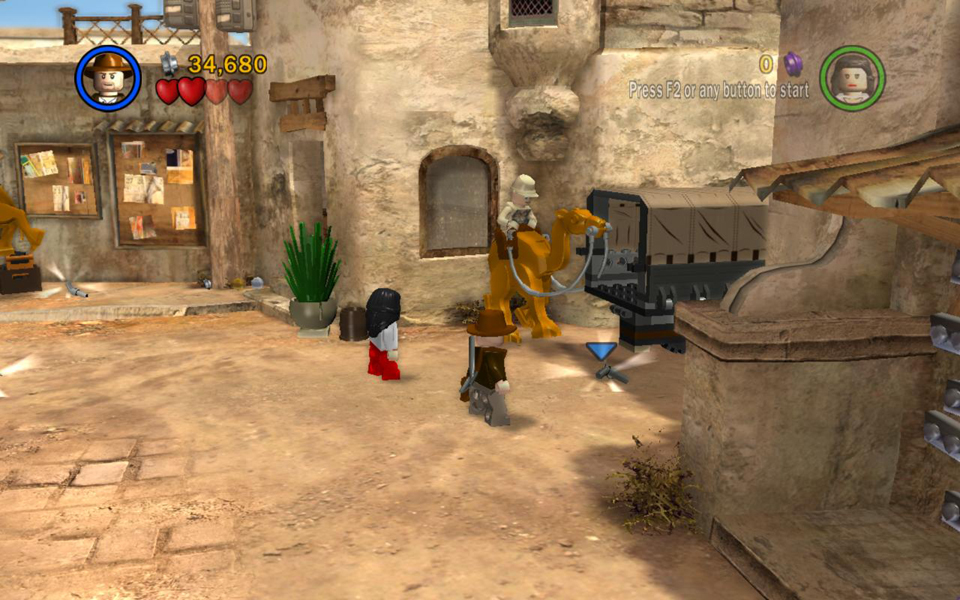 Pick up the dropped weapons. |
 Shoot the camels so the soldiers jump down. |
To get out of the bazaar area, go to the cart blocking the alley near the middle of this area. Smash the small crate next to it and use the jiggling pile of LEGO bits to build an orange handle for the cart. Then pull it to the right to expose the exit. Go through.
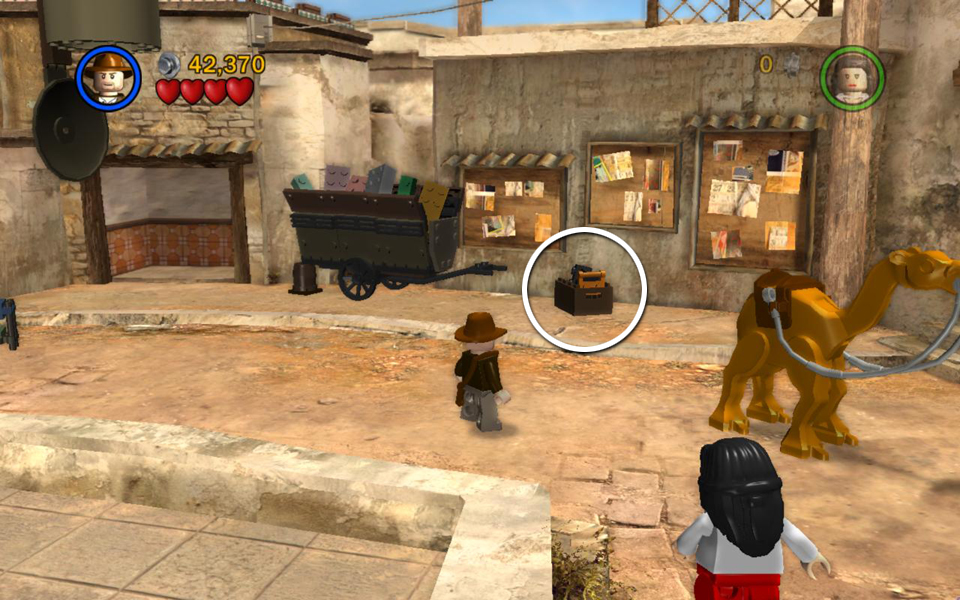 Smash the crate and build a handle for the cart. |
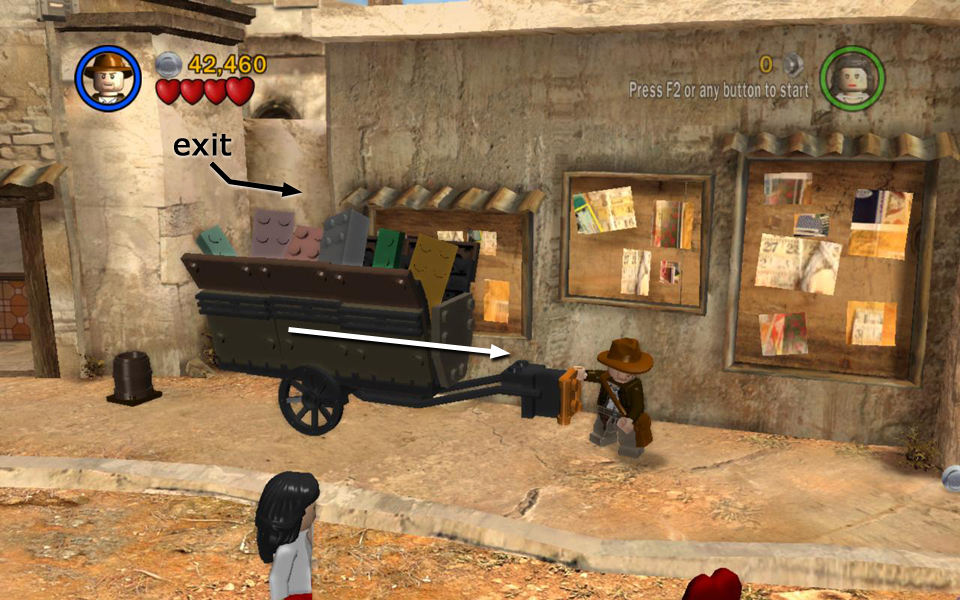 Pull the cart to the right to open the exit. |
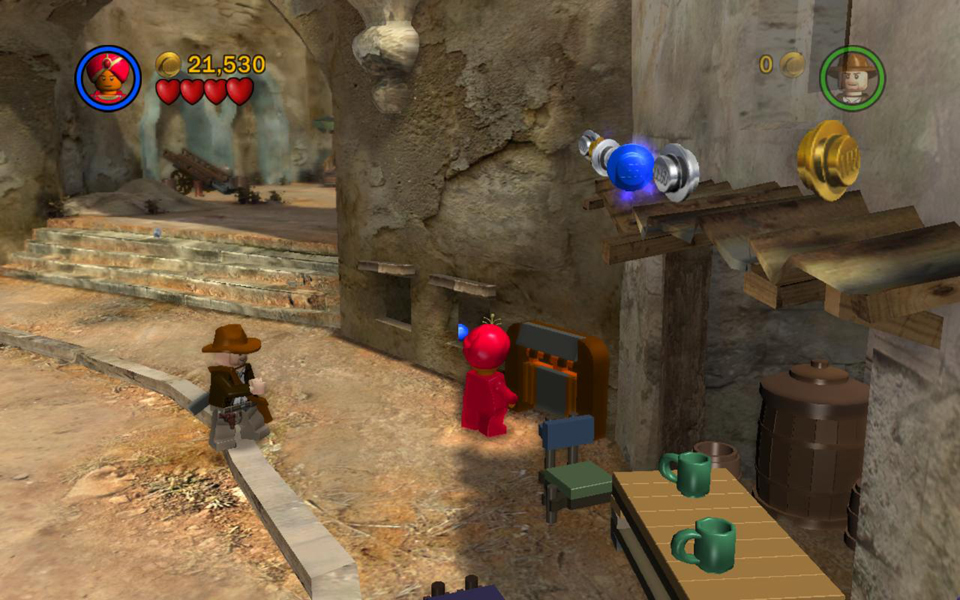
FREE PLAY: Switch to a small-sized character and go through the crawlspace on the left side of the area. When you come out on the ledge above, toggle the small character to Indiana Jones, step onto the whip platform and use the whip to open the water tank on the right. Artifact piece #4 drops out onto the ground.
 Go through the crawlspace to the ledge above. |
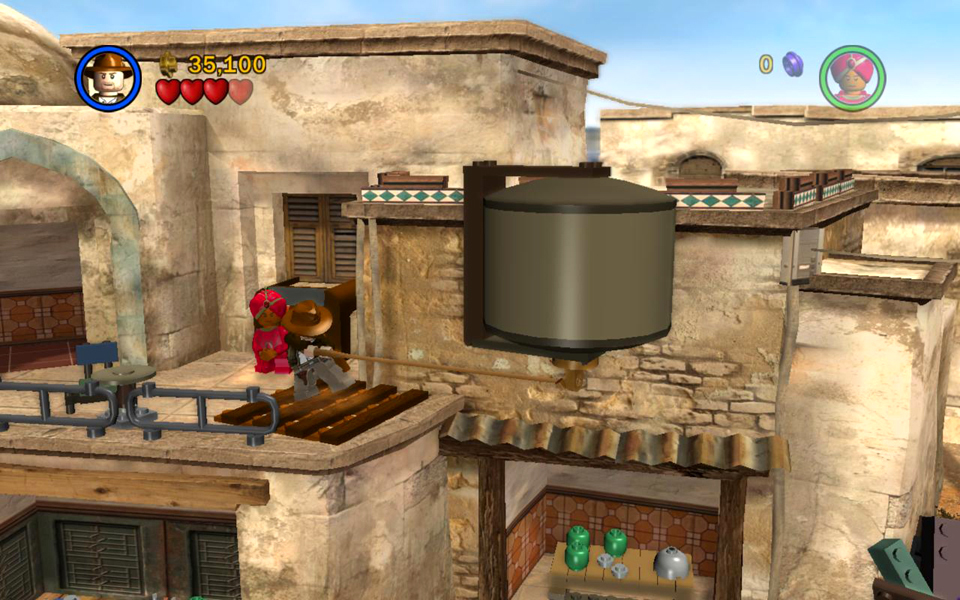 Use the whip to open the tank. |
|
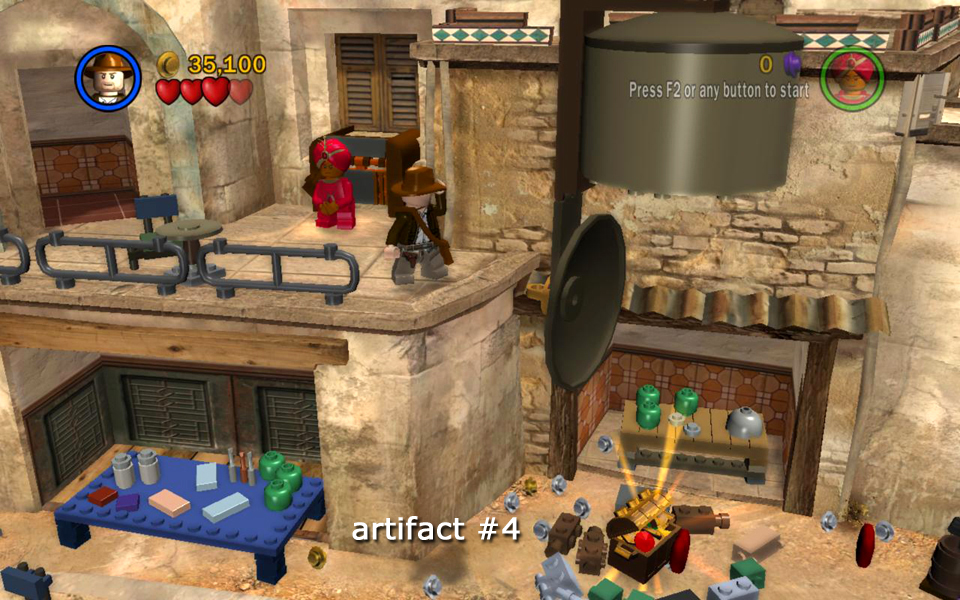 Out falls artifact piece (4/10). |
||
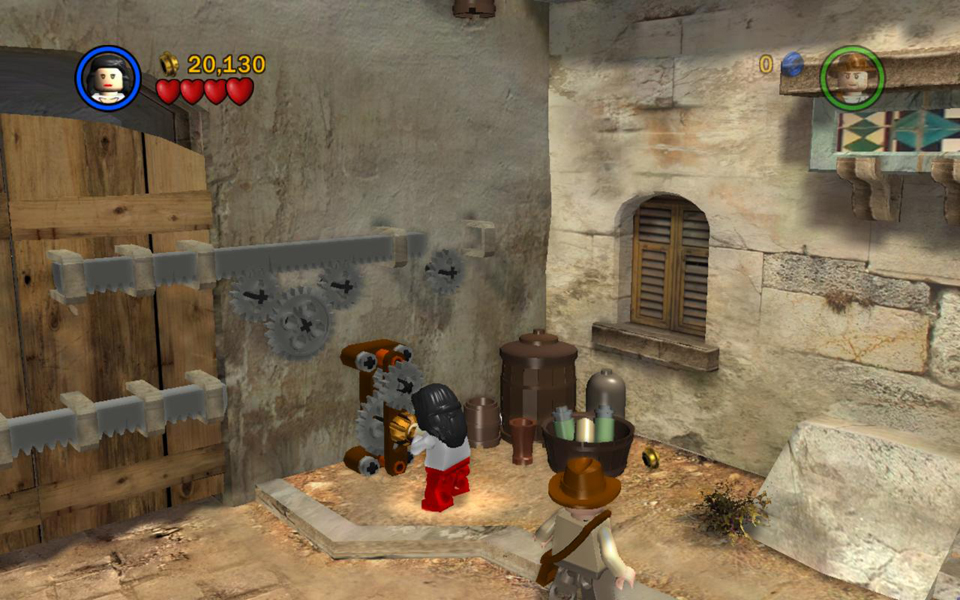
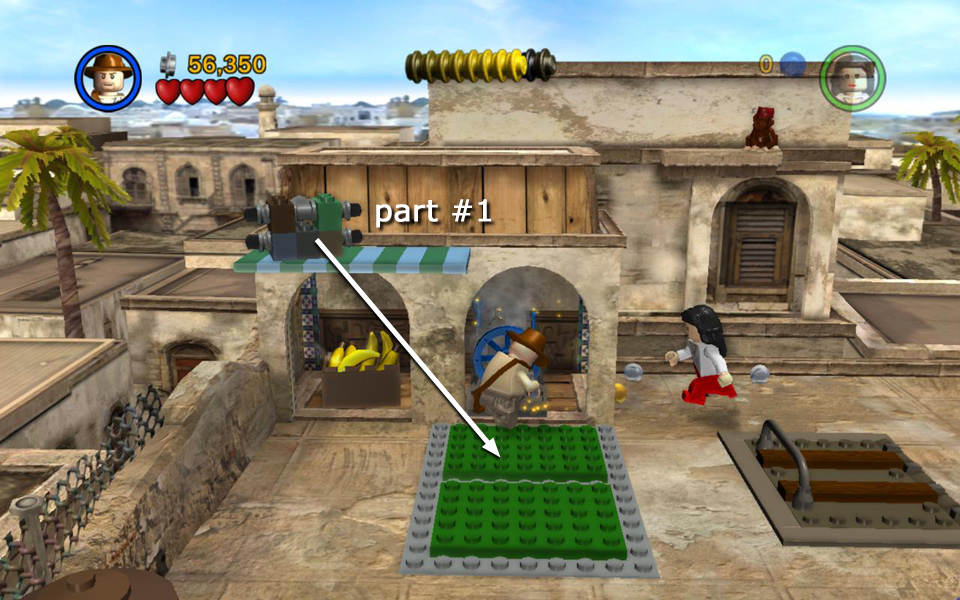
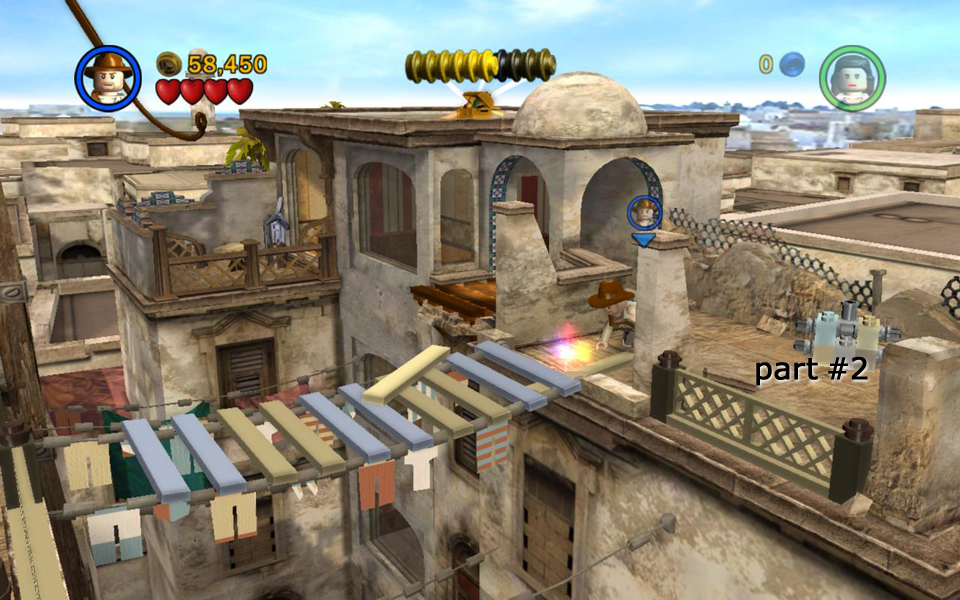
Use a character with explosives to destroy the metal bars at the right end of the road. Enter the building and go up the stairs to the roof. Pick up the crate of metal bars at the top of the stairs and drop it onto the green plate to the left. Use the LEGO bits to build a metal chest. Then slide it along the checkerboard floor and off the edge of the roof. When it hits the ground, it breaks open revealing artifact piece #5.
 Blow up the bars and go through to the roof. |
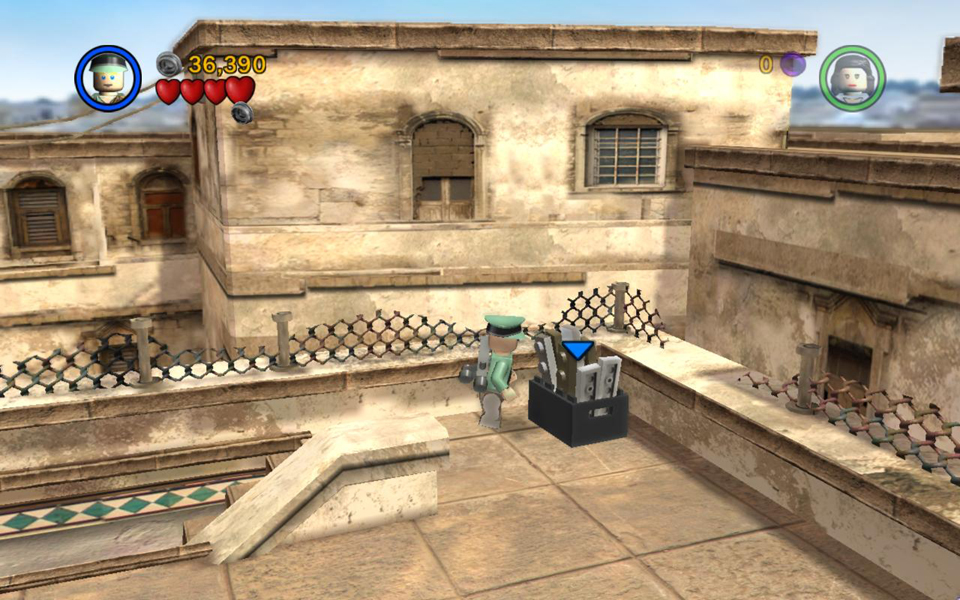 Pick up the box of metal bars. . . |
|
 . . . and carry it to the green LEGO pad. |
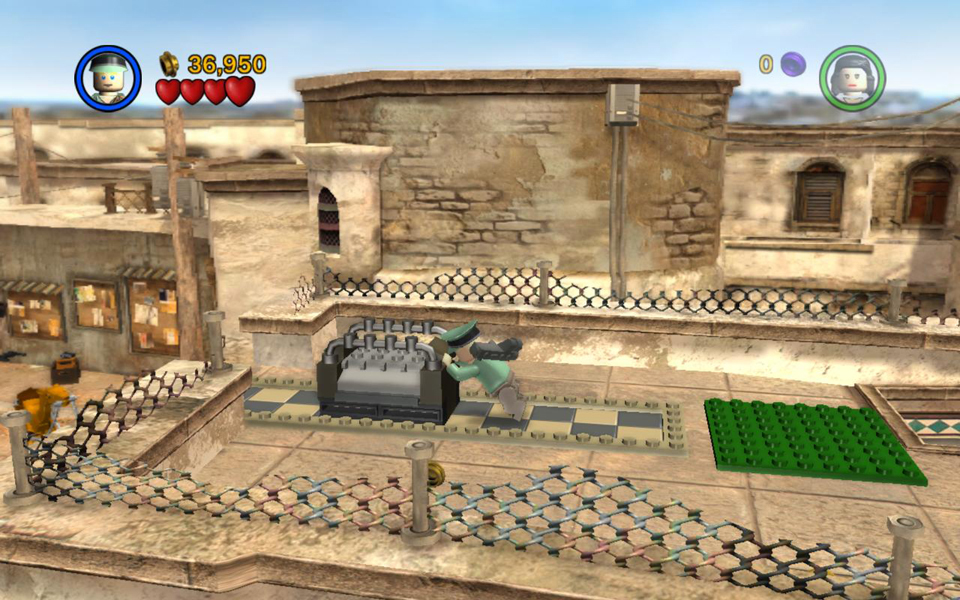 Build a chest and push it off the edge. |
|
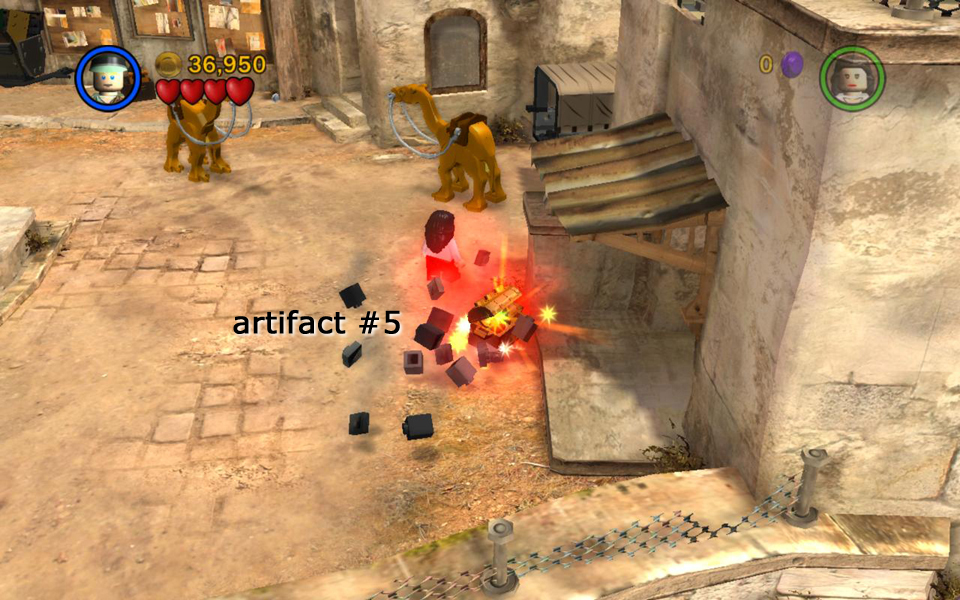 Artifact piece (5/10). |
||
Approach the guard post on the near left and use a character with the enemy disguise ability to fool the guard into opening the door. Go through to a small, open area with a bunch of dish antennas. Stand near the jiggling pile of LEGO pieces on the right and build an antenna array on top of the view screen. When you finish, artifact piece #6 appears.
If you want to, you can blow up the various antennas for studs and hearts before returning outside to the bazaar.
 Use an enemy disguise to get through this door. |
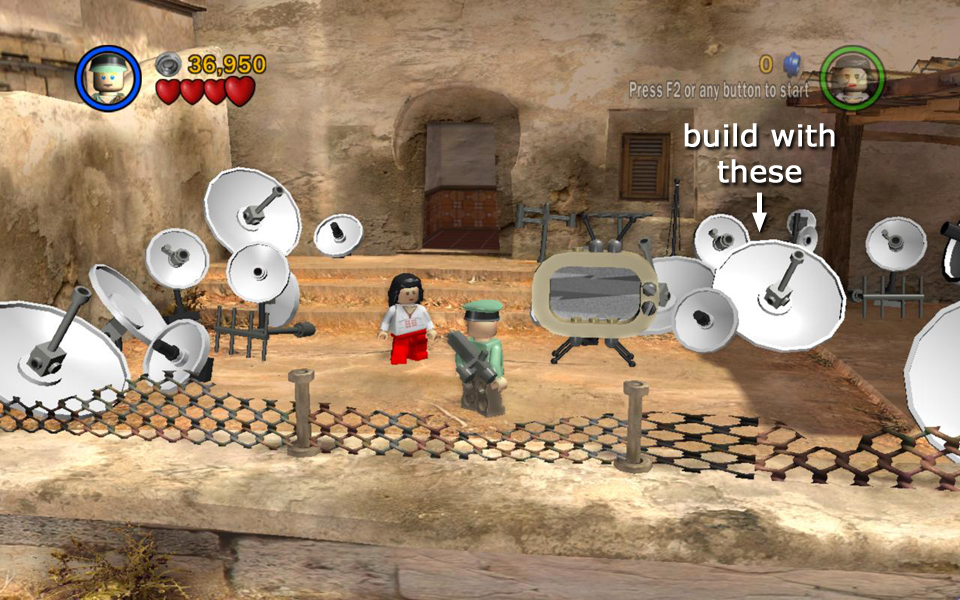 Build a huge dish antenna array. |
|
 Artifact piece (6/10) appears. |
||
Area 4: Narrow Stairs and Rooftop [jump to top]
(Click any of the screenshots below to enlarge.)
As you enter the next area, watch out for the bandit swordsmen waiting to ambush Indy and Marion. Deal with them and then head up the stairs, fighting off more bandits as you go.
At the top of the stairs is an open area with another monkey perched on a high ledge holding a bundle of dynamite. Before you can trade with the monkey, you'll need to stand on the whip platform and use Indy's whip to pull down the railing in front of the monkey. Then grab a banana from the nearby crate and toss it up to the monkey, who will then throw down the explosives. Quickly throw the dynamite at the barrel of metal bars on the left. It detonates, allowing you access to the ladder behind.
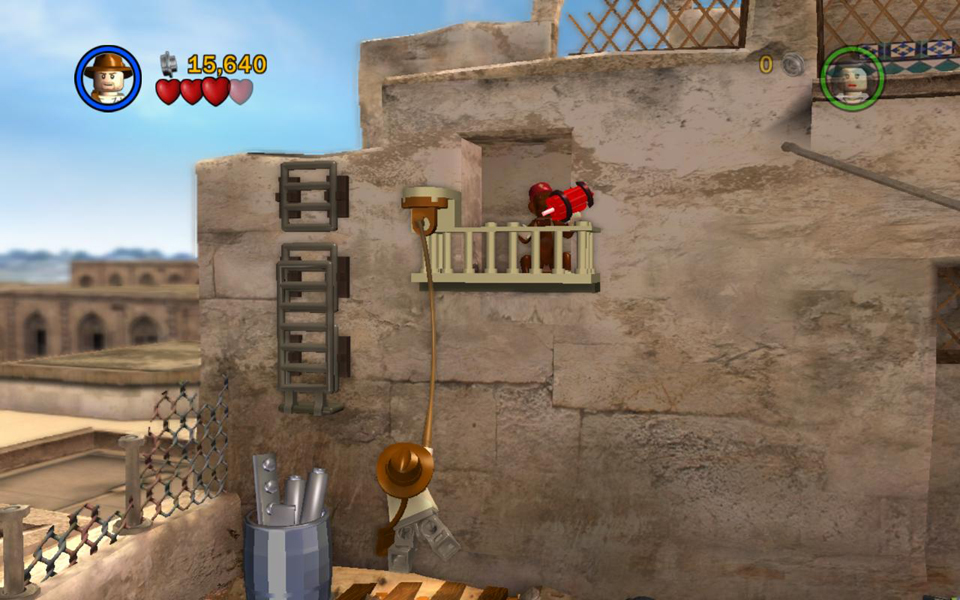 Whip down the railing near the monkey. |
 Trade a banana to the monkey for dynamite. |
|
 Quickly throw the explosives at the barrel. |
 The ladder drops down so you can exit. |
Before climbing out of this area, go to the right and smash the small stack of green bricks. Use the leftover parts to repair a second ladder. Climb to the top and jump to the ledge on the right. Step out onto the narrow ledge on the right side of the building and go around the back wall to find artifact piece #7.
Return to the ladder on the left and climb up to the next area.
 Smash the green bricks and build a ladder. |
 Climb to the ledge above on the right. |
|
 Go around behind the wall to find artifact piece (7/10). |
||
Area 5: Rooftop Garden and Crumbling Buildings [jump to top]
(Click any of the screenshots below to enlarge.)
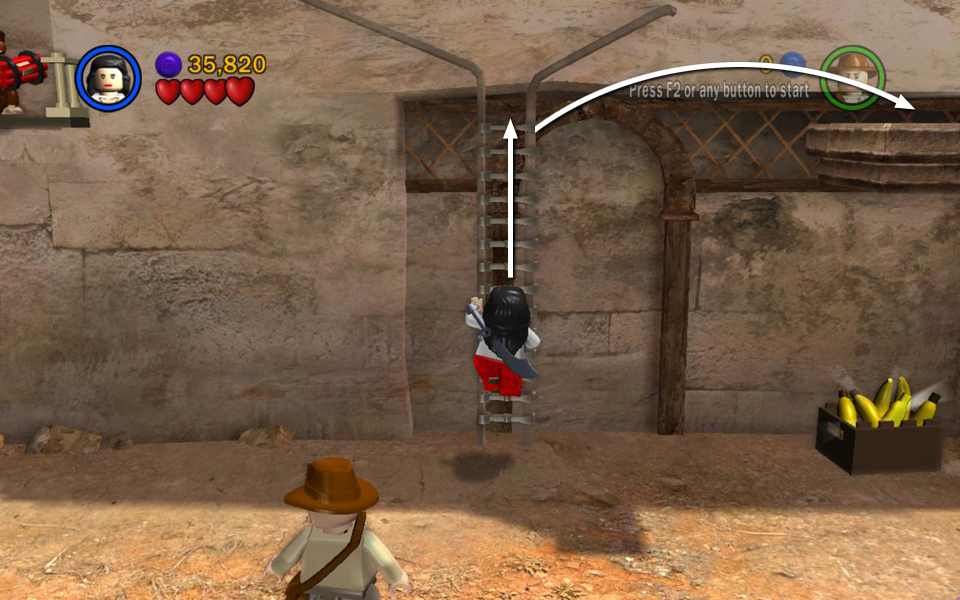
This lovely rooftop garden has various objects you can build and break for studs and hearts. There's also a treasure chest hidden nearby. Move to the front edge of the roof and hop over the edge to grab the handrails below. Climb down and to the left to a small, wooden ledge with artifact piece #8. Climb back up the way you came.
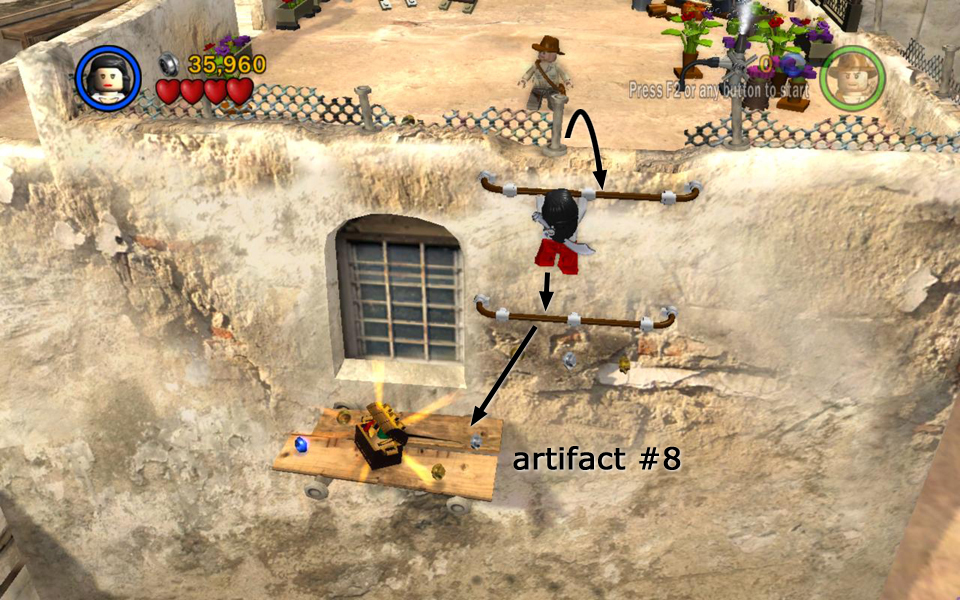 Artifact piece (8/10). |
Continue forward toward the greenish, copper dome. Push the green handle forward to rotate the dome, revealing a set of steps. Climb up and push the big, green ball to the right. It rolls down the steps and bounces across the gap to the next building, where it topples some planks, forming a bridge so you can cross over. Continue across the next wooden bridge onto another roof.
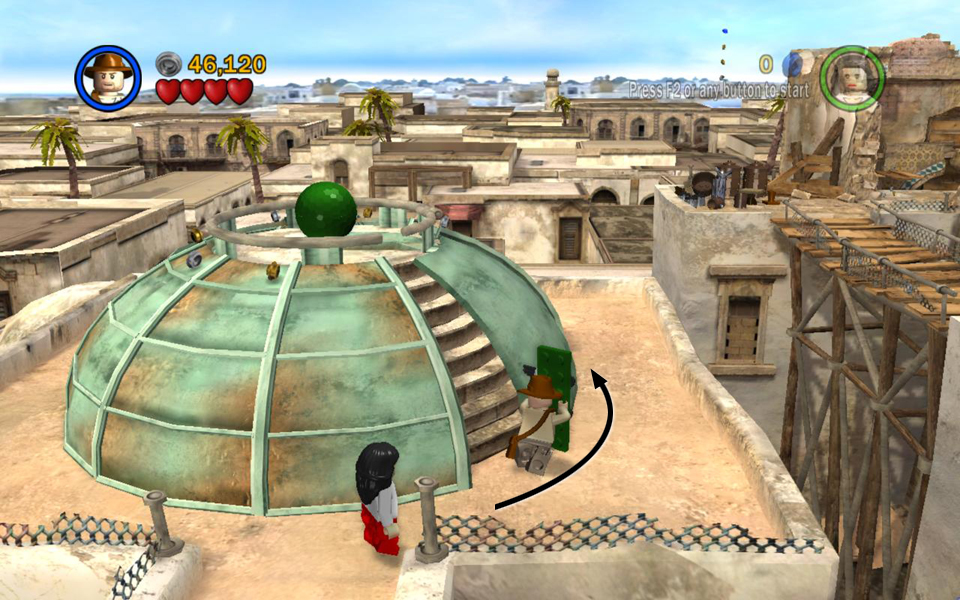 Push the green handle to open the dome. |
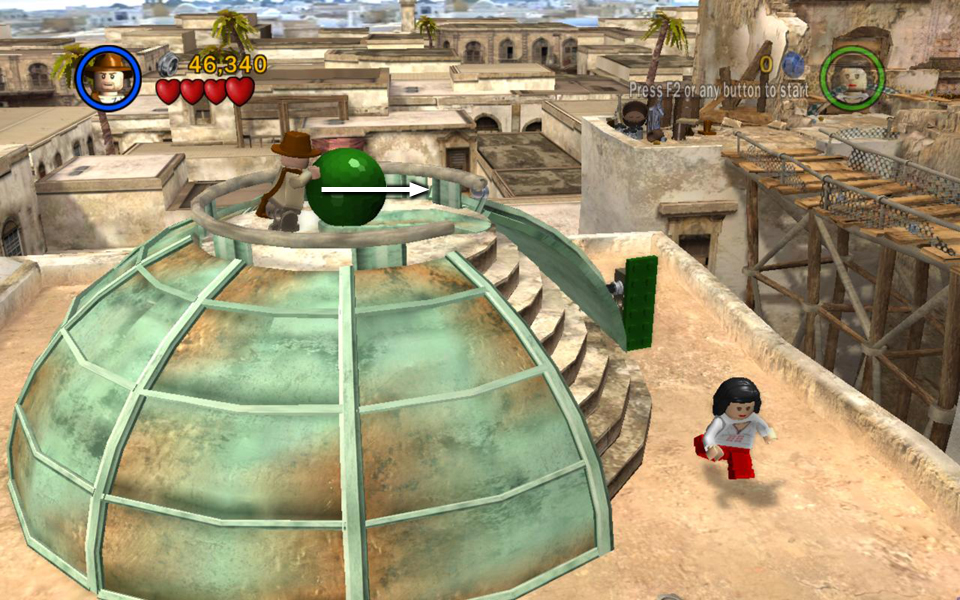 Push the green ball off its perch. |
|
 It knocks these planks down to make a bridge. |
||
FREE PLAY: Use explosives to destroy the small metal fan (shown at the upper middle of the last screenshot in the section above). Rebuild the bits to make a fan that blows upward. Hop into the updraft to collect the studs above.
Continue to the right, crossing over the bridges made of rickety LEGO planks. If the boards break before you're able to cross, there are handholds below.
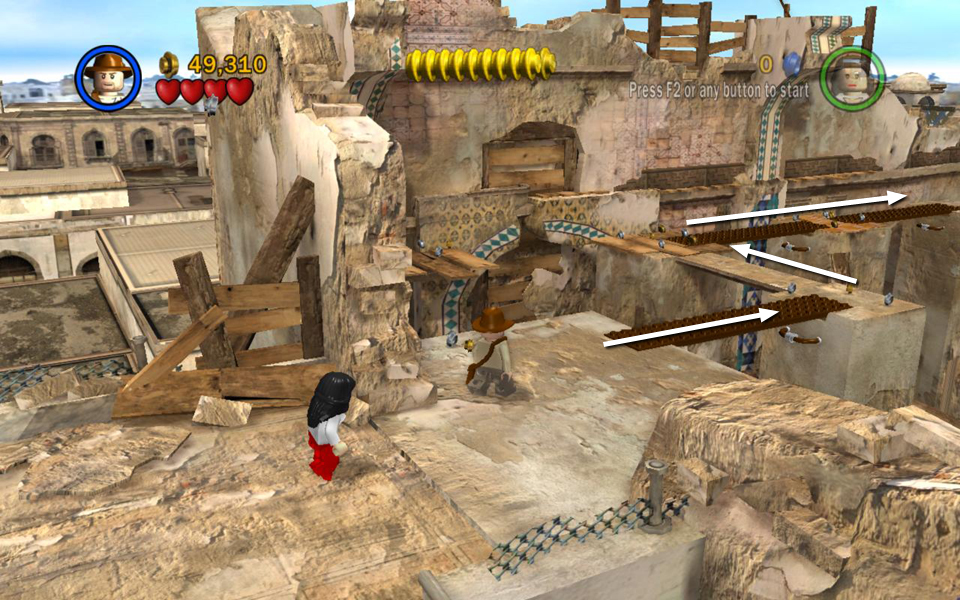 Cross over the planks to the next roof. |
 If the boards break, use the handholds below. |
On the next flat rooftop, there's yet another crate of bananas and, naturally, a monkey to receive them. Trade with the little guy for a golden key and use it to operate the mechanism that extends a metal bridge to the next roof.
Before crossing, have Marion jump across to the square ledge on the right, where you'll find a purple stud (worth 10,000).
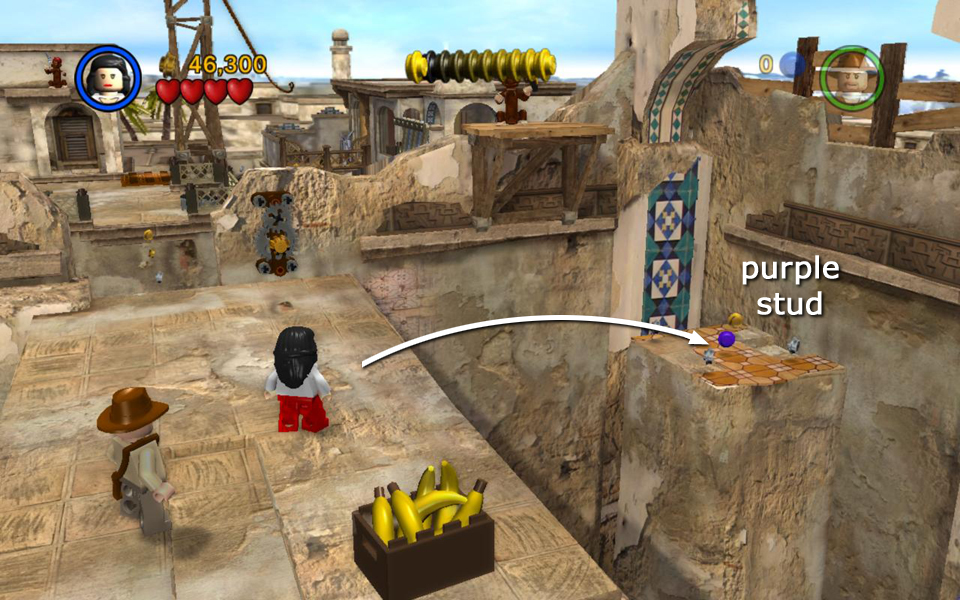 Jump over to the purple stud and back. Then trade with the monkey to get a key. |
 Use the key to extend a bridge. |
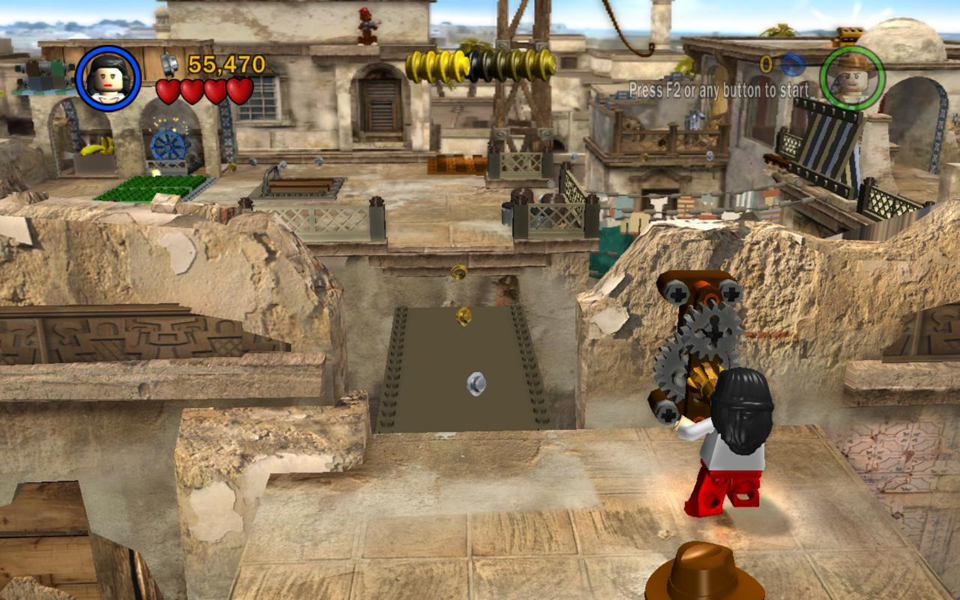
Just ahead there's another monkey and another box of bananas. This time trade for a wrench. Use it to repair the blue machine, which retracts the awning above the bananas, dropping a complicated LEGO machine part. Place it on one of the green plates.
Move Indy onto the whip point to the right and whip swing across to the next building. Go around to the right to find another LEGO machine part. Smash the blue-and-tan wall from behind. Use the leftover boards to build a bridge across the clotheslines leading back to the other roof. Then carry the machine part across the bridge and drop it on the other green plate.
Use the two sets of LEGO bits to build a lever. Jump up and grab it to pry open the trapdoor. This is the exit to the next area.
 Trade a banana for a wrench. |
 Use it to fix the machine and get a LEGO part. Drop this on the green plate. |
|
 Whip swing across to the next roof. |
 Break down the blue-and-tan wall and build a bridge. |
|
 Carry the second part back to the green plate. |
 Use the bits to build a lever and open the exit. |
FREE PLAY: While you're in the building on the right, where you find the second machine part, toggle to a character with explosives. Move through the room on the left and out the other side. Blow up the metal fan and use the leftover bits to build a different fan that points upward. Hop into the updraft and ride it up to the roof on the right, where you'll find artifact piece #9.
 Blow up the fan and rebuild it to point upward. |
 Ride the breeze to the roof above and get artifact piece (9/10). |
Area 6: Military Base Entrance [jump to top]
(Click any of the screenshots below to enlarge.)
This street is crawling with enemy soldiers. The enemy officers in the dark uniforms use grenades, so watch out for them especially. The soldiers respawn as you explore, so try and focus on doing what you have to do and getting out.
FREE PLAY: Use a character with an explosive weapon to destroy the silver bars over the crawlspace to the left of the guarded gate. Then switch to a small-sized character to get through. Artifact piece #10 is sitting on the ledge above.
 Blow up the bars over the crawlspace. |
 Crawl through to get artifact piece (10/10). |
In order to move on, you'll need an enemy disguise. In Free Play you should have a character with an enemy uniform. If not—or if you're playing in Story Mode, with only Indy and Marion—you can steal a disguise. When you defeat the enemy officers, watch to see if they drop their hats and try and grab one before it disappears. If you don't succeed at first, just run around the area until more enemies appear. Then try again.
Once you're dressed like an enemy, head for the guard post near the large gate in the middle of this area. Knock at the door and trick the guard into opening the gate.
Fight the soldiers inside. Then use the jiggling pile of LEGO bits to rebuild the truck engine. Smash the tool canisters next to the truck to get a wrench and use it to repair the engine.
 Use an enemy disguise to trick the guard into opening the door. |
 Rebuild the truck's engine and fix it with a wrench from the can. |
PARCEL & SECRET CHARACTER: In Free Play, switch to a character with the academic ability to tackle the glyph puzzle on the wall behind the truck to open the nearby door.
 Use a scholar to solve the glyph puzzle and open the door. |
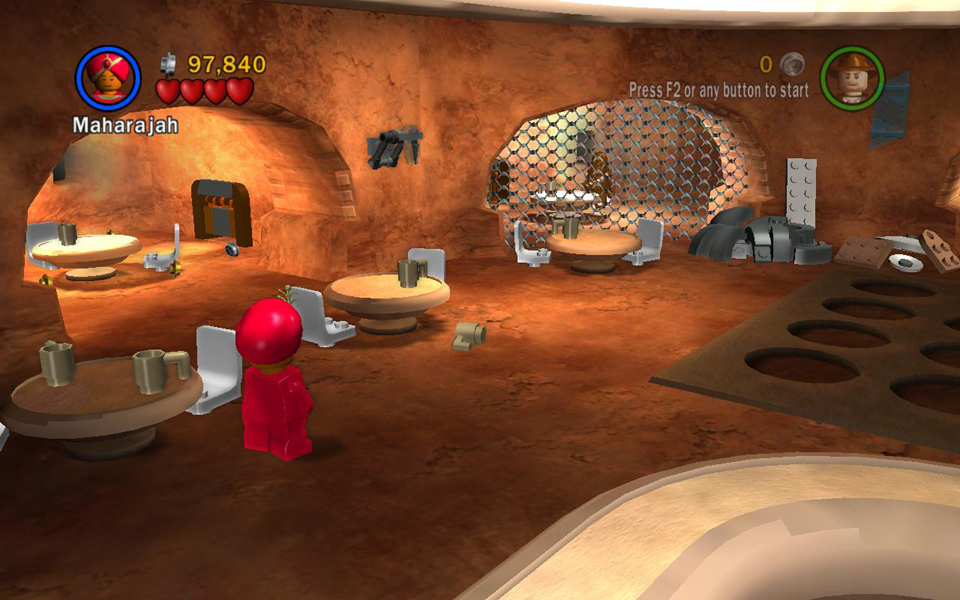
Go through to find yourself inside the Mos Eisley cantina from Star Wars. Switch to a small-sized character and wriggle through the crawlspace in the alcove at the back of the room to discover Chewbacca enjoying a quiet drink. Chewie is one of five hidden Star Wars characters that will enable you to unlock Han Solo as a playable character. For more info, see the Characters page.
 Send a tiny character through the crawlspace. . . |
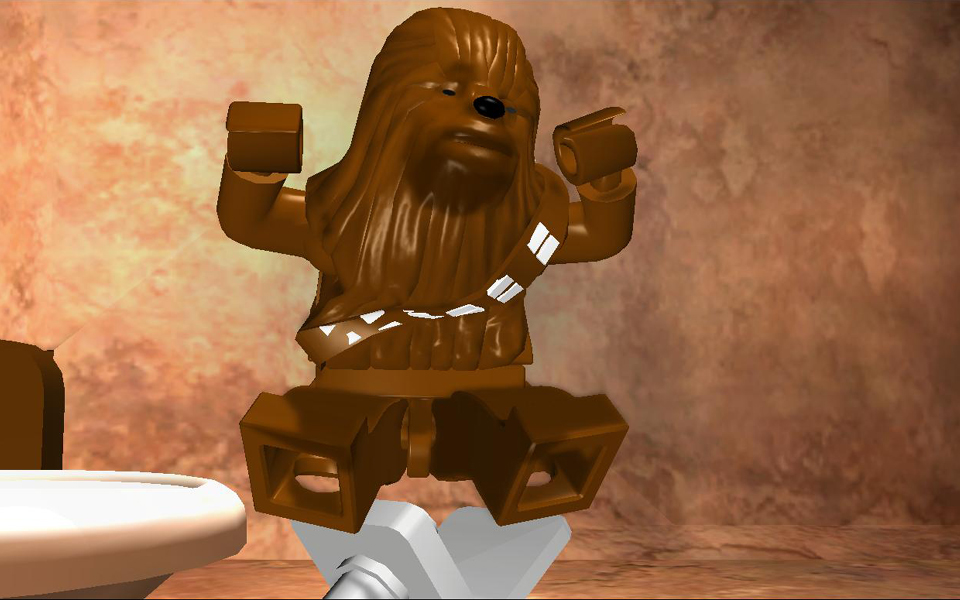 . . surprising Chewbacca! |
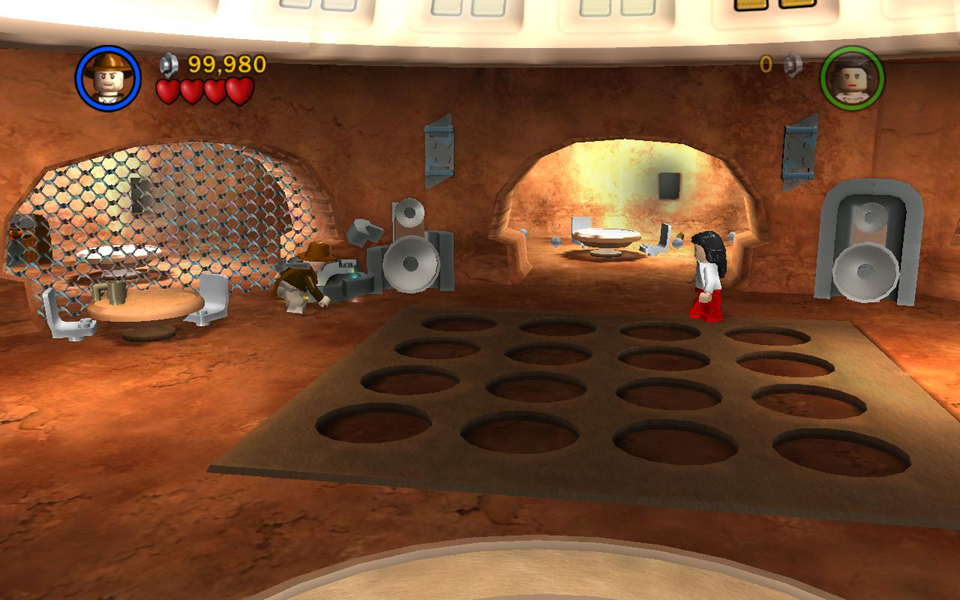
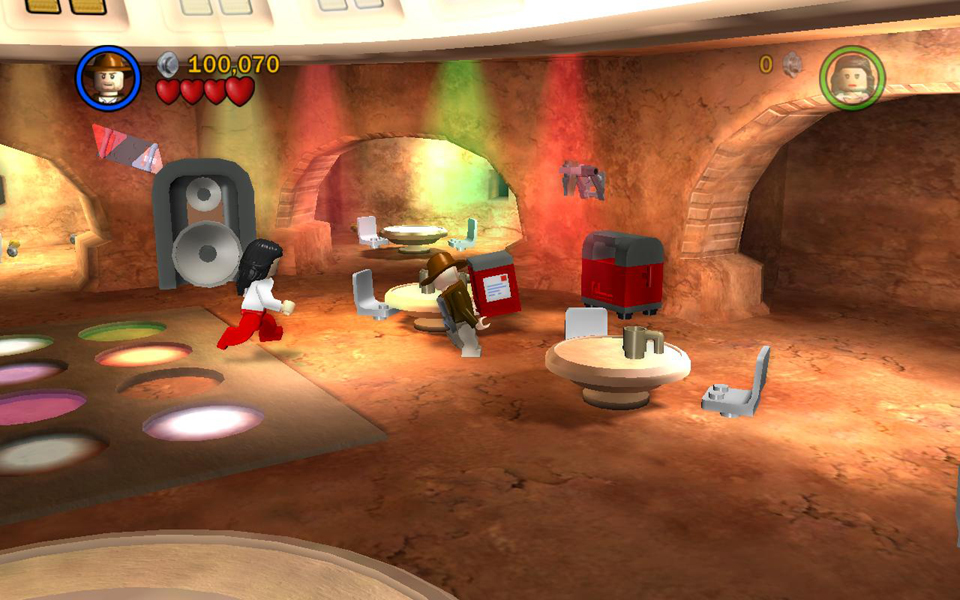
Next, use the jiggling piles of LEGOs to rebuild the speakers on each side of the dance floor. This activates the sound system.
As the music plays, the lights on the dance floor begin to flash. As each pair of circles lights up, move one character onto each of circle. The lights then change color and another pair lights up. Move the two characters onto that pair to trigger the next set of lights. If you take too long, the first pair of lights goes out, but if you keep at it, pretty soon the whole floor will be lit up and a parcel appears in the middle. Carry it to the mailbox on the right and send it home.
Go through the doorway on the left to get back to the alley with the truck.
Later, when you've finished the level, return to the Mail Room at Barnett College. You'll then be able to unlock the "Treasure x2" Extra for 1,000,000 studs. (See Parcels & Extras for more info.)
 Rebuild the two large speakers. |
 Step on each of the white circles to make them turn green. |
|
 When all the lights are lit, the parcel appears. |
 Carry it to the mailbox. |
When you're ready to finish the level, have one character get into the truck and drive through the gate. The other character follows on foot. Head for the right end of the street. Crash through the metal barriers and the gate beyond. Then get out of the truck and run through the small doorway to end the level. ![]()
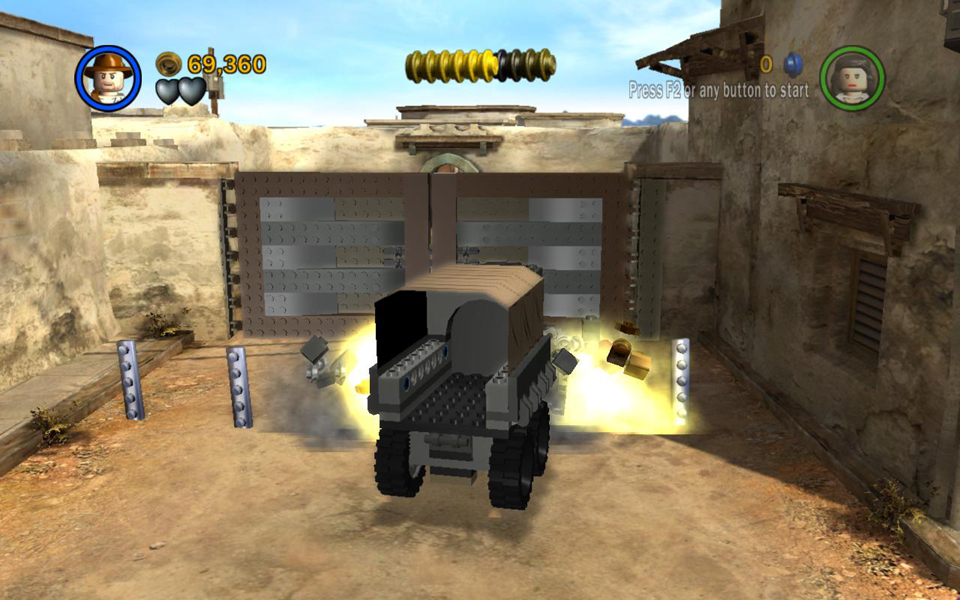 Crash through the gates to reach the level exit. |
| < < < Previous Raiders Level | Next Raiders Level > > > |