Temple of Doom – Bonus Level 3: Slave Driver Cave
True Adventurer: 14,000 studs
Bonus Level Characters: Indiana Jones, Maharajah
Unlocks: Nothing
LEVEL ENTRANCE: Once you've unlocked any of the characters with the Thuggee Chant ability (see the Characters page if you're not sure who has it), head for the area behind Pankot Village. Use the Thuggee character to activate the Kali statue and reveal the secret entrance to this level. (Check the Bonus Level Intro if you need screenshots.)
Trapped Dungeon with Lava Pool
(Click any of the screenshots below to enlarge.)
This unusual bonus level includes 2 timed sequences that you must beat in order to get the Artifact at the end. If you fail either of these timed events, you must start over. Don't worry about smashing things and gathering studs at first. Once you've beaten the timed sequences and opened the path to the Artifact, you'll have a chance to go back and gather any studs you missed.
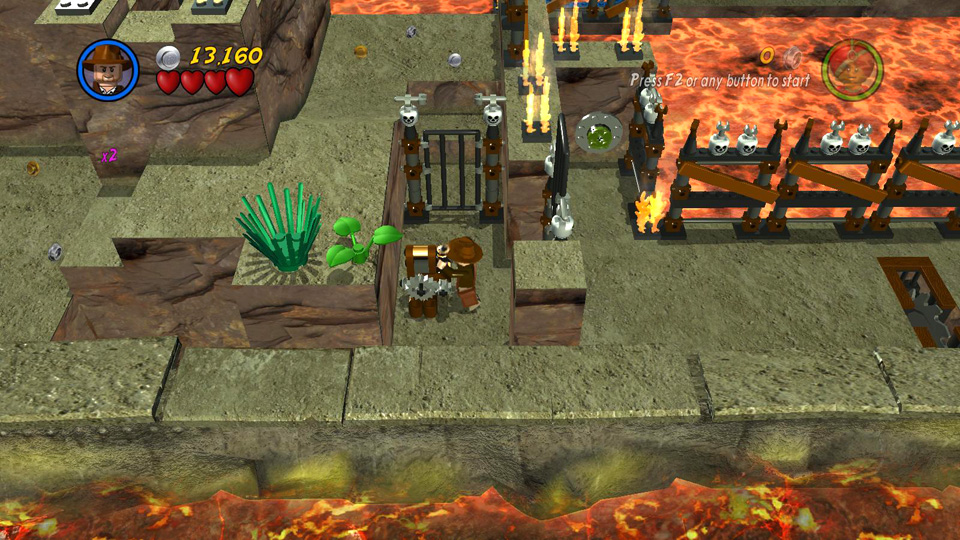
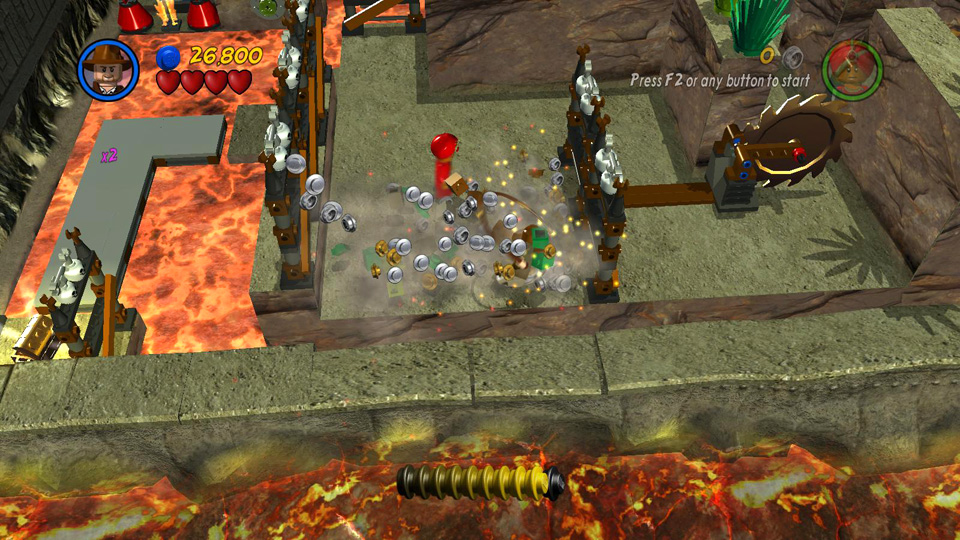
If you're playing alone, you'll need to control Indiana Jones. The Maharajah is just along for the ride. The first timed sequence doesn't begin until you pull the lever. When you do, a huge LEGO boulder begins to roll down the ramp in the background. If the boulder reaches the end of the track and lands on the switch there, you'll fail and have to start over. So the goal is to hurry through the traps and raise a platform that will stop the boulder before it reaches the switch.
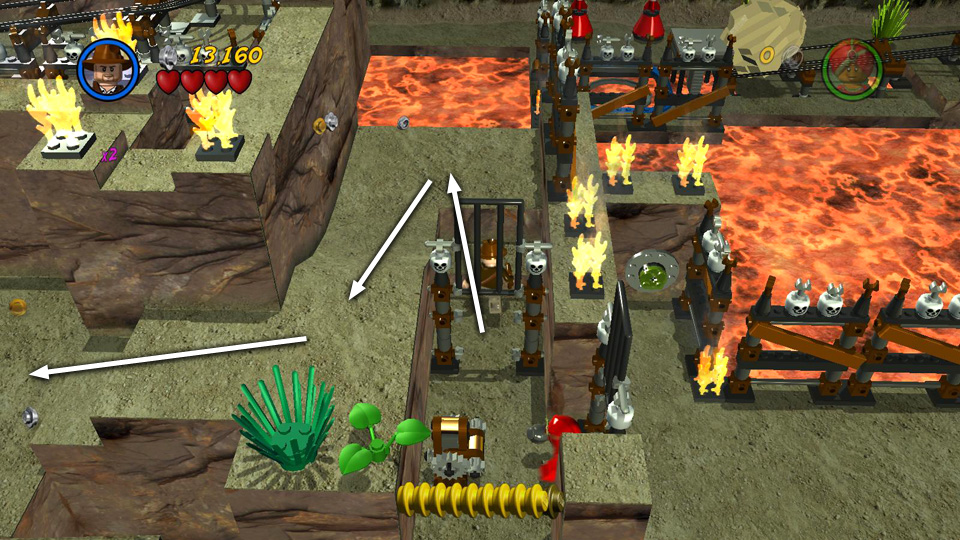
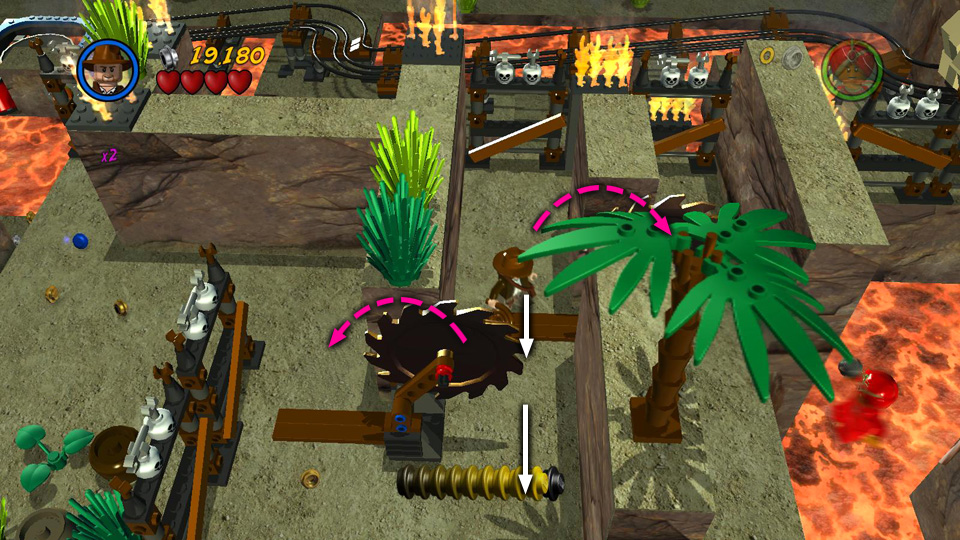
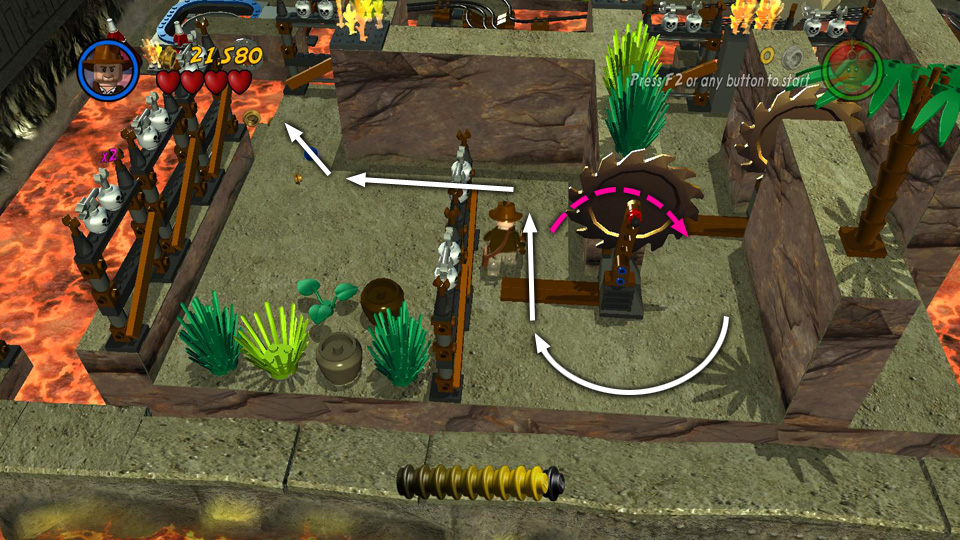
FIRST TIMED SEQUENCE: Pick up a few studs in the first room. Then pull the lever to open the gate on the left and release the boulder. Run through the gate, wait for the spinning saw blade to retract and then quickly run past it. Go around the corner, head back toward the foreground and, again, wait just until the saw moves back to the right before running past it. Once you've cleared the first saw, turn left and head up the slope. Jump over the next saw as it retracts into the floor.
Continue left to the closed gate. Then turn to face the background and use Indy's whip to pull the orange ring. This raises the platform at the bottom of the track, stopping the boulder from rolling onto the switch—provided you reach the ring and pull it in time. It also opens the gate on the left.
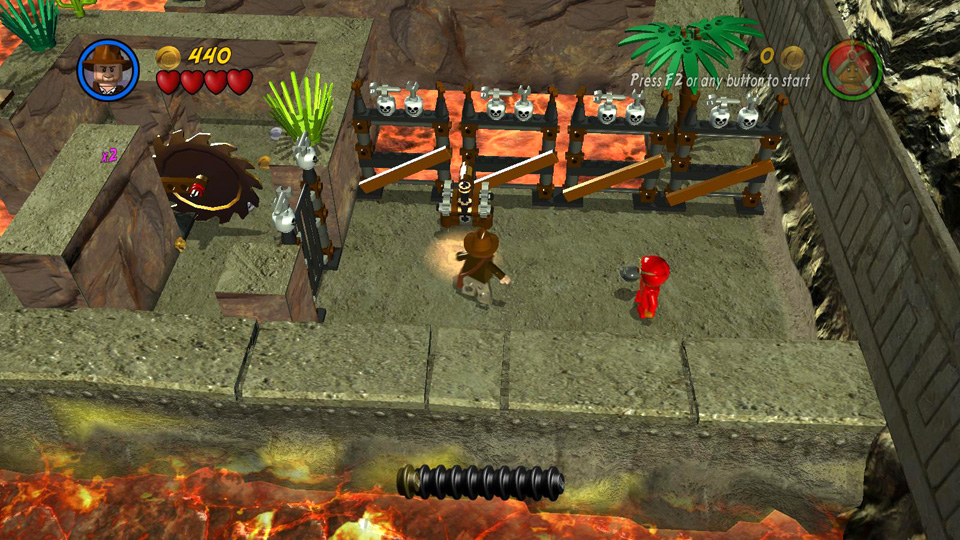 Pull the lever to open the gate on the left and begin the first timed sequence. |
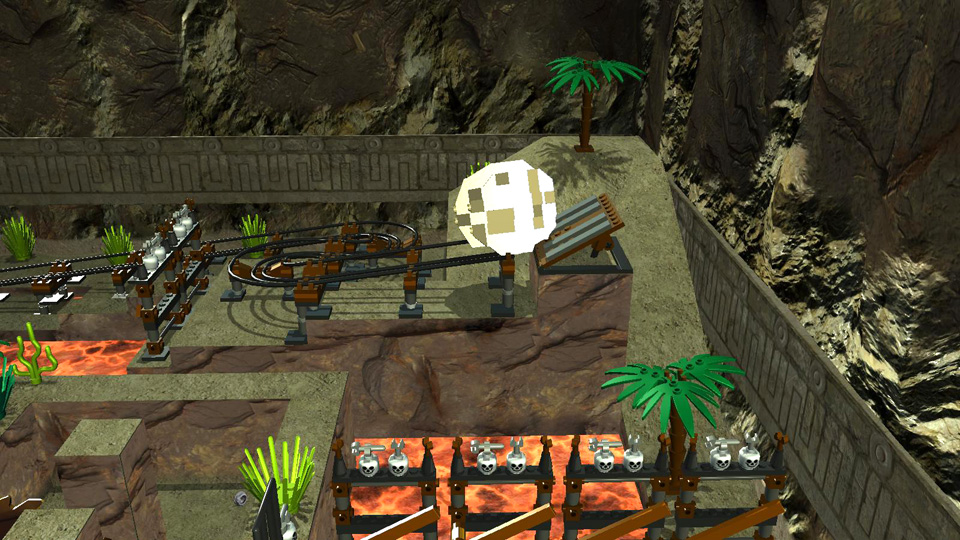 The boulder starts to roll down the track. You must hurry to prevent it from reaching the bottom. |
|
 Run through the gate, wait for the saw to move to the left and then run past it and around the corner. |
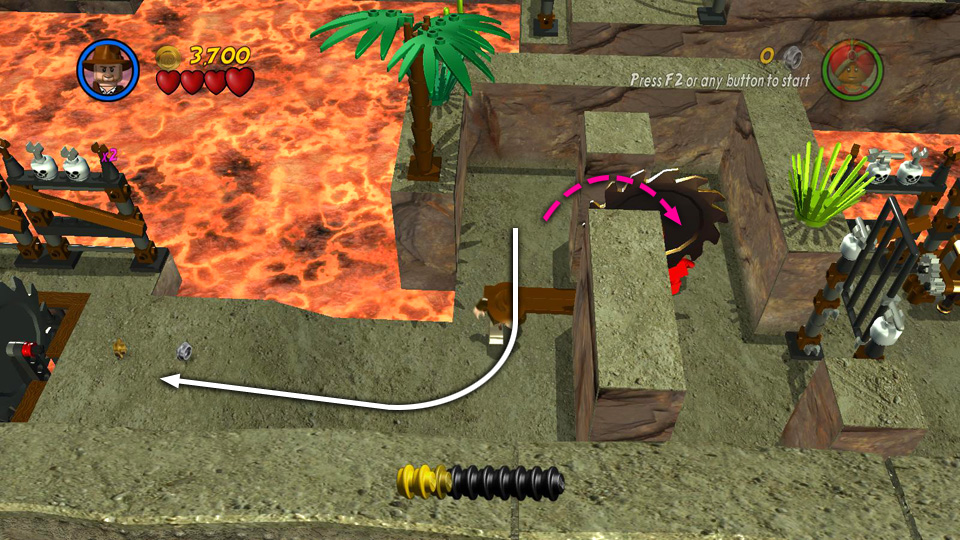 Wait for the saw to swing back to the right. Then run past it into the open area beyond. |
|
 Continue to the left and jump over the next saw when it sinks into the floor. |
 Just beyond the saw is an orange ring in the background. Pull it with Indy's whip. |
|
 If you've been fast enough, this raises a platform that stops the boulder and opens the gate to the next area. |
||
The next timer doesn't start until you pull the lever in the hallway to the left. As soon as you do, the gate next to the lever opens, and another giant LEGO boulder begins to roll down a second track near the back wall. This track is slightly longer, so you'll have a little more time to navigate the next set of traps. But, again, if you fail, you'll have to start over at the beginning.
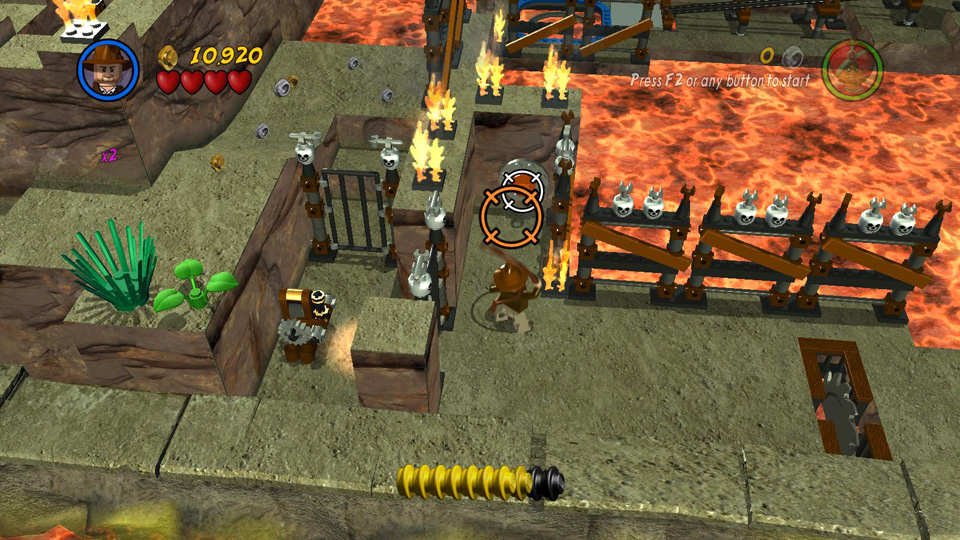
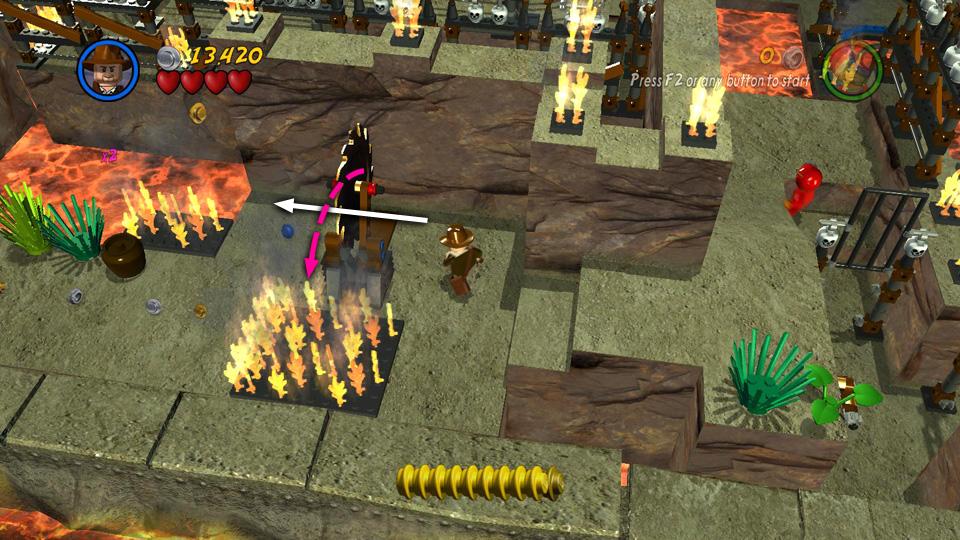
SECOND TIMED SEQUENCE: Pull the lever, run through the gate toward the background. Hop up the steps and turn left. Then run back toward the foreground and down the steps to the left. Avoid the flames; they're too wide to jump across. Instead, wait for the spinning saw to move away and then run through. Just take care not to run on into the next set of flames.
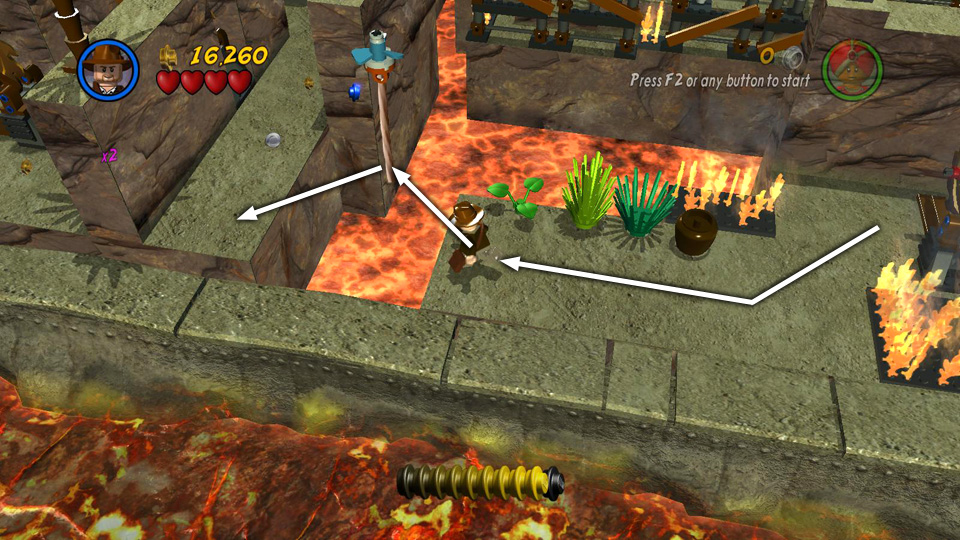
Continue running to the left, past the plants and brown jar, and then jump to grab the rope dangling above the lava. Jump from the rope down to the next ledge. Turn to face the background, wait for the next spinning saw to move to the other side of the passageway and quickly run through. Round the corner to the left, wait for that same saw to move back to the right and then run past it. Here you need to be especially careful not to run on into the next saw blade, which is position very close to the previous one. Wait in the gap between the two blades until the one in front of you moves to the left. Then run past it. Now turn left and face into the background once more. Wait for the saw you just passed to move back to the right and run past it into the next area.
Ignore the plants and jars for now and run to the back left corner of this ledge. Hop down the steps on the left. Stand on the bottom step, just above the lava and whip the orange ring in the background. This raises another small platform at the end of the second track, preventing the boulder from rolling onto the switch. If you're too slow and don't pull the ring in time, you fail and have to start over.
 Pull the lever to open the nearby gate. . . |
 . . . and start the second boulder rolling down the track toward the second switch. |
|
 Run through the gate, up the steps and around to the left. |
 Hop down the next set of steps, wait for the saw blade to move down screen and run past it. |
|
 Run past the plants and brown jars, and then use the dangling rope to cross the lava. |
 Wait for the next saw blade to move to the left and then run past it and around the corner. |
|
 Wait for the blade to move back to the right, run past it and stop. Then wait for the next blade to move to the left and run past it. |
 Round the corner, wait for the previous blade to move to the right and run past it on the left side. Then head for the back left corner. |
|
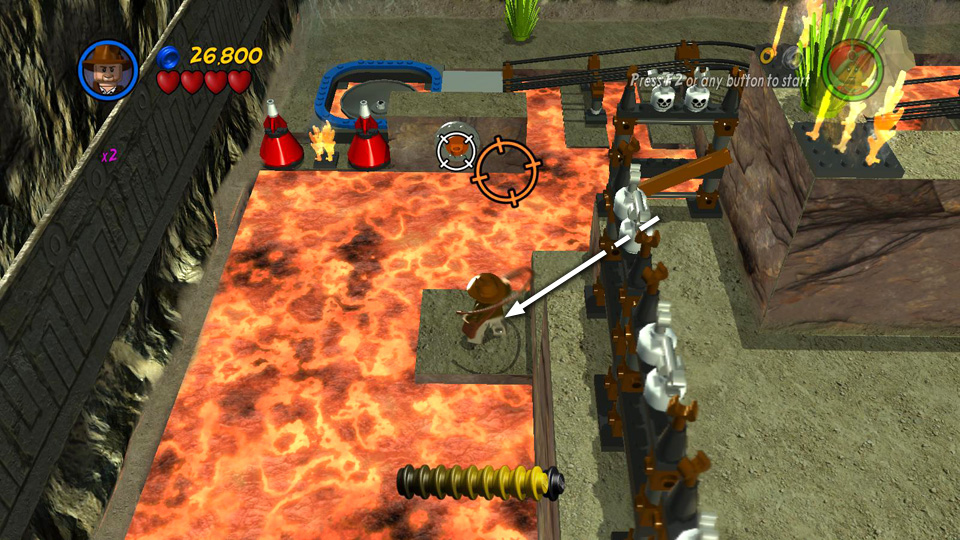 Hop down the steps and use Indy's whip to pull the orange ring in the background. |
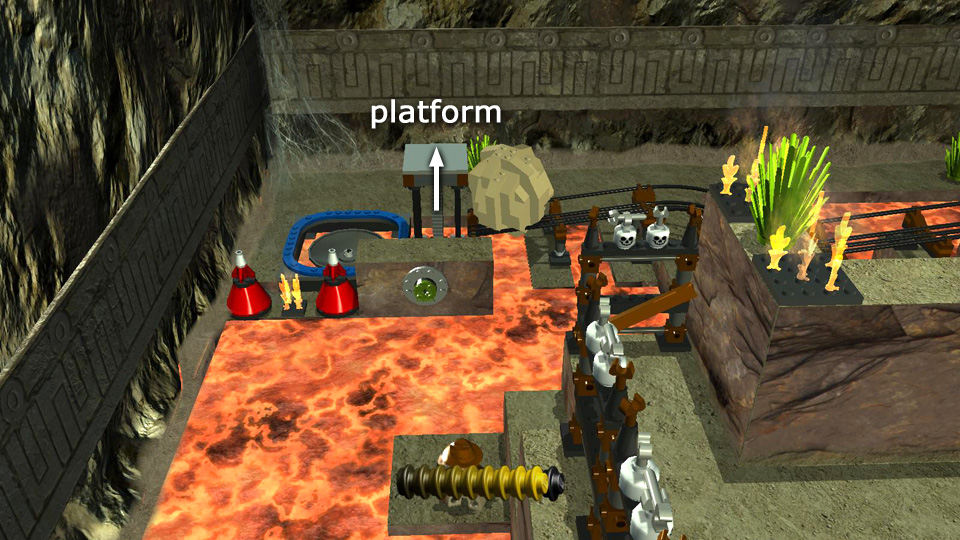 If you've been fast enough, this raises a platform that stops the boulder before it reaches the switch. |
Once you manage to stop the second boulder from reaching its switch, an L-shaped platform rises out of the lava, enabling you to reach the Artifact in the near left corner. You don't have to go after it immediately, though. If you haven't achieved "True Adventurer" yet, take a few minutes to backtrack to the left, smashing jars and plants and gathering any studs you may have missed. You can return all the way to the start if necessary. Just watch out for the traps on the way.
When you're ready to go, head back to the far left and hop across the L-shaped platform to reach the Artifact. ![]()
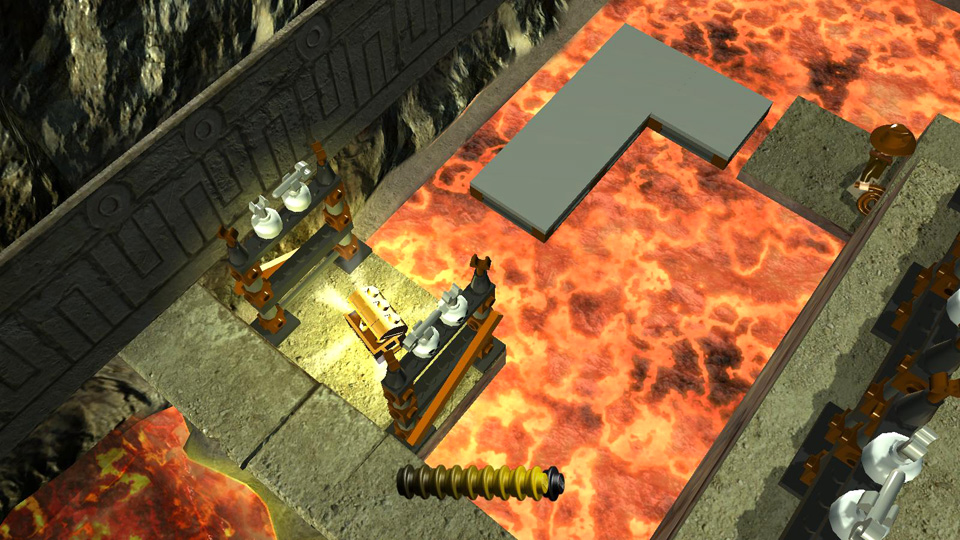 A platform then rises from the lava so you can reach the Artifact. |
 If you like, you can go back and gather studs before taking the Artifact and ending the level. |
| < < < Bonus Level 2 | Bonus Level 4 > > > |