Raiders of the Lost Ark – Story Level 3: Map Room Mystery
True Adventurer: 23,000 studs
Characters: Indiana Jones (Desert Disguise), Sallah (Desert), Marion (Evening Dress)
Unlocks: Enemy Soldier (Desert)
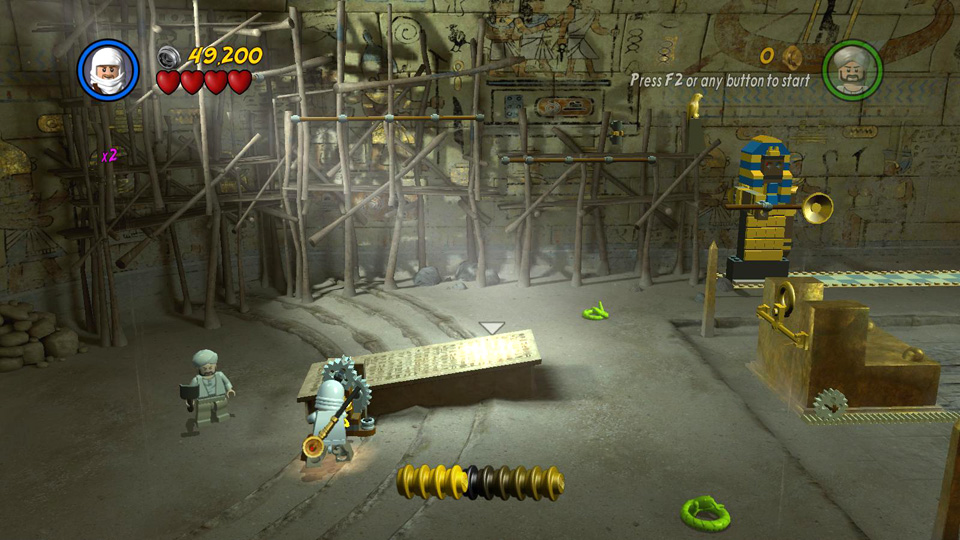
LEVEL ENTRANCE: Use Sallah to dig out the sand around the base of the LEGO sphinx head in the middle of the big island. The head then rolls down onto the slab, breaking through into the map room below. Drop through the hole to enter the level. Check out the Hub Maps and Story Level Intro for details and screenshots.
Map Room
(Click any of the screenshots below to enlarge.)
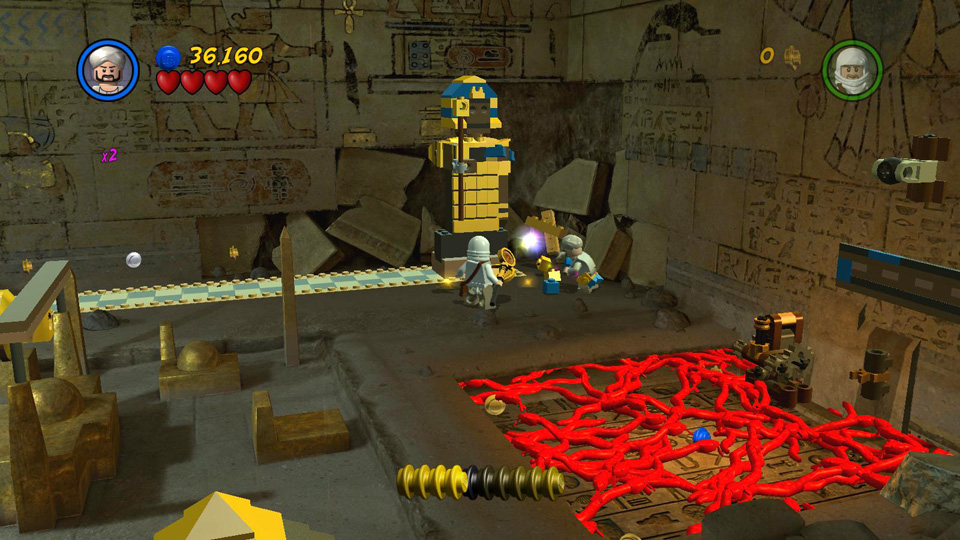
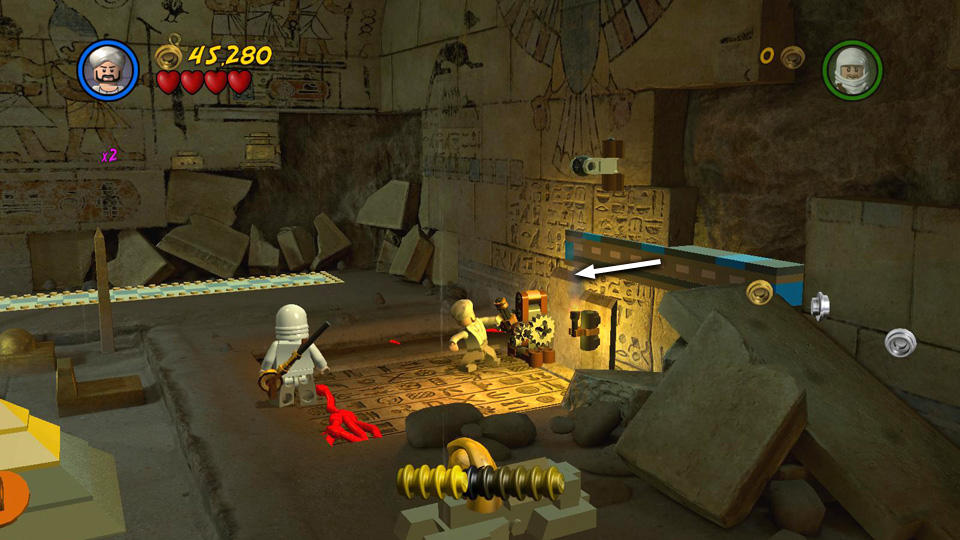
Use Sallah's shovel to smash the green snakes on the left and bottom center of the room, since Indy's ophidiophobia causes him to cringe away. (Ophidiophobia. Now there's a word you can use to impress your friends and confuse your enemies!) New snakes will drop from the ceiling to replace the ones you kill. So just watch out for them as you explore.
Smash the model buildings in the map area for studs. There's also a purple stud hidden between the model buildings and the checkerboard tiled area in the background.
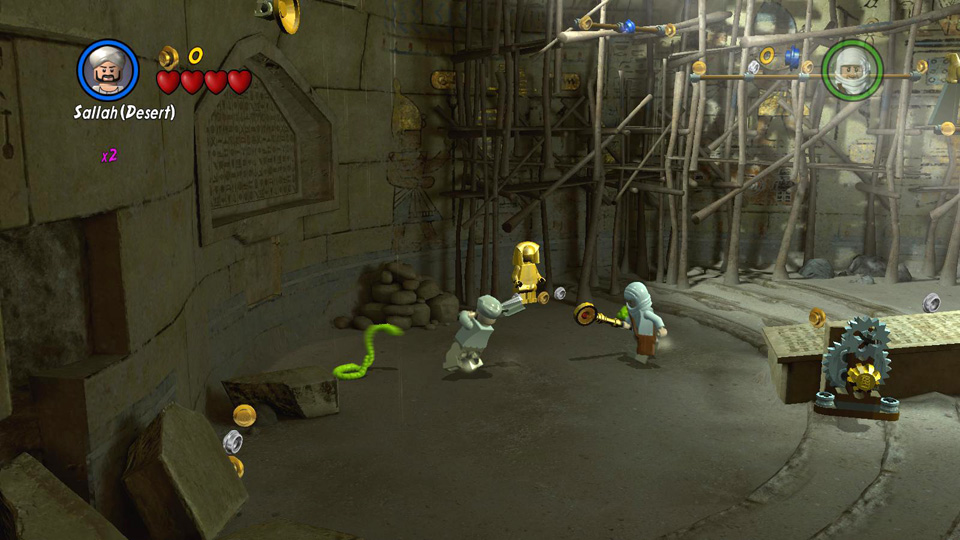 Use Sallah's shovel to hit the green snakes. |
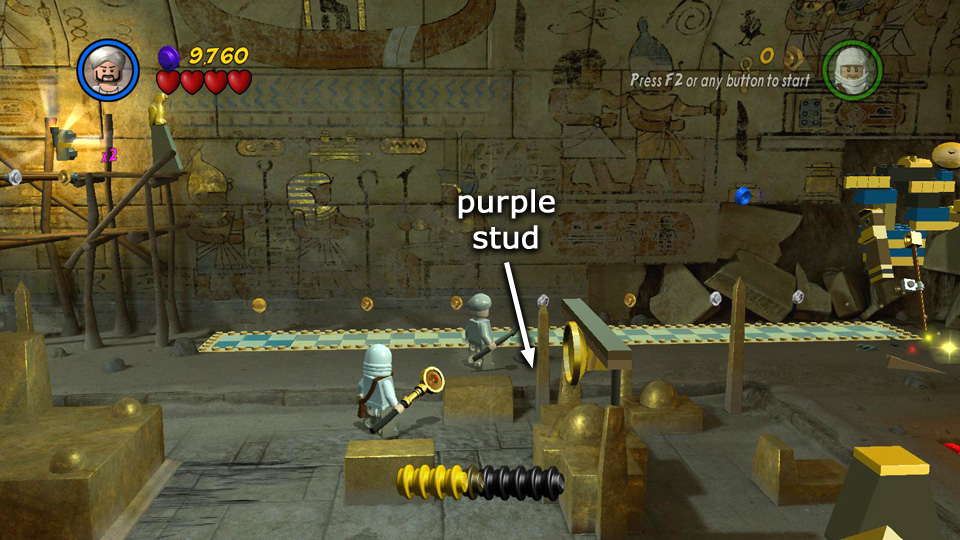 Smash the model buildings and pick up a purple stud hidden behind the buildings. |
Move to the back right corner and dig up the sparkling patch to reveal some LEGO bricks and beams. Use them to build the base for a statue. Hit the pile of debris in the corner and use the bits to build a statue on top of the base. Push the statue along the checkerboard floor all the way to the left. When the statue reaches the end of the tiles, it sinks into the floor slightly and lowers its staff.
Have Sallah jump up and grab the end of the staff. Jump to grab the handrail on the left and then climb onto the scaffolding. Hit the snake waiting there. Then grab the burning torch from the sconce on the wall. If you like, you can also take a little detour across the handrails to the left to pick up some extra studs.
 Dig up the sparkling area in the back right corner. |
 Use the bits to build a base for a statue. |
|
 Smash the pile of blue and gold bricks and use them to build a statue on top of the base. |
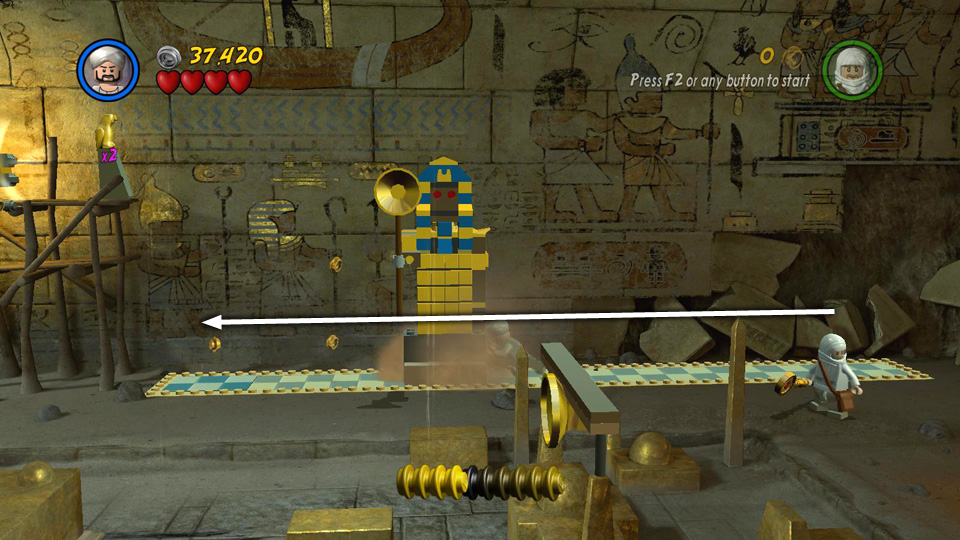 Push the statue all the way to the left. |
|
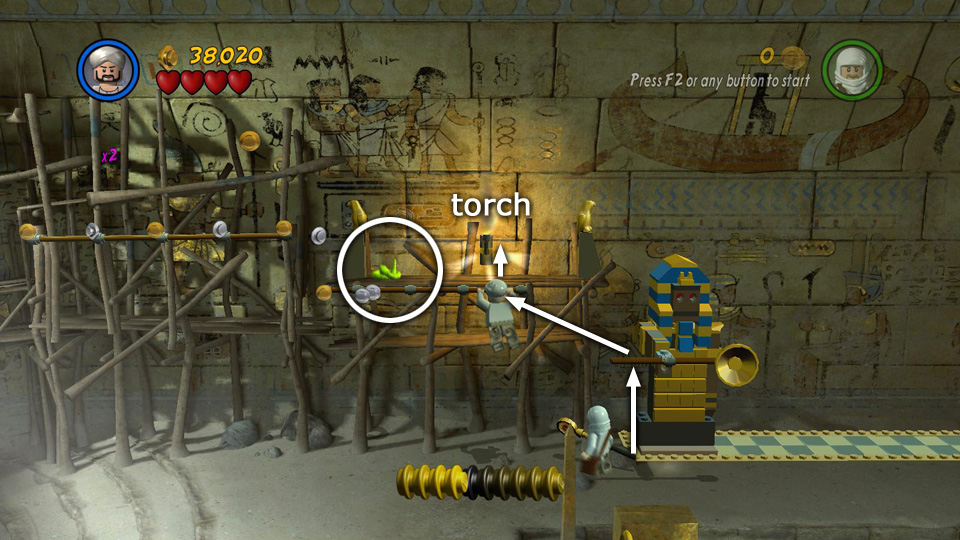 Climb up to the scaffolding, smack the snake and take the burning torch. |
||
Carry the torch to the snake pit on the right and place it in the sconce on the wall. This will keep the red snakes at bay while you pull the lever next to the sconce to extend the ledge above.
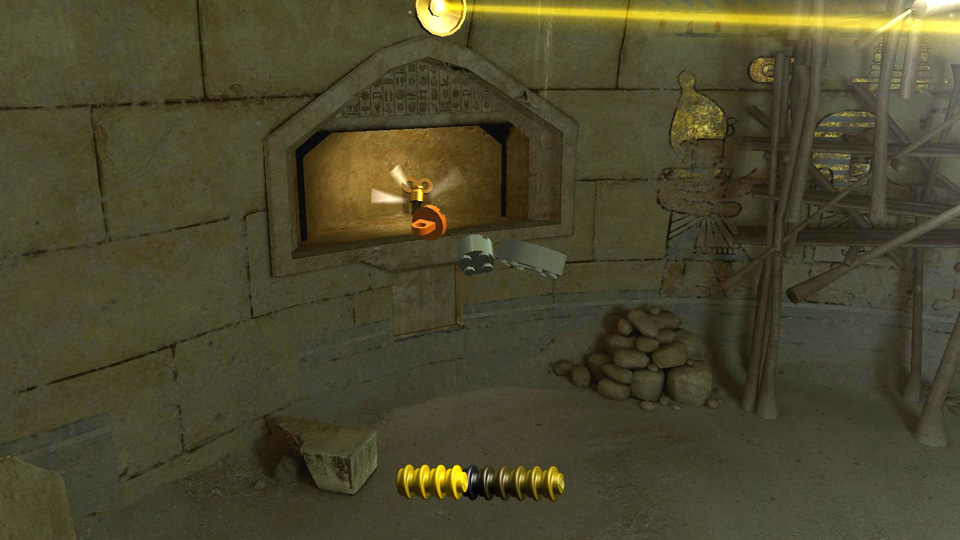
Now use Indy's whip to pull the orange ring on the small pyramid just to the left. This reveals a golden statue, which drops a mirror. Carry the mirror up the stone ramp on the right and onto the ledge you just extended. Then attach it to the bracket on the wall.
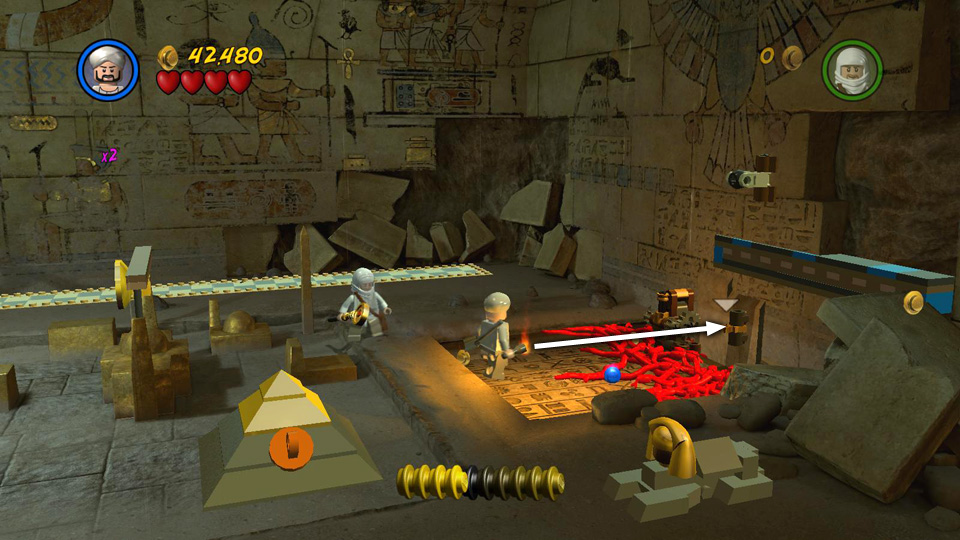 Place the lit torch in the sconce above the snake pit on the right. |
 Pull the lever to extend the ledge above. |
|
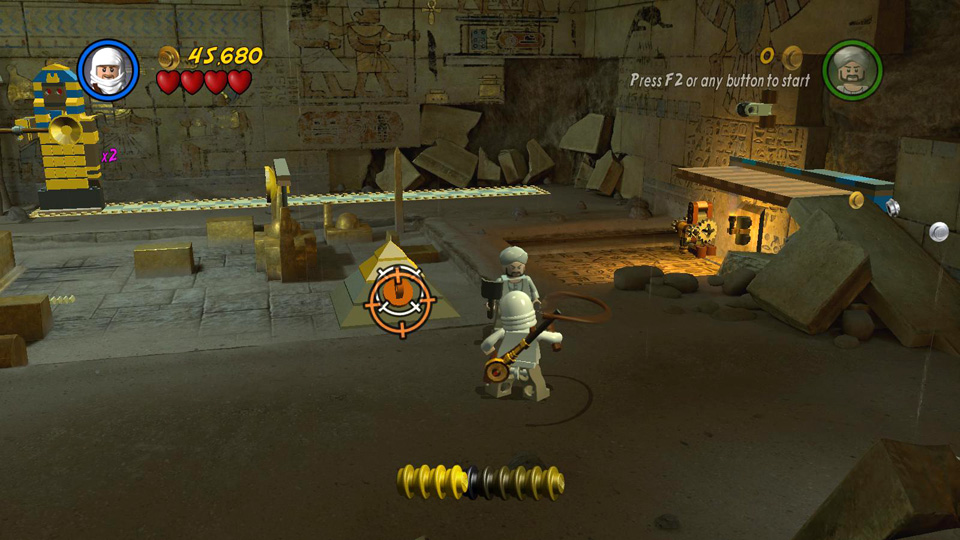 Use Indy's whip to yank the orange ring. |
 Take the mirror from the statue and attach it to the bracket above the snake pit. |
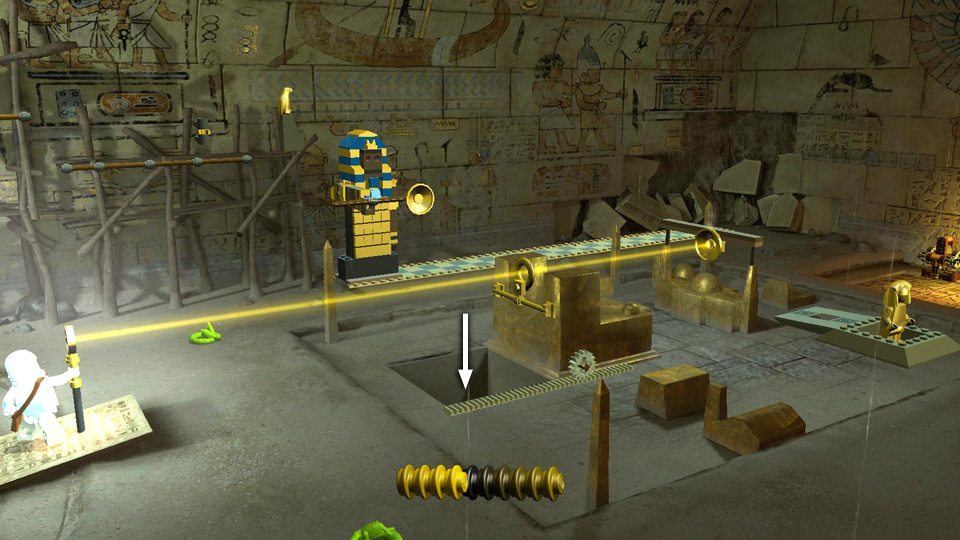
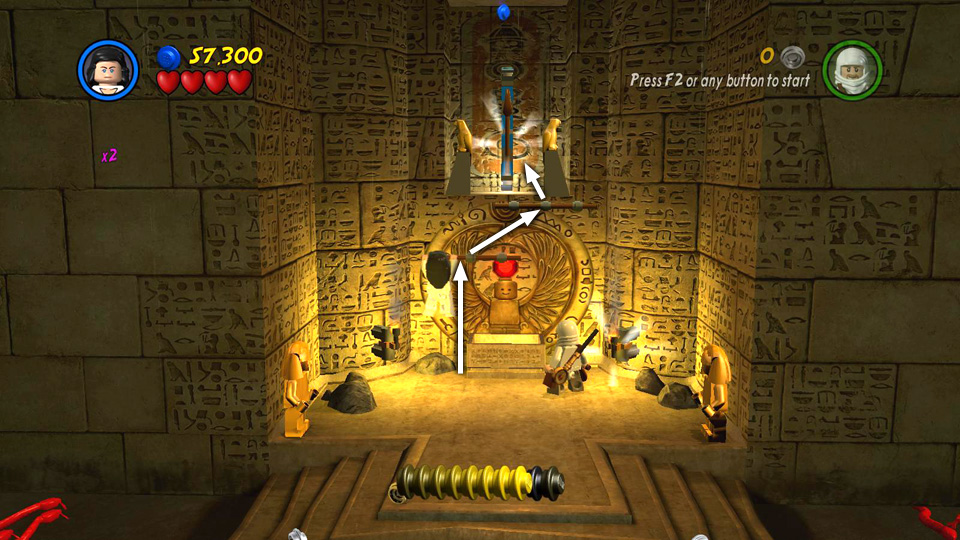
Return to the left side of the room, smacking any snakes that have respawned there. Have Indy climb up onto the angled stone tablet and press Use to plant the Staff of Ra there. Sunlight from the hole in the roof then shines through the headpiece, sending a beam of light across the room. Turn to the left just a little so the beam hits the mirror on the statue sitting on the checkerboard tiles. It then reflects onto the mirror you attached to the far wall and bounces back to a third mirror on the wall behind you, opening a secret panel and dropping a small pile of LEGO bits on the floor.
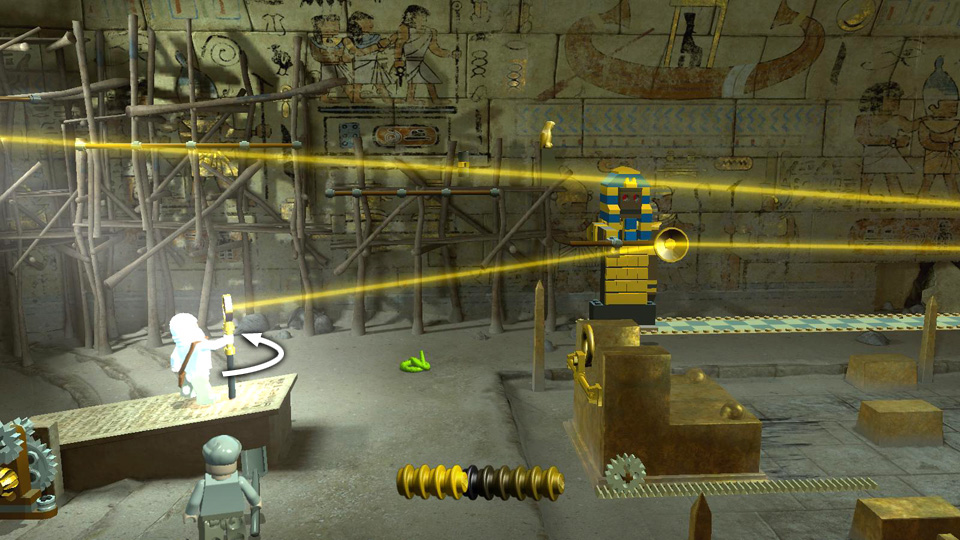 Place the Staff of Ra in the hole on top of the carved tablet. Pivot left so the beam of light hits the mirror on the statue. . . |
 . . . bounces off the mirror above the snake pit. . . |
|
 . . . and strikes the mirror behind you, opening the secret compartment there. |
||
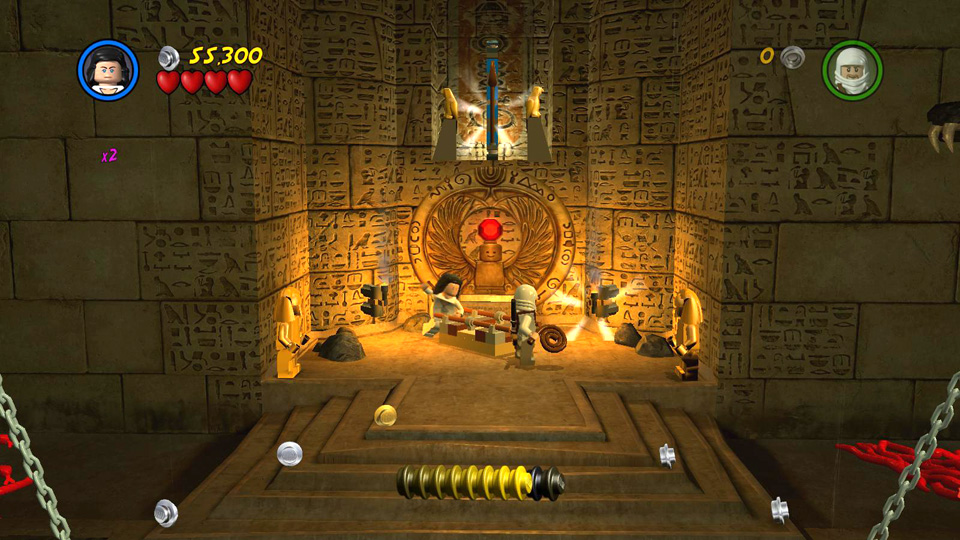
Use these bits to build an orange ring. Whip the ring to pull a stone block out of the wall, which you can then use to climb up into the secret compartment and reach the golden key.
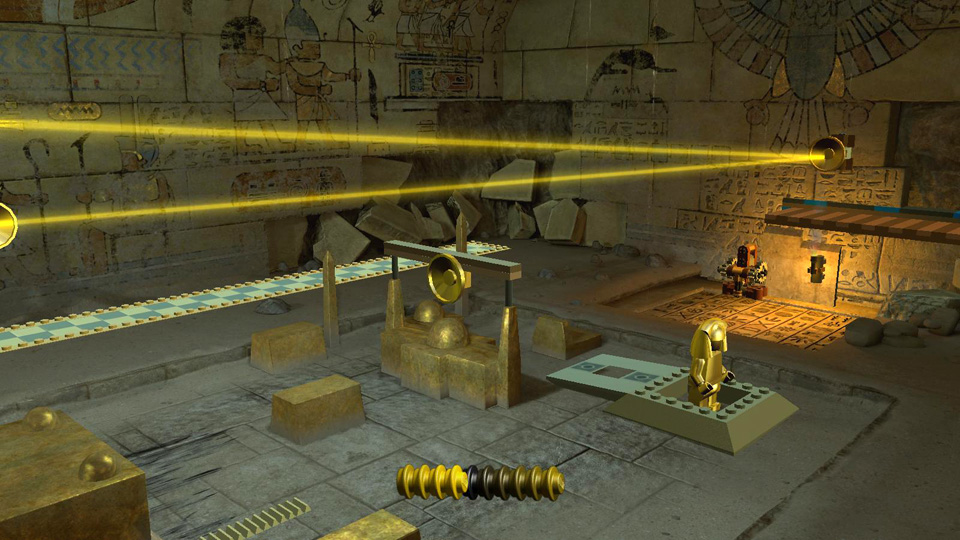
Turn the key in the mechanism to lower the stone tablet where Indy used the Staff of Ra earlier. Climb onto the tablet once more and plant the Staff once more. This time the beam of light shines onto the mirror in the middle of the map, opening a trapdoor in the floor. Drop through the hole to enter the next area.
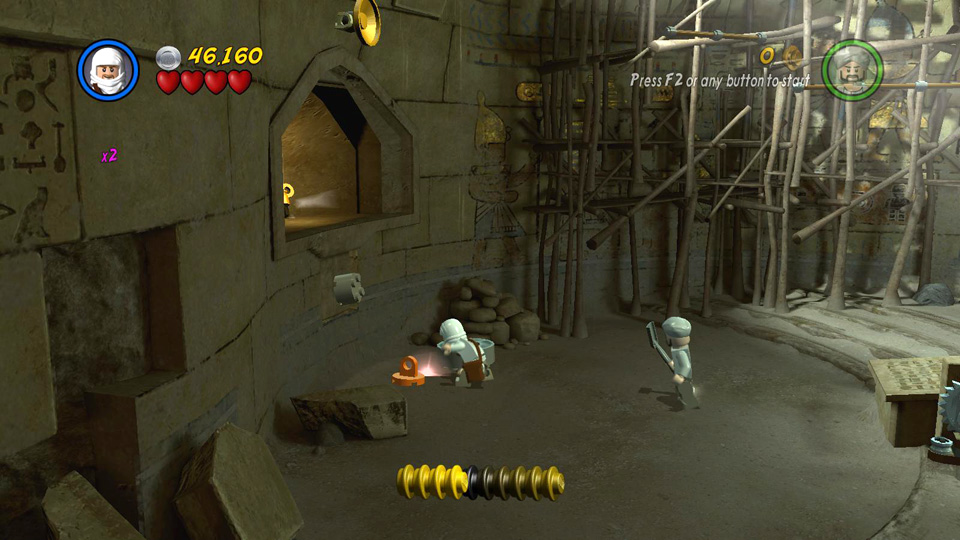 Use the bits that fall out to build an orange ring. |
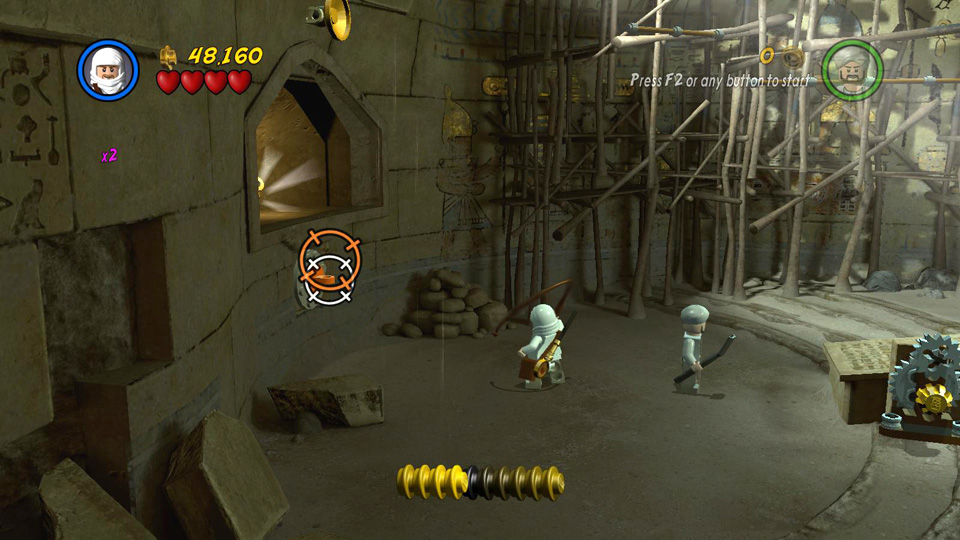 Whip the ring to pull a block out of the wall. |
|
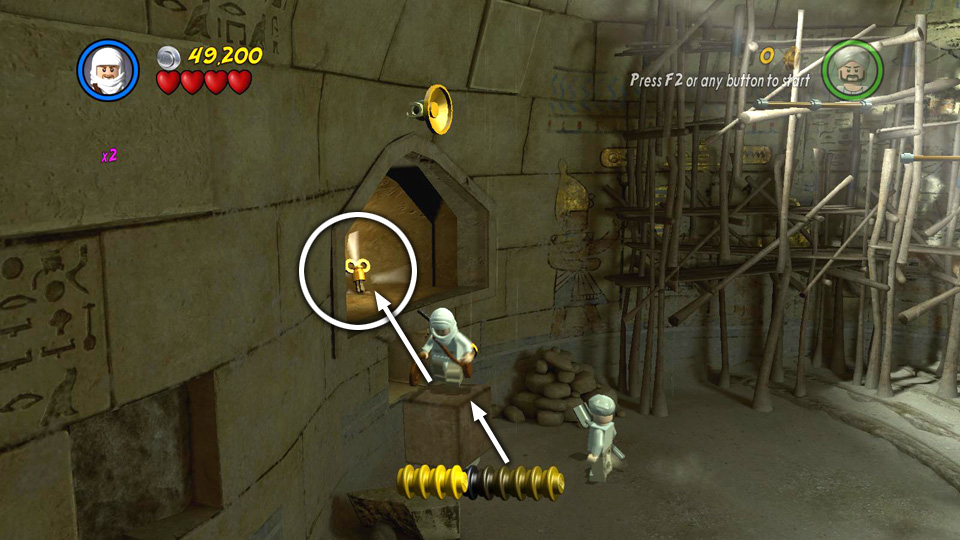 Then use the block to reach the gold key. |
 Turn the mechanism to lower the carved tablet. |
|
 This time, when you set the Staff into the tablet, a concealed trapdoor opens. Drop through. |
||
Room with Anubis Statues
(Click any of the screenshots below to enlarge.)
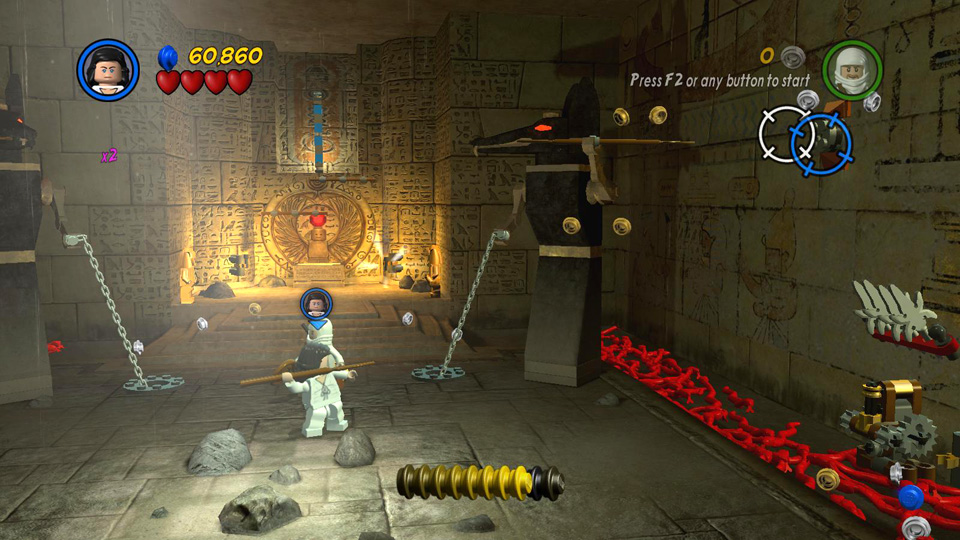
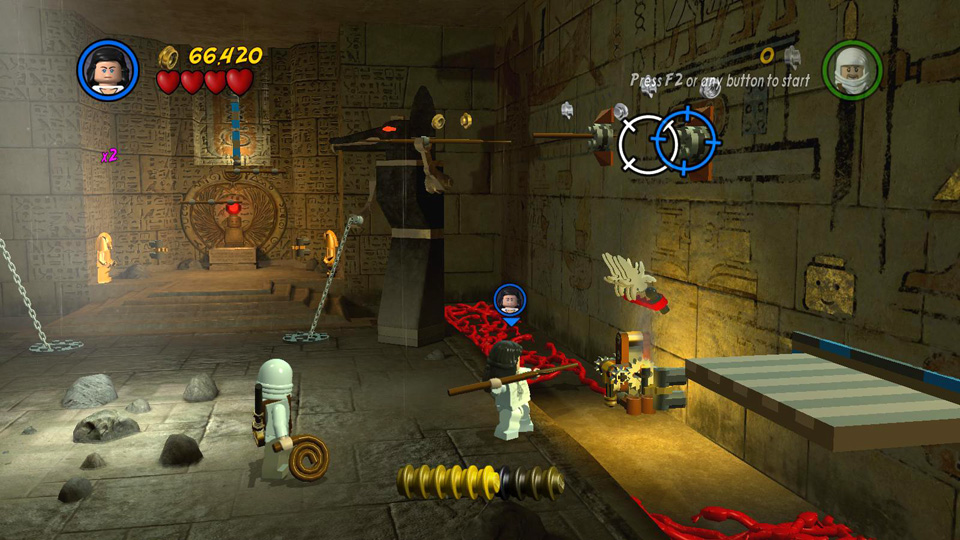
After the cut scene, you control Indy and Marion. Avoid the snake pit around the edges of the room for now. Use Marion to punch the green snakes on the floor.
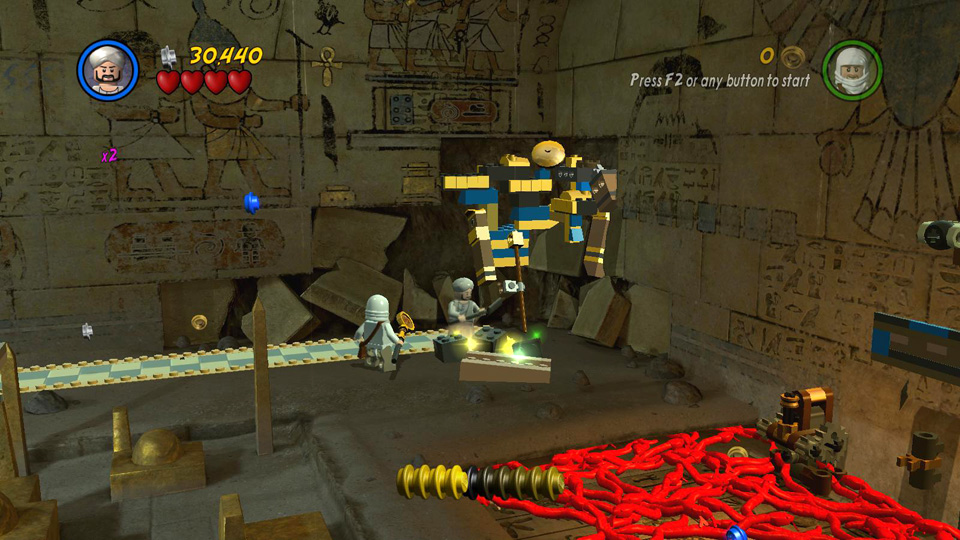
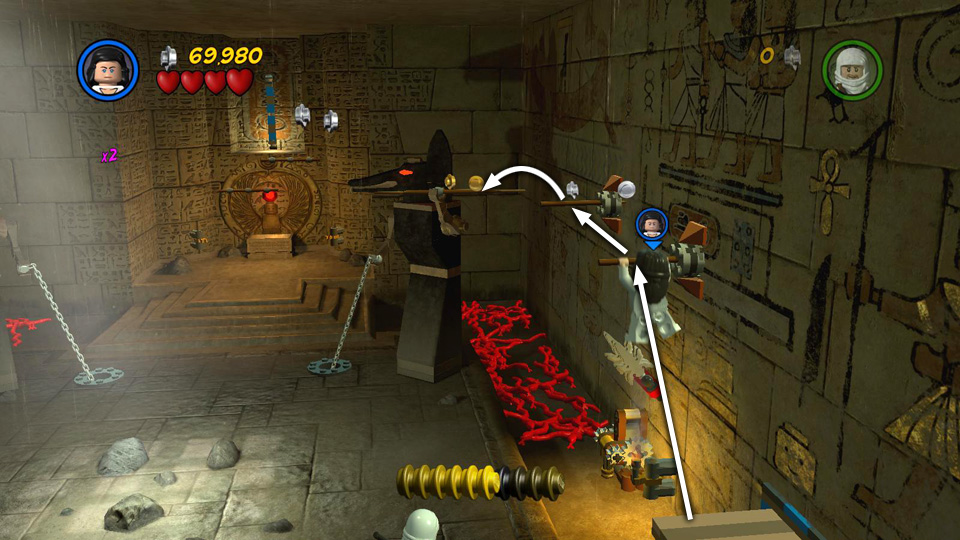
Go to the alcove at the back of the room and smash the tan object with the brown handles. Use the leftover bits to build handrails on the back wall. Climb onto the ledge above, smash the golden bird statues and take the spear from the rack. Then hop down and throw the spear into the socket on the right wall.
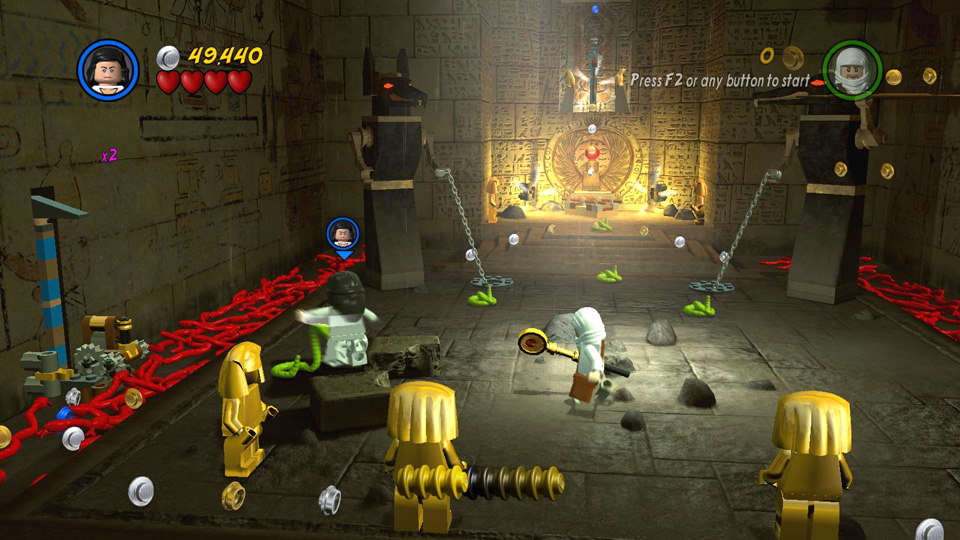 This time use Marion to smack the green snakes. |
 Smash the box in the alcove in the back. |
|
 Use the bits to build handrails so you can climb up and get the spear. |
 Throw the spear into one of the sockets on the right wall. |
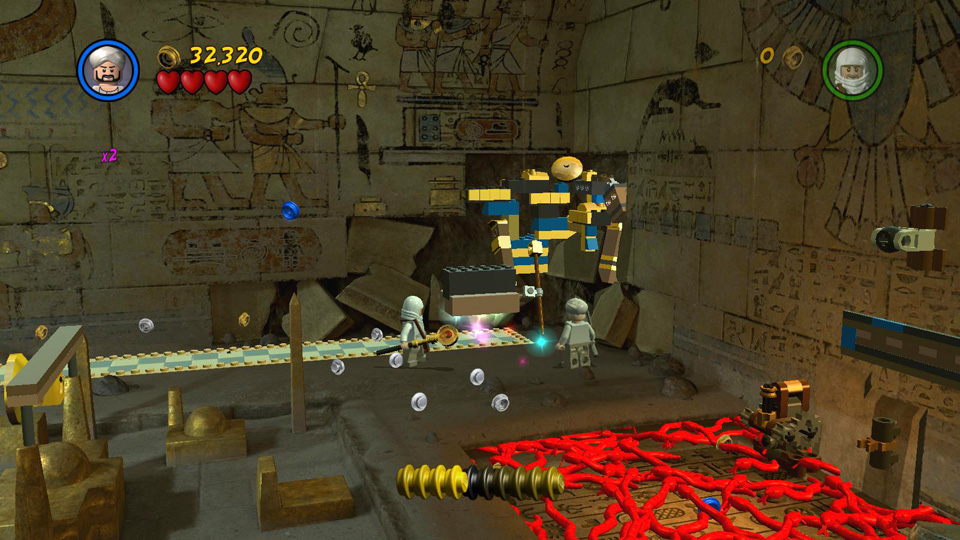
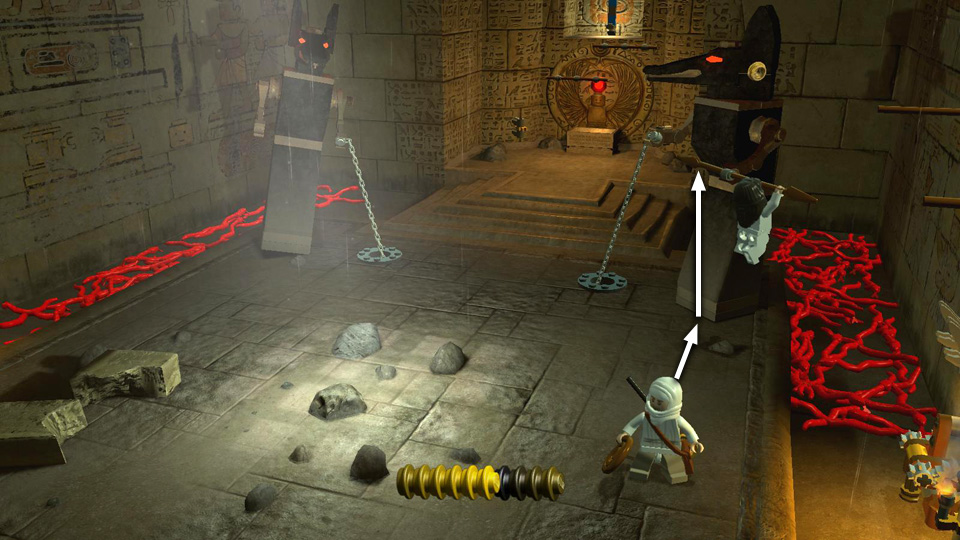
Grab one of the burning torches from the alcove at the rear and place it in the sconce on the right wall to repel the snakes while you pull the lever next to the sconce. This extends a ledge above and to the right.
Return to the alcove at the back of the room and get another torch. Place this one in the sconce on the left wall. Then pull the lever next to it to open a concealed compartment containing another spear. Take the spear and throw it into the second socket on the right wall.
Use Marion to climb onto the ledge on the right, which you extended a moment ago. (She can jump farther and higher than Indy can.) Jump from the ledge to grab the first spear, then the second, then the spear the Anubis statue is holding. As Marion hangs from the statue's spear, Indy should then jump up and grab the other end of that same spear. (If you're playing solo, just wait a moment and Indy will do this automatically.) Both characters' combined weight hanging from the spear pulls the chain connecting the 2 statues, sending the one on the left crashing through the wall. Go through the opening the statue just made to finish the level. ![]()
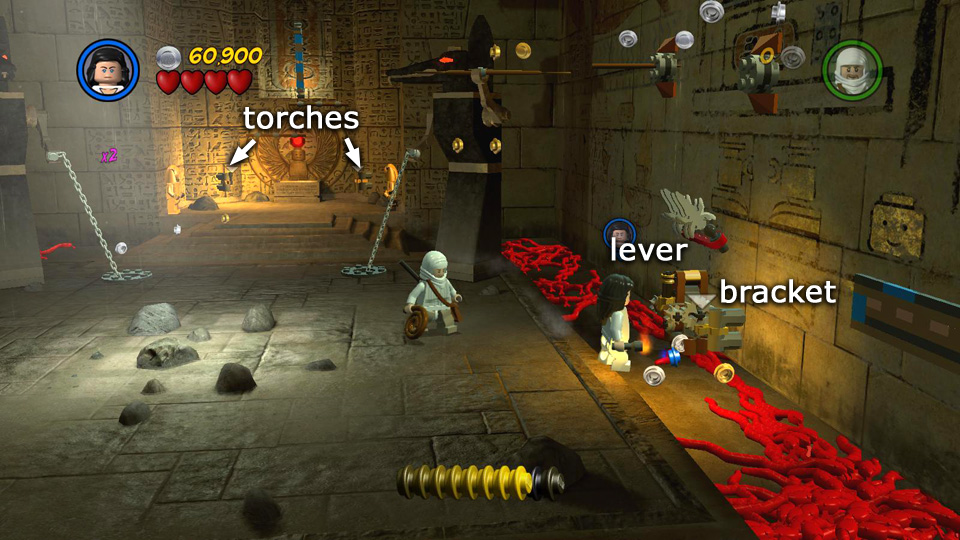 Get a torch from the rear alcove. Place it in the bracket on the right to repel the snakes as you pull the lever to extend the nearby ledge. |
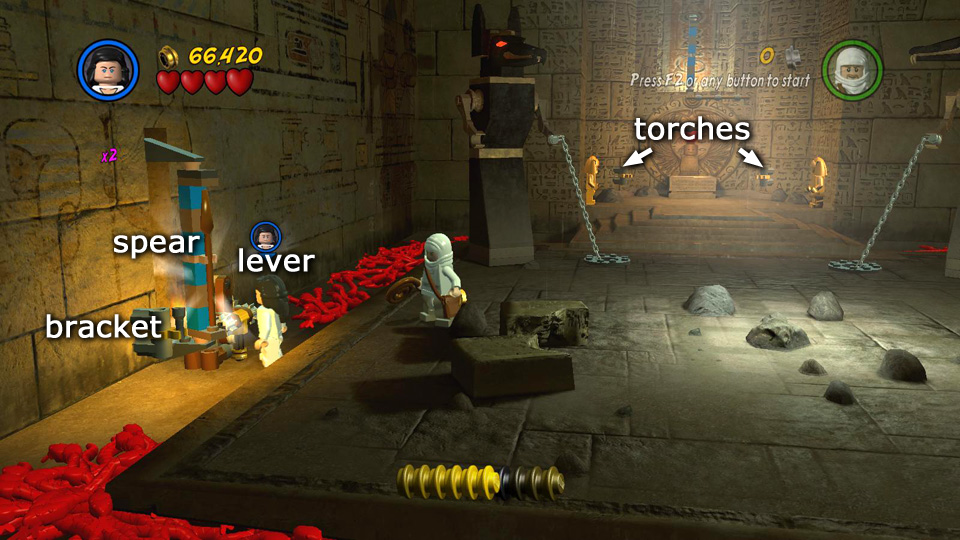 Place a second torch in the bracket on the left. Pull the lever there to get another spear. |
|
 Throw the spear into the second socket on the right. |
 Use the ledge and spears to jump across to the spear the statue is holding. |
|
 While one character hangs on the spear, the other should jump up next to them to pull the spear down further. |
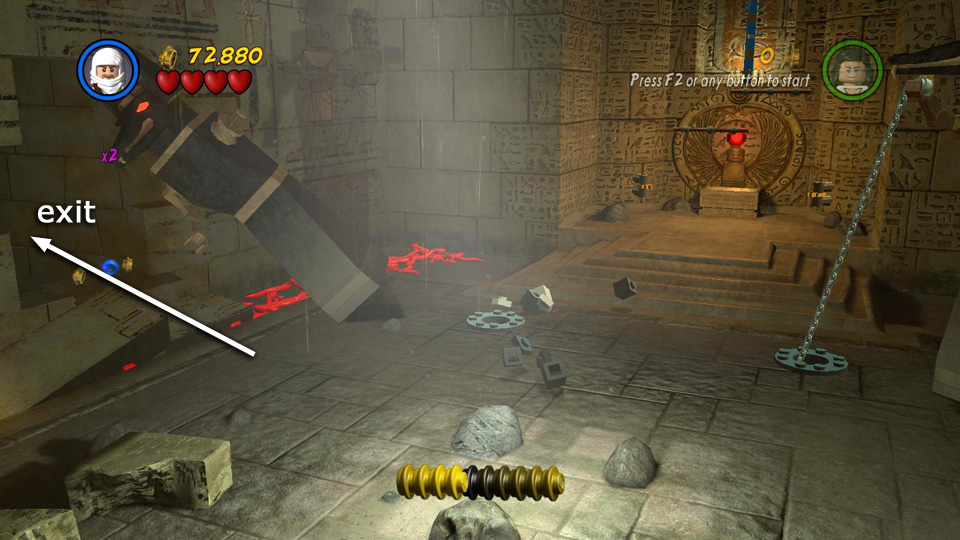 This topples the other statue, making a hole in the wall where you can exit. |
| < < < Story Level 2 | Return to the Hub | Story Level 4 > > > |