Borrow LEGO - Fast, free delivery - 300+ playsets to choose from - Pley.com

LEGO Indiana Jones: The Original Adventures - Artifacts

Printable
Version
Print

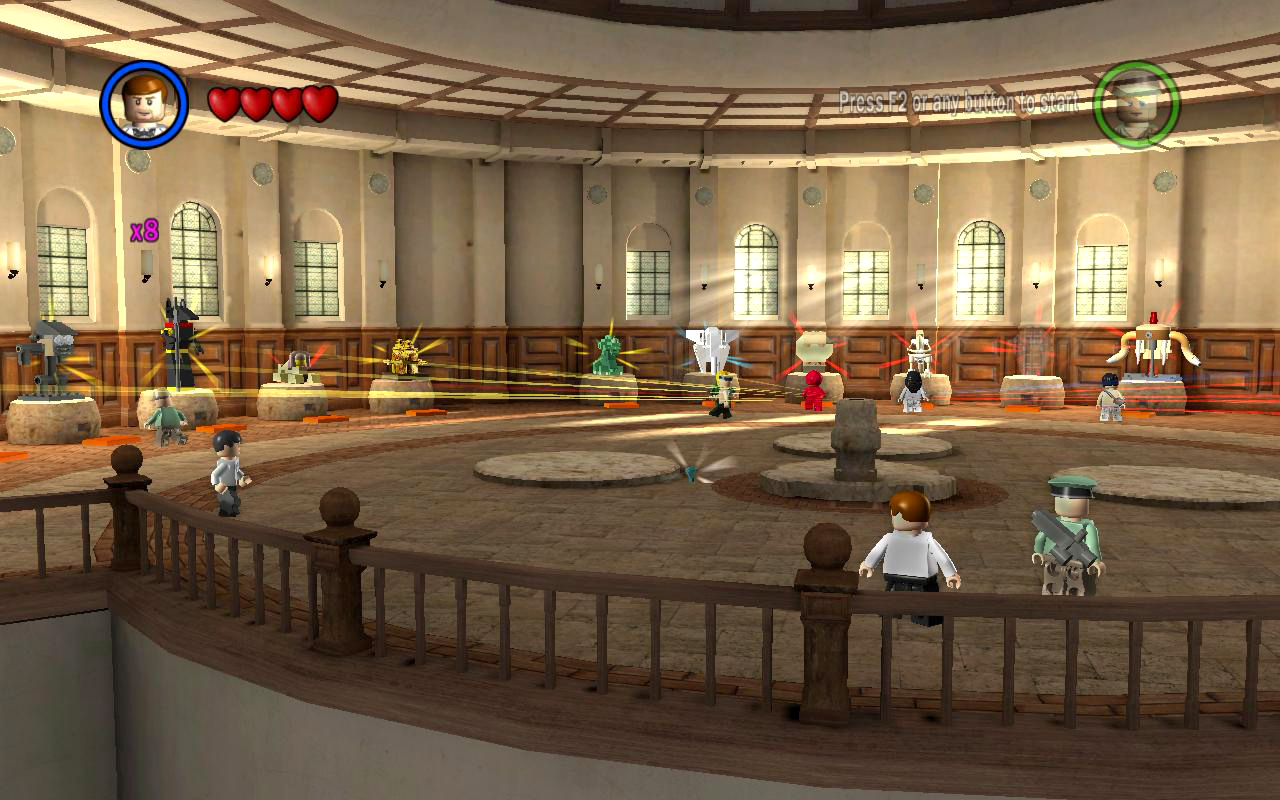
The Artifact Room in Barnett College

Each of the game's 18 main levels contains 10 artifact pieces, which look like golden treasure chests. Some of these are sitting out in the open; some are cleverly hidden. Some can only be obtained in Free Play mode. So, in order to collect all 10, you'll need to replay each level at least once, using characters with the necessary Special Abilities.

When redoing a level in Free Play, once you've found all the artifacts (and the Parcel) you don't have to finish the level. Just go to the Pause Menu, select 'Barnett College', then choose 'Save and Exit'. This only applies to Free Play, though. In Story Mode you must complete the level to get credit for the items you found.

NOTE: If you are replaying a level any treasure chests you've already found during previous play-throughs will be replaced by blue studs (worth 1,000).

All of the artifacts—both partial and complete—that you've collected so far are on display in the Artifact Room at Barnett College. The level selection screens (at the Bulletin Boards in the college) also show how many artifact pieces you've found in each level.

Collecting all the artifacts contributes to 100% completion. It also unlocks bonus levels. Completing all six artifacts in the Raiders of the Lost Ark storyline unlocks the Young Indy level. Similarly, completing the six Temple of Doom artifacts unlocks the Lost City level, and the six Last Crusade treasure chests unlock the Warehouse. (For more info on accessing these, see the Bonus Levels page.)

Artifact Locations
Printable
Version
Print

The following tables list treasure chest locations for each level. Bold type indicates special abilities required in Free Play. For details, including screenshots, see the individual level walkthroughs.

Raiders Level 1: The Lost Temple - Hovitos Idol
Chest Area Location/Info - walkthrough
#1 1 Near the start behind a tree.
#2 1 On ledge below stone door that opens with two buttons. Must dig up 3 golden heads to reveal. (First is near the level start; second is behind one of the stud-shooting head traps; third on a ledge to the left of where the treasure appears.)
#3 2 Behind rocks and trees to the left of the stone door with the spear traps.
#4 2 In cave behind waterfall.
#5 3 Behind stone pillar to the right of where you build the ladder.
#6 4 In side room to the right. Need explosives to break silver bars.
#7 5 On lower level of area with falling heads. Need Thuggee to activate statue and retract spikes, academic ability to solve hieroglyph puzzle.
#8 6 At end of tunnel with rolling boulder. Must get through without being flattened by the boulder.
#9 7 In mouth of giant skull. Shoot both eyes with enemy spear or crossbow to open mouth.
#10 7 In woods on far left side of area opposite airplane.
Raiders Level 2: Into the Mountains - Nepalese Altar
Chest Area Location/Info - walkthrough
#1 1 Inside the fireplace. Pull dangling ropes to access.
#2 1 Behind the bar. Need female character to reach lever on ledge above.
#3 2 Need character with excavation ability to dig up parts for snowmobile. Ride through barriers to make treasure chest appear.
#4 2 In building next to Marion's tavern. Need explosives to break bars over door.
#5 2 Beyond chasm with bridge. Must build 3 LEGO snowmen in this area to reveal. (First is near Marion's tavern; second is near small cave with metal bars and dynamite; third is near ledge with checkerboard floor.)
#6 3 On high ledge above crawlspace. Need small-sized character to reach.
#7 3 Near bottom of deep pit with handrails. Need female character to reach and glass-breaking ability or explosives to break ice surrounding chest.
#8 4 Near area exit. Need academic ability to solve glyph puzzle.
#9 5 In golden brazier. Light with torch from previous area to make treasure chest appear.
#10 5 In courtyard behind gates.
Raiders Level 3: City of Danger - Monkey Statue
Chest Area Location/Info - walkthrough
#1 2 In alcove behind shelf with golden key.
#2 2 In room next to monkey. Need glass-breaking ability or explosives to break window.
#3 2 Behind closed door near area exit. Need enemy disguise to enter.
#4 3 In water tank. Need small-sized character to reach.
#5 3 Behind barred door. Need explosives to blow up bars.
#6 3 In guarded room. Need enemy disguise to enter.
#7 4 Behind the wall on the high ledge to the right of the monkey.
#8 5 On the ledge protruding from the wall below the rooftop garden.
#9 5 On rooftop to the right. Use explosives to destroy fan. Then rebuild and ride updraft onto roof.
#10 6 On high ledge. Need explosives and small size to access.
Raiders Level 4: Well of Souls - Anubis Statue
Chest Area Location/Info - walkthrough
#1 1 Behind pillar on left side of snake pit.
#2 2 Behind closed door on right. Small size and explosives needed to get box in area on left, which is then used to open the door to the room on the right.
#3 2 Same area as artifact piece #2, above.
#4 3 Behind brick walls on left.
#5 3 On left side of stairs. Use explosives to blow up silver statue.
#6 6 On hidden ledge near bottom of dangling vine.
#7 6 In side area. Smash urns to reveal hidden passage. Use Marion to jump across rotating columns to far right side of cavern.
#8 7 Appears in mid-air after closing chutes. Need movable block on checkerboard floor to reach.
#9 8 In secret room at end of hall with coffins. Need academic ability to solve puzzle.
#10 9 On high ledge on left. Defeat giant serpent. Then climb up to treasure chest before exiting.
Raiders Level 5: Pursuing the Ark - Sphinx
Chest Area Location/Info - walkthrough
#1 1 On high ledge on right. Need small-sized character to reach.
#2 1 In fenced-off area in far left corner. Need explosives and academic ability.
#3 1 In barred alcove on far wall. Jump from train car to top of alcove and dig down. (Shovel is available in Story Mode.)
#4 2 Behind silver fuel tank. Can use explosives to destroy the tank, crash into it with the Jeep available in the level, or trick enemy officer into blowing it up with a grenade.
#5 3 In tower on right. Repair car and drive it onto the orange pad to lower the platform below the chest.
#6 3 In side area beyond rear gate. Use car to break down gate. Build raft and paddle around pond to reveal chest.
#7 3 In tall tower at far left. Use explosives to destroy cooking grills. Build ladder to reach top of tower. Then blow up cage on top.
#8 4 Use excavation ability (or shovel from previous area) to dig up 3 blue boxes. Build gramophone to get treasure chest.
#9 4 Use firearm to shoot targets in hut on right.
#10 5 Third group of trucks in convoy includes a small pick-up truck carrying the treasure chest.
Raiders Level 6: Opening the Ark - Ark of the Covenant
Chest Area Location/Info - walkthrough
#1 1 On top of submarine. Use explosives to blow up hatches on right. Stand on buttons to reveal chest.
#2 1 In side room on far right. Use enemy disguise to enter. (Indy has this in Story Mode.) Build boat to reach chest.
#3 1 In underwater alcove on far right.
#4 1 On high ledge on far left. Use small-sized character to reach.
#5 2 In secret room on far right. Need enemy disguise to enter, which Indy has in Story Mode. Smash birthday cake to get chest.
#6 2 Buried in horse paddock. Need excavation ability.
#7 2 Behind door to left of glyph puzzle. Use buttons on garage roof to open door.
#8 3 Use available shovel to dig up bits for movie camera. Build camera and push forward to get treasure chest.
#9 3 Buried in cave at back of canyon. Use available shovel to excavate.
#10 3 In small cave at back right. Need academic ability to solve glyph puzzle.

[Jump to Top of Page]


Temple of Doom Level 1: Shanghai Showdown - Jade Dragon
Chest Area Location/Info - walkthrough
#1 1 Floating in the air on the left. Roll the bass drum to the right and jump off it to reach the treasure chest.
#2 1 Step on buttons on stage to get sword. Cut down gong and use it to smash 3 metal tables to reveal chest.
#3 2 On ledge reached via crawlspace. Smash tubs and build a door. Treasure chest is inside.
#4 2 High above the area exit. Use ledge on left and bouncy awnings to reach.
#5 2 On ledge at right end of street. Need academic ability, explosives and small size to reach.
#6 2 On awning at far left. Need Thuggee to activate statue on left ledge. Grab balloon and float to chest.
#7 2 Behind door at left end of street. Use explosives to blow up bars. Use excavation ability to dig up flower bed. Place block on button to get chest.
#8 3 Hovering above high ledge on right. Send Short Round through crawlspace to reach it.
#9 3 On shelf in middle of hangar. Use forklift to reach.
#10 3 In side room on left. Need explosives to open door and enemy disguise to obtain treasure chest.
Temple of Doom Level 2: Pankot Secrets - Ivory Elephant
Chest Area Location/Info - walkthrough
#1 1 Hidden in the bushes near the starting area.
#2 1 Get shovel near start. Follow the river to the left and dig up the treasure chest.
#3 1 Whip swing across the pit beyond the second gate. Dig up the treasure chest.
#4 2 In palace hallway. Smash potted plant near Kali statue to get treasure chest.
#5 2 In purple wardrobe in first bedroom.
#6 2 Above high ledge with whip platform in second bedroom.
#7 3 In alcove on right side of lava pit with dangling vine.
#8 3 Just inside large cavern on left. Use Willie to reach.
#9 3 Just beyond spider pit. Use whip to open alcove. Smash skeleton to get treasure chest.
#10 3 Inside breakable jars on stairs leading down to final room.
Temple of Doom Level 3: The Temple of Kali - Jewel Eyed Skull
Chest Area Location/Info - walkthrough
#1 1 On high ledge near start. Need female character to reach.
#2 1 Behind bars on far left. Need Thuggee disguise (or Thuggee character in Free play) to open bars.
#3 1 On ledge below collapsed wooden bridge.
#4 1 Behind bars near dangling ropes and first rotating column. Use explosives to destroy bars.
#5 1 On top of first rotating column.
#6 1 Must dig up 3 LEGO skulls to reveal. The first is near the level start; second is on ledge below start; third is near the area exit.
#7 2 Use repair ability to fix machine on far left and extend ledge with chest.
#8 2 In alcove on left wall. When ledge above collapses, chest is revealed.
#9 2 On high ledge on left. Use explosives to destroy bars. Pull lever to extend ledges. Use female character to climb up.
#10 2 On large Kali statue's head.
Temple of Doom Level 4: Free the Slaves - Dinosaur Fossil
Chest Area Location/Info - walkthrough
#1 1 On high ledge beyond first lava pool. Use small-sized character to get through crawlspace.
#2 1 Just before end of cart tracks on right. Use Thuggee power to activate statue and open vent. Ride air current up to treasure.
#3 1 In room with first trapped slave child. Use Indy's whip to help you reach it.
#4 2 On ledge below wooden platforms used to cross lava pool.
#5 2 In last room in this area. Fix elevator to reach it. (Repair ability not required.)
#6 3 Near slave cage on left. Need Thuggee character to access.
#7 3 On high ledge in back wall. Need small-sized character to fit through crawlspace.
#8 3 Smash containers in slave cage. Use cog to repair machine on right to obtain the treasure chest. (Wrench is available nearby.)
#9 4 Use excavation ability (or shovel from previous area) to dig up 3 LEGO skulls. The first is near the entrance, second is on the right where the tracks curve, third is on the ledge in the foreground.
#10 4 On high ledge on left. Send Short Round through crawlspace. Then climb handrails to reach.
Temple of Doom Level 5: Escape the Mines - Pankot Diamond
Chest Area Location/Info - walkthrough
#1 1 On ledge below front right edge of floor.
#2 1 On high ledge on right. Use Willie to reach it.
#3 1 In raised tunnel on back wall. Again, use Willie to reach it.
#4 1 On ledge at far left. Need small-sized character and Thuggee to obtain.
#5 2 Sitting on right side of mine cart tracks just before the end of the loop.
#6 2 Use shovels to hit 3 brown-and-gold hoppers above the carts.
#7 2 Knock 3 enemy mine carts off the rails to obtain.
#8 3 On the left side of the tracks, just beyond where the exit tunnel splits off from the main loop.
#9 3 Use shovels to hit 3 brown-and-gold hoppers above the carts.
#10 3 Knock 3 enemy mine carts off the rails to obtain.
Temple of Doom Level 6: Battle on the Bridge - Ceremonial Headdress
Chest Area Location/Info - walkthrough
#1 1 Behind bars at start. Need explosives to access.
#2 1 Near tunnel opening. Must avoid obstacles and make it through tunnel without being washed away.
#3 2 On right side of cliff, just below where Indy starts.
#4 2 In alcove behind bars. Need small size and excavation ability to obtain.
#5 3 On high ledge to right of start. Use academic to solve puzzle and raise ledges below chest.
#6 3 In second-to-last pit dug in road.
#7 3 Behind boulder to left of cliff with Kali statues.
#8 3 Dig up vase behind trees near previous artifact piece. (Shovel is available on far right.) Place vase on button to obtain chest.
#9 4 On one of the narrow pillars in the foreground.
#10 4 On right side of canyon just before large gate. Run over flowers to make them grow in a smiley face pattern and reveal treasure chest.

[Jump to Top of Page]


Last Crusade Level 1: The Hunt for Sir Richard - Crusader Shield
Chest Area Location/Info - walkthrough
#1 1 Behind second-floor window. Need female character to reach and glass-breaking ability or explosives to shatter window.
#2 1 In covered walkway above canal. Smash ice cream stand in alcove behind café tables and build crawlspace. Use small-sized character to get through.
#3 1 Use glass-breaking ability or explosives to shatter window on far right. Drive motor scooter over traffic cones to make treasure chest appear.
#4 2 Behind bars on upper left. Need waponas available in level to obtain.
#5 2 In secret room on upper right. Need enemy disguise and explosives to obtain.
#6 3 Behind bars to left of start. Must find and smash 5 skeletons to open bars. Thuggee character needed to access one of the skeletons.
#7 3 Behind bars in room with large pool. Small-sized character and female needed to access. Excavation also required, but a shovel is available.
#8 3 High above right corner ledge in room with checkerboard floor. Use Elsa to reach it.
#9 4 Appears on small island after you smash the 10 red buoys with the speedboat.
#10 4 Inside tower on far right. Repair ability and explosives needed. Female character useful but not required.
Last Crusade Level 2: Castle Rescue - Suit of Armour
Chest Area Location/Info - walkthrough
#1 1 Above high corner ledge. Use Elsa to reach it.
#2 1 Use explosives to destroy the 4 suits of armor with red shields. Thuggee character needed to open side room where one of the suits of armor is found.
#3 1 On high balcony in same side room where previous artifact piece is found. Need Thuggee and small-sized characters to obtain.
#4 2 Use explosives to destroy the silver box on the ledge with the crane. (Can be done in Story or Free Play.)
#5 3 Use Henry Jones Sr. to solve the glyph puzzle and reveal the treasure chest.
#6 3 Atop bookcase on far left. Need small-sized character to reach.
#7 5 In area behind locked gate on upper level left. Need enemy disguise and explosives, both of which are available in Story Mode.
#8 5 Atop scaffolding on upper level left. Need explosives, which are available in Story Mode.
#9 5 On upper level right, push gargoyle off ledge with checkerboard tiles to obtain treasure chest.
#10 6 Behind hieroglyph puzzle. Need explosives and academic ability, both of which are available in Story Mode.
Last Crusade Level 3: Motorcycle Escape - Gilt Frame Portrait
Chest Area Location/Info - walkthrough
#1 1 In far left corner room. Need explosives to destroy bars in order to enter.
#2 1 In corner area to right. Need explosives to obtain motorboat and female character to reach treasure.
#3 2 Must smash or run over 3 special plants, which bloom white when destroyed.
#4 2 In small bunker with silver bars. Use explosives to access.
#5 2 Inside wooden barn.
#6 3 Between barn and high, stone wall near area entrance.
#7 3 Down the well in the middle of the farmyard. Turn the key to raise the bucket containing the treasure chest.
#8 3 Use repair ability to fix tractor inside barn. Drive over 3 vegetable patches to get the chest.
#9 4 Inside the gun emplacement on the right. Destroy the turret with explosives (available in Story Mode) to open the door.
#10 4 Blow up the manhole covers and plant the green seeds to get the treasure chest.
Last Crusade Level 4: Trouble in the Sky - Eagle Statue
Chest Area Location/Info - walkthrough
#1 1 In glass case on right. Need female character and explosives to obtain (or Willie, who can high-jump and break glass).
#2 2 Inside house with clock. Use explosives to blow up silver cart and obtain key. Use key to set clock at 12:45. Door opens revealing treasure chest.
#3 2 In shed near water tower. Pull rope on tower to get door handle for shed.
#4 3 On high ledge near start. Smash rocks to reveal crawlspace. Use small-sized character to reach chest.
#5 3 In shed between barn and farmhouse. Push small cart to right to fill with grain. Push back to left and use to reach upper level of barn. Pull lever to open shed.
#6 3 Follow path uphill to left. Use Jones Sr. to solve puzzle and climb to treasure chest.
#7 4 Hovering near upper right cliff face. Climb handrails to reach it.
#8 4 Hidden behind boulder near right end of beach.
#9 4 Dig up 3 plastic sand castles using available shovel. First castle is at right end of beach; second near shed where you find the shovel; third is at left end of beach near shipwreck.
#10 4 On top of cliff above small cove at far left.
Last Crusade Level 5: Desert Ambush - Ancient Amphora
Chest Area Location/Info - walkthrough
#1 1 Inside cave with blue pool. Replace LEGO lion's head to obtain.
#2 1 In same cave as first artifact piece. Need explosives and excavation ability to get key on lower level. Use key on upper level and whip swing to reach treasure chest.
#3 1 Building bulldozer and use it to smash 3 silver poles. First dug out of the ground on the right; second is built from bits near cave entrance; third is on left near trucks.
#4 1 On high ledge to left of exit. Use horse from far right to reach it.
#5 1 In cave behind glyph puzzle near middle of area. Need academic, explosives, Thuggee and excavation to obtain.
#6 2 Trick Vogel into blowing up the silver tanks near the back wall (or use explosives in Free Play). Build a sprinkler to make the treasure chest appear.
#7 2 Make Vogel blow up the silver objects on the left ledge (or use explosives in Free Play). Build an oil drill to obtain the chest.
#8 2 Push the mine cart downhill to smash through the boulders and reveal the treasure chest.
#9 3 Use a small-sized character to go through the crawlspace near the start to reach the chest.
#10 3 Trick Vogel into blowing up the silver box near the start (or use explosives in Free Play). Use the key inside to raise the lift. Then follow the path up to the treasure.
Last Crusade Level 6: Temple of the Grail - Fake Holy Grail
Chest Area Location/Info - walkthrough
#1 1 On high ledge on left canyon wall. Use horse to reach paddock key on right ledge. Unlock paddock and use horse to reach chest.
#2 2 Use Thuggee to activate statue. Build picture of treasure chest and smash it to get actual chest.
#3 3 In secret room near crawlspace. Use small-sized character to reach lever and open door.
#4 3 Behind spinning blades just beyond first wooden bridge.
#5 3 Behind bars to left of exit. Use a character with a sword to cut the cable and open the bars.
#6 4 Behind bars near start. Use small-sized character to reach key and open bars.
#7 4 On ledge above broken engine. Use repair ability to fix engine. Then climb moving handholds.
#8 5 Just beyond entrance. Use explosives to blow up lion statue's teeth to reach treasure chest.
#9 5 Beneath wooden platform on second ledge. Use whip to pull hook and access chest.
#10 5 Use torch from sconce near entrance to activate glyph puzzle near exit from large cavern. Solve puzzle to get treasure.
< < < Barnett College Hub Top of Page Parcels and Extras > > >


blogspot visit counter